How to Install Samsung Dishwasher: Step-by-Step Guide
Installing a Samsung dishwasher yourself saves money and gives you control over every connection, but a single mistake like a loose water line or improper drain loop can lead to leaks, error codes, or poor cleaning performance. This guide walks you through the complete installation process using step-by-step procedures that work for most Samsung models, including Rotary, Stormwash+, and Linear Wash varieties. You will learn how to prepare your cabinet space, connect water and drain lines safely, wire the power supply, level the unit for quiet operation, and test everything before finalizing the setup.
Verify Cabinet Dimensions and Model Compatibility
Before unpacking your new Samsung dishwasher, confirm the cabinet opening meets the required specifications and that your model fits your installation needs.
Check Standard Samsung Dishwasher Sizes
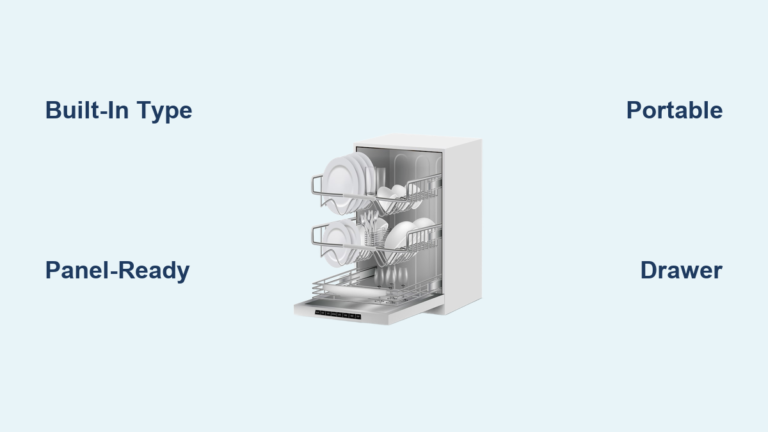
Measure your cabinet opening carefully, including flooring height and baseboard clearance. Samsung standard models require 24 inches width, 34 1/8 to 35 1/2 inches height, and 24 to 25 inches depth. Compact models require 18 inches width for under-counter setups. Even a half-inch discrepancy can prevent the unit from sliding in completely.
Match Your Model to Installation Requirements
Different Samsung dishwasher types have specific clearance needs. Stormwash+ models require extra space due to their 1.5x larger targeted sprayer and dual rotating bottom arms. Linear Wash models use side-mounted water jets, so ensure no cabinet interference with those paths. Models like the DW80CG4051SR use a wingback 90 brass fitting that eliminates the need for Teflon tape but requires cutting PEX lines for future repairs.
Gather Required Tools and Installation Parts

Having everything ready before starting prevents mid-job delays and ensures a smooth installation process.
Essential Tools Checklist
You will need a Phillips and flat-head screwdriver, a Torx T15 screwdriver for junction boxes, an adjustable wrench sized 5/8 inch or larger, pliers or a piston wrench for hose clamps, a wire stripper and crimpers for electrical connections, a drill with a hole saw if new cutouts are needed, a spirit level for alignment, a voltage tester to confirm power is off, a 9/64 inch Allen key for rear leveling adjustments, and duct tape or cable ties to secure hoses.
Parts Included and Parts You May Need
Samsung dishwashers typically include mounting brackets, silver flat-head and gold rounded screws, a 6-foot stainless steel water supply line, 90 degree brass elbow fittings, a plastic Romex connector for strain relief, wire nuts, and hose clamps. A drain clamp is often not included, so reuse an old one or purchase separately.
Shut Off Power and Water Safely
Safety must be your first priority. Incorrect shutdown procedures can result in electrocution or flooding.
Turn Off Electrical Supply
Locate the dedicated 15-amp circuit breaker for the dishwasher, which is often labeled breaker #19 or marked as dishwasher on your panel. Turn it off and verify power is absent using a voltage tester at the junction box. Never remove the strain-relief grommet, as it prevents the metal chassis from becoming energized.
Isolate the Water Line
Shut off the hot water valve under your sink. Trace the metal hose from the old unit to ensure you are turning off the correct valve. Open the dishwasher door and run a quick cycle to drain residual water before disconnecting the supply line.
Remove Your Old Dishwasher
If you are replacing an existing unit, remove it carefully to avoid damaging plumbing or electrical lines.
Disconnect Components in Order
Unplug or disconnect wiring at the junction box first. Close the water valve and disconnect the supply line using an adjustable wrench. Loosen the drain hose clamp from the garbage disposal or air gap. Remove the mounting screws from the underside of the countertop. Unscrew the kick plate and set it aside. Lower the front legs slightly to ease removal.
Slide the Old Unit Out Safely
Feed hoses and wires through the cabinet as you pull the dishwasher forward. If the unit sticks, lower the rear legs or, as a last resort, cut the front legs with a reciprocating saw. Place a towel under connections to catch any remaining drips.
Unbox and Prepare the New Samsung Dishwasher
Handle the dishwasher carefully to avoid internal or cosmetic damage during unboxing.
Unpacking Steps
Keep the box upright following the arrow indicators. Cut the straps, remove the top, and lift the unit off the base tray. Remove external plastic wrap but leave internal foam and sound-dampening fabric until after installation. Retrieve the kick plate from the packing material. Inspect the unit for shipping damage before proceeding.
Initial Setup Before Sliding In
Adjust all leveling legs to their shortest position using a flathead screwdriver for front legs and a 9/64 inch Allen key for rear legs. This prevents damage during movement. Attach the 90 degree water inlet fitting by inserting the smaller side of the seal first, then hand-tighten and snug with a wrench without over-tightening. For wingback models, the pre-installed gasket means no Teflon tape is needed. Install the plastic Romex connector to the junction box and route the power cord through the base channel. Slide mounting brackets into the top slots and trim excess with tin snips if they extend beyond cabinets.
Connect the Water Supply Line

Proper water connection ensures correct pressure, prevents leaks, and avoids cycle failures.
Connection Requirements
Use hot water only at a temperature of 120 degrees Fahrenheit or higher. Water pressure must fall between 20 and 120 psi. An accessible shut-off valve is required.
Step-by-Step Water Line Installation
Route the braided stainless steel line from under the cabinet to the dishwasher inlet. Connect the other end to the sink valve using a 90 degree fitting angled toward the sink. Tighten both ends with an adjustable wrench without over-tightening. Open the valve and flush the line for three minutes to clear debris. Check every connection for leaks immediately.
Install the Drain Hose Correctly
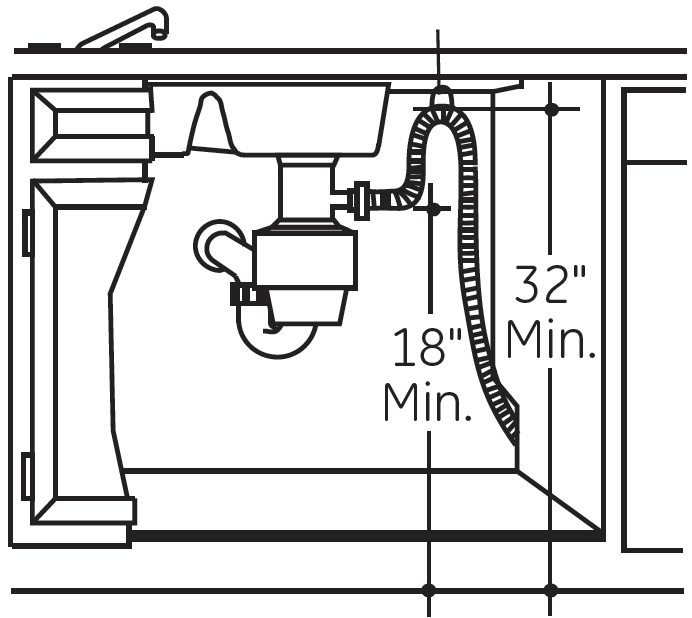
Correct drain setup prevents backflow, odors, and clogs that can trigger error codes.
Choose Your Drain Method
An air gap is required in some areas and mounts on the countertop or sink deck. Connect the hose directly to the air gap with no additional loop needed. The high loop is the most common method. Route the hose at least 10 inches above the sink drain or garbage disposal and secure it to the cabinet underside with wire or a bracket. Never combine an air gap with a high loop, as this restricts flow and causes drainage errors.
Connect to Garbage Disposal
If connecting to a garbage disposal, you must remove the plastic knockout plug from the disposal inlet. Failure to remove it blocks drainage and triggers error codes. Cut the hose end if needed, use an adapter for size mismatches, slide a hose clamp on before attaching, insert the hose, and tighten the clamp securely. Ensure no kinks in the hose path.
Wire the Power Connection
Electrical connections must be precise. Errors risk shock or fire.
Power Requirements
Your Samsung dishwasher needs a 15-amp dedicated circuit. GFCI protection is recommended or required in some areas. Plug-in models use a NEC-compliant outlet under the sink. Hardwired models connect directly to house wiring via the junction box. Only qualified electricians should handle hardwired connections.
Hardwired Installation Steps
Tilt the unit slightly backward to access the junction box. Remove the cover with a Torx or Phillips screwdriver. Strip half an inch of insulation from the wires. Pass the power cable through the strain relief. Connect black to black, white to white, and green or bare to the grounding screw. Use wire nuts and tuck wires into the box. Replace the cover. Never trap white sheathing in the grommet, and always verify the correct breaker by physical label, not the panel diagram.
Slide In, Level, and Align the Unit
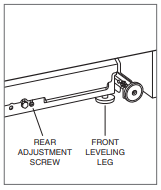
Proper positioning determines performance, noise level, and door function.
Insertion Tips
Feed the power cord, water line, and drain hose through the opening before sliding. Slide in slowly with the door closed for balance. Never rest the unit on hoses or wires.
Level Side-to-Side
Place a level on the top inner edge of the tub. Adjust front leveling legs clockwise to raise or counter-clockwise to lower. Ensure an even gap between the door and countertop on both sides.
Level Front-to-Back
Place the level on the side of the tub. Adjust the rear leg with a 9/64 inch Allen key. Aim for level or slightly tilted toward the rear, up to one-quarter inch lower in front. Improper leveling causes leaks, vibration, poor cleaning, and error codes.
Secure with Mounting Brackets
Mounting prevents movement during operation and maintains alignment.
Top Mount Installation
Ensure the unit is flush under the countertop. Pre-drill holes slightly smaller than the screw diameter into the underside of the counter. Insert silver flat-head screws through the brackets and tighten until snug without over-tightening. Snap plastic caps over the screws to seal and finish.
Side Mount for Granite or Quartz
Remove the tub spacer caps inside the tub at the top sides. Drill into the side cabinets through the exposed holes. Secure with screws while avoiding distortion of the tub. Replace the caps after installation.
Attach the Kick Plate
The kick plate finishes the appearance and protects against moisture.
Insert the rubber skirt behind the plate and align it under the door with the skirt taut. Push inward until gaskets seal against the floor and walls. Secure with gold rounded screws and tighten evenly to avoid warping. Snap plastic caps over the screws to seal against leaks and improve appearance.
Run the Final Test Cycle
Validate all systems before declaring installation complete.
Pre-Test Checklist
Remove all internal foam and packing material. Turn the circuit breaker on. Open the water supply valve fully. Close the door securely.
Start and Monitor the Test Cycle
Select Rinse, Quick Wash, or Smart Install Cycle if available. Press Start and close the door within three seconds. Monitor for normal startup sounds, water filling, spray arm rotation, no leaks, and no error codes. If issues appear, check the breaker, inspect connections, or consult the Samsung error code guide.
Maintain Optimal Performance
Proper care extends your dishwasher lifespan and keeps cleaning effective.
Monthly and Quarterly Maintenance
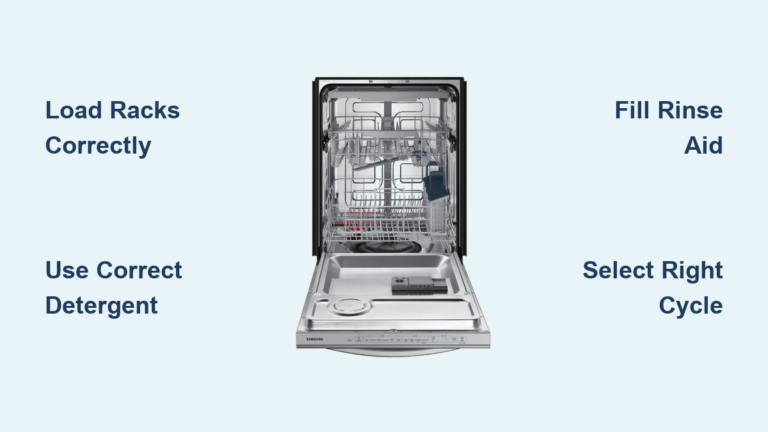
Clean the filter monthly to prevent clogs and odors. Run a cleaning cycle with dishwasher-safe cleaner every one to two months. Use recommended detergent and rinse aid for spot-free drying.
Use Smart Features
Add your dishwasher to the SmartThings app for remote monitoring and alerts. Enable AI Wash or Sensor Dry for adaptive performance. Confirm hot water reaches 120 degrees Fahrenheit at the inlet.
Key Takeaways for Samsung Dishwasher Installation
Leveling is the most critical step for preventing leaks and errors. Always create a high loop or install an air gap, but never both. Avoid using Teflon tape on braided supply lines or wingback fittings. The strain-relief grommet must stay in place, as removal risks electrical shock. Test the unit before finalizing by running a cycle while you still have access to connections. Verify the correct breaker by physical label rather than relying on the panel diagram.
Frequently Asked Questions About Installing a Samsung Dishwasher
How long does it take to install a Samsung dishwasher?
With proper preparation and tools, installation takes approximately 1.5 hours for first-time DIYers. Professional installers typically complete the job in under an hour.
Do I need a plumber to install a Samsung dishwasher?
You do not need a plumber if you have basic DIY skills and standard tools. However, if your home uses PEX plumbing or requires hardwired electrical connections, consider hiring a licensed electrician for safety.
Can I install a Samsung dishwasher myself?
Yes, most homeowners can install a Samsung dishwasher themselves by following the step-by-step procedure. The most challenging steps are leveling the unit and creating a proper drain high loop.
Why is my Samsung dishwasher showing an error code after installation?
Error codes often appear due to improper drain connections, such as a missing garbage disposal knockout plug or a drain hose that is too low. Check that the drain hose forms a proper high loop at least 10 inches above the sink drain.
Does a Samsung dishwasher need a dedicated circuit?
Yes, Samsung dishwashers require a dedicated 15-amp circuit. This prevents overload and ensures stable power for the control board and heating elements.
Final Thoughts on Installing Your Samsung Dishwasher
Proper installation ensures your Samsung dishwasher operates quietly, cleans effectively, and lasts for years without leaks or error codes. Take time to level the unit correctly, as this single step prevents most common post-installation problems. Always test the system with a full cycle before securing the kick plate and calling the job done. If you encounter PEX plumbing or complex electrical setups that exceed your comfort level, professional installation is a worthwhile investment that protects your home and your appliance warranty.