How to Fix Kenmore Dishwasher Lower Spray Arm
Is your Kenmore dishwasher leaving food residue on plates or leaking water at the bottom of the door? A damaged or malfunctioning lower spray arm could be the culprit. This rotating component, connected directly to the pump outlet, sprays water upward during the wash cycle to clean dishes on both racks. When cracked, clogged, or stuck, it compromises cleaning performance and may cause leaks.
Replacing the lower spray arm on your Kenmore dishwasher is a fast, tool-free fix that typically takes 15 minutes or less. With part number 154568002, compatible across many Kenmore models, you can restore full cleaning power without calling a technician. In this guide, you will learn how to remove, replace, and troubleshoot the lower spray arm, plus get pro tips for preventing future issues.
Confirm Your Model and Part Fit
Before starting, verify compatibility to ensure a proper fit. Using the wrong part can waste time and money, so taking this step saves frustration later.
Correct Part for Most Kenmore Models
The replacement part number 154568002 fits multiple Kenmore and Kenmore Elite dishwashers. This lower wash arm assembly is the standard replacement across many popular models.
• Replacement part number: 154568002
• Type: Lower wash arm assembly
• Fits: Multiple Kenmore and Kenmore Elite dishwashers
Example: Confirmed fit for Kenmore Elite Model 665.12833K313. Always double-check using your full model number, usually found on the inner door frame.
Where to Buy the Replacement Part
You can find part 154568002 from several reputable retailers.
• RepairClinic.com: Approximately $35 to $45, includes compatibility checker and video guides
• AppliancePartsPros.com or Sears.com: OEM-equivalent parts with customer reviews
• Amazon or eBay: Third-party options. Verify seller ratings and part specs carefully
Buy from authorized sellers to ensure genuine, durable components. Authentic parts last longer and fit properly.
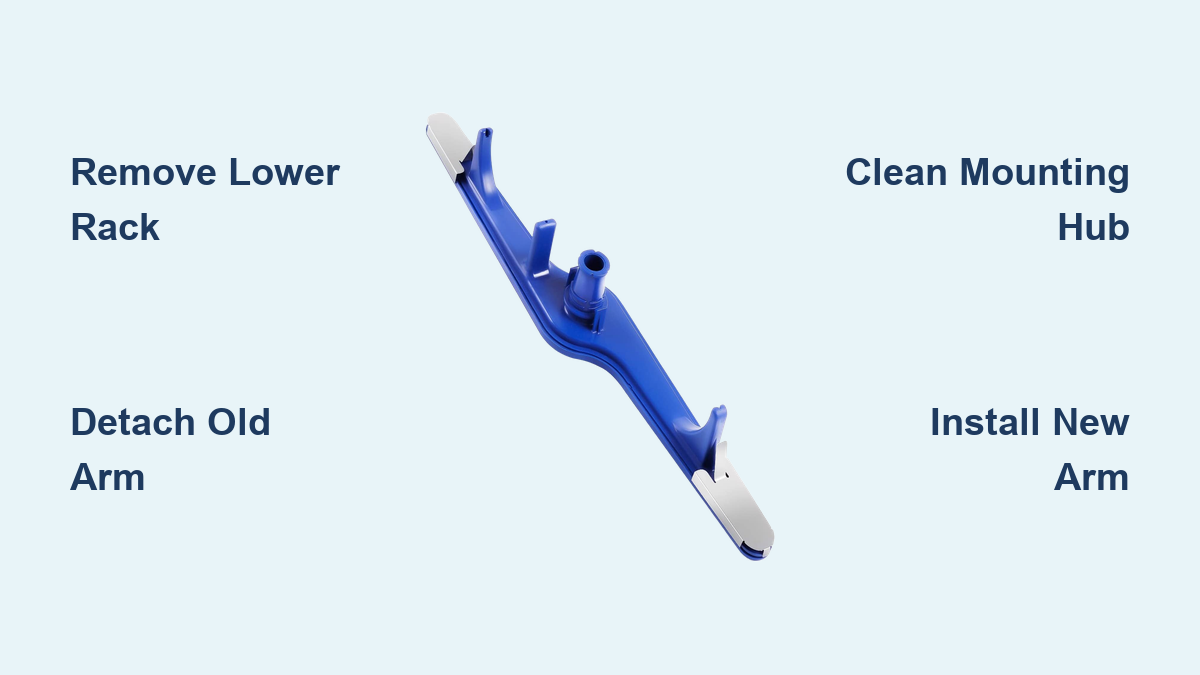
Remove the Lower Dish Rack
Clear access to the spray arm before beginning the repair. This step takes less than a minute but makes the entire process easier.
Open the dishwasher fully. Pull the lower rack straight out until it stops. Set the rack aside safely to avoid bending tines or spilling contents.
Once the rack is removed, the white or gray spray arm should be fully visible at the tub floor center. You are now ready to detach the old spray arm.
Detach the Old Spray Arm

Two designs exist: locking bracket or snap-fit. Identify yours and proceed accordingly. Knowing your model type prevents unnecessary force or damage.
Rotate and Remove Bracket Type
This design is found on most Kenmore Elite models.
- Locate the locking bracket at the base of the spray arm.
- Turn it 1/4-turn counterclockwise by hand.
- Pull the arm straight up from the pump outlet.
No tools are needed. Just use firm, even pressure.
Pull to Release Snap-Fit Design
On some models, the arm uses a simple snap-fit connection.
Firmly grip the arm near the base. Pull upward in one smooth motion to disengage from the hub.
If the arm feels stuck, do not force it. Mineral buildup is likely the cause, and forcing removal can damage the pump outlet.
Fix Stuck Spray Arms From Hard Water
Hard water deposits can glue the arm in place, making removal difficult. This is a common issue in areas with high mineral content in the water supply.
Soak With Vinegar Solution
White vinegar dissolves calcium and lime buildup effectively.
- Pour white vinegar around the base where the arm meets the tub.
- Let it sit for 10 to 15 minutes to dissolve calcium and lime.
- Use an old toothbrush to scrub loosened grime.
Repeat soaking if needed. Never force removal when the arm is stuck.
Avoid Costly Damage
Do not use pliers or hammers to remove a stuck spray arm. Excessive force can crack the tub floor or damage the pump outlet, turning a simple repair into an expensive problem.
After cleaning, reattempt removal using the correct method for your model type.
Inspect the Mounting Hub
Check the connection point before installing the new part. A clean, undamaged hub ensures proper function and prevents leaks.
What to Look For During Inspection
Examine the hub carefully for any signs of problems.
• Cracks or warping in the hub
• Leftover debris or mineral buildup
• Missing or damaged O-ring
If the hub shows cracks or significant damage, you may need to address that issue before proceeding.
Clean the Hub Thoroughly
Wipe the hub with a damp cloth. Use a vinegar-soaked rag for stubborn deposits. Ensure the opening is clear and smooth before installing the new arm.
The spin test confirms readiness: rotate the hub by hand. It should move freely without resistance.
Install the New Spray Arm
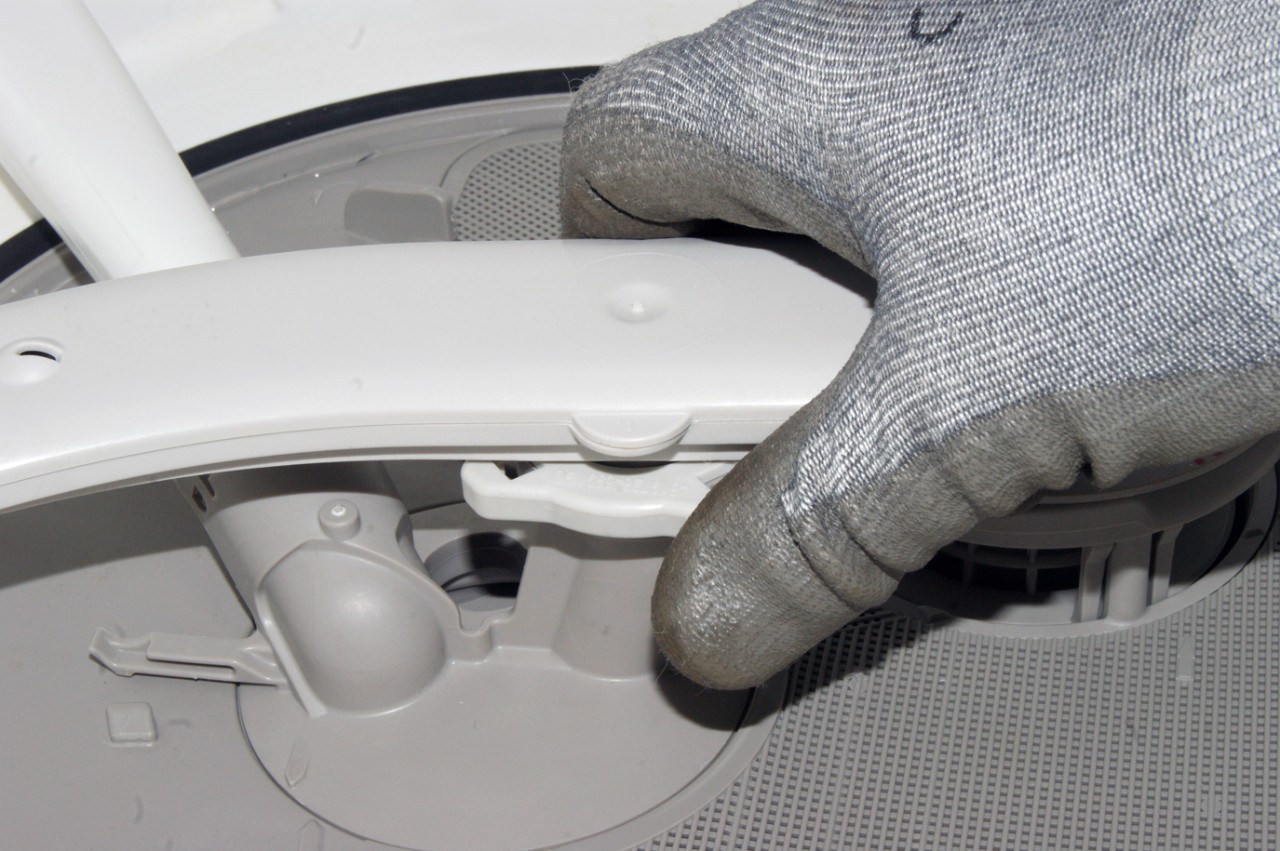
Now attach the replacement arm securely. Proper installation prevents leaks and ensures effective cleaning.
Align and Press Down
Center the new arm over the pump outlet. Push down firmly and evenly until fully seated.
Lock Into Place for Bracket Models
Rotate the bracket 1/4-turn clockwise to lock. You should feel resistance indicating engagement.
Snap In for Snap-Fit Models
Press until you hear or feel a distinct snap. No wiggle or looseness should remain once installed.
The arm must not lift easily once properly installed. If it does, remove and try again.
Test the Installation
Verify function before closing the door. Testing now saves running a full wash cycle only to discover problems.
Spin Check
Rotate the arm by hand. It should turn freely without scraping the tub or rack.
Confirm Secure Attachment
Gently tug upward. The arm should not detach. Ensure no part contacts the lower rack when spinning.
If the arm is restricted or wobbles, recheck alignment and hub cleanliness. Remove and reinstall if necessary.
Reinstall the Lower Rack
Final step before testing the dishwasher.
Slide the rack back into the tracks. Push until fully seated. The wheels should roll smoothly. Avoid overloading, especially with large pans that block arm rotation.
Leave space around the center for unobstructed spray. Proper loading makes a significant difference in cleaning results.
Troubleshoot Common Problems
Fix issues fast with these targeted solutions.
Spray Arm Will Not Come Off
Cause: Hard water buildup
Fix: Soak base in vinegar for 10 to 15 minutes. Scrub with a toothbrush. Reattempt removal gently.
New Arm Will Not Seat Properly
Cause: Misalignment or debris
Fix: Confirm hub is clean and undamaged. Ensure locking collar is open if applicable. Realign and press again firmly.
Arm Spins Slowly or Stalls
Cause: Obstruction or poor fit
Fix: Remove and reinstall to confirm full seating. Check for dishware interference. Clean spray holes if clogged.
Clean Spray Holes Monthly
Clogs reduce water pressure and cleaning power. Regular maintenance prevents this common problem.
Quick Cleaning Routine
- Remove the arm every 3 to 6 months.
- Soak in warm vinegar for 15 to 30 minutes.
- Use a soft brush to scrub each nozzle.
- Rinse thoroughly under running water.
Never use wire or metal tools. These can scratch or enlarge holes, ruining spray patterns.
Clear Internal Passages
Hold the arm up to light. Look for blockages inside channels. Flush with water from a sink sprayer if needed.
This maintenance restores spray force and even coverage.
Prevent Cracks and Leaks
Extend the life of your new spray arm with proper care and loading habits.
Avoid Harsh Loading Practices
Do not place heavy pots or pans directly over the arm. Do not let sharp utensils rest against it. Heavy impact can crack the plastic over time.
Check Water Temperature
Extremely hot water can warp plastic over time. Ideal range is 120 to 140 degrees Fahrenheit. Check your dishwasher manual for specific recommendations.
Inspect monthly. Look for hairline cracks, warping, or wobbling. Early detection prevents leaks and poor cleaning.
Diagnose Poor Cleaning Results
Even a new arm can underperform if other issues exist. Rule out these common causes.
Common Cleaning Problems
• Clogged filter or drain
• Low water inlet pressure
• Detergent type or age
• Overloading the lower rack
Run an empty cycle with dishwasher cleaner or vinegar to flush the system.
Confirm Spray Coverage
After a cycle, check if water reached the top rack. If not, the lower arm may not be spinning due to obstruction.
Revisit installation steps to ensure free rotation. Check that nothing blocks the arm during operation.
Extend Spray Arm Lifespan
Small habits make a big difference in how long your spray arm lasts.
Use Vinegar Monthly
Pour 1 cup white vinegar in the bottom of an empty dishwasher. Run a hot water cycle to prevent mineral buildup.
Load Dishes Smartly
Keep large items away from the center. Angle bowls and pans to avoid blocking spray. Proper loading ensures full spray coverage.
Replace at First Sign of Damage
At the first sign of cracks, warping, or stiffness, replace the arm. Delaying leads to leaks and poor cleaning.
Keep a spare part 154568002 on hand. It is a common wear item, and having one ready avoids delays.
When to Call a Technician
Most repairs are DIY-friendly, but seek professional help in these situations.
• Pump outlet is cracked or leaking after installation
• Water does not reach the arm, indicating a possible pump issue
• Dishwasher fills slowly or makes grinding noises
Sears Home Services or a local appliance repair pro can diagnose deeper issues that go beyond the spray arm.
Frequently Asked Questions About Kenmore Dishwasher Lower Spray Arm Repair
How Do I Know If My Lower Spray Arm Needs Replacement?
Signs include cracks or splits in the arm, restricted rotation, water leaking from the base during operation, or inadequate cleaning on the lower rack. If dishes remain dirty despite proper detergent and loading, inspect the spray arm for damage or clogs.
Is Part Number 154568002 Compatible With My Kenmore Dishwasher?
Part 154568002 fits multiple Kenmore and Kenmore Elite models. However, always verify compatibility with your specific model number before purchasing. Check the inner door frame or your owner’s manual for the full model number.
Can I Replace the Lower Spray Arm Without Tools?
Yes. The lower spray arm attaches via a locking bracket or snap-fit design, both removable by hand. No screwdrivers or wrenches are required for standard replacement.
Why Is My Spray Arm Stuck and Hard to Remove?
Mineral buildup from hard water deposits can bind the arm to the mounting hub. Soak the base area with white vinegar for 10 to 15 minutes to dissolve the deposits. Never use pliers or force, which can damage the pump outlet.
How Often Should I Clean the Spray Arm?
Remove and clean the spray arm every 3 to 6 months. Soak in warm vinegar, scrub the spray holes with a soft brush, and rinse thoroughly. Regular cleaning prevents clogs and extends the arm’s lifespan.
What Should I Do if the New Spray Arm Does Not Spin Properly?
Remove the arm and check the mounting hub for debris or damage. Ensure the arm is fully seated and the locking mechanism is engaged. Run a test spin by hand before running a wash cycle.
Key Takeaways for Kenmore Dishwasher Lower Spray Arm Repair
Replacing the Kenmore dishwasher lower spray arm is one of the easiest and most effective maintenance tasks you can perform. Using part 154568002, most users complete the job in under 15 minutes with no tools required. The key steps involve removing the lower rack, detaching the old arm by rotating the bracket or pulling the snap-fit, inspecting and cleaning the mounting hub, and pressing the new arm firmly into place until it locks.
By cleaning the spray arm regularly with vinegar and ensuring free rotation after each installation, you will maintain spotless dishes and prevent leaks. Inspect the arm monthly for cracks or warping, and replace immediately at the first sign of damage. Keep vinegar on hand for monthly maintenance, load dishes properly to avoid blocking spray, and consider keeping a spare part 154568002 in your toolkit for quick replacements.
This simple fix delivers big results: better cleaning performance, longer appliance life, and fewer expensive service calls.