How to Fix Maytag Dishwasher Not Draining
You’re not alone if your Maytag dishwasher won’t drain. Standing water after a cycle is a common complaint, especially on models like the MDB4949, MDB4949SKZ0, and MDB8989SHZ0. While a small amount of water (about ½ inch) in the filter area is normal, excess water means something’s wrong.
The good news? Most drainage issues are easy to fix with basic tools and a step-by-step approach. Whether it’s a clogged filter, stuck knockout plug, or failing drain pump, this guide walks you through every possible cause, test, and repair.
Check for Normal Standing Water First
Before you panic, confirm it’s really a problem. Some water remaining after a cycle is actually normal.
Normal vs. Abnormal Residual Water
• Normal: About ½ inch of clean water under the filter. This protects seals and is drained before the next cycle.
• Abnormal: Water above the filter, foul smell, or dirty water sitting for hours. This indicates drain failure.
Run the “Cancel/Drain” cycle. If water drains now but not after regular cycles, the issue is intermittent, likely electrical or blockage-related.
Clear Major Clogs First
Start with the simplest, most common causes. Many “broken” dishwashers just need a deep clean.
Clean the Filter and Sump Area
A clogged filter is the number one cause of poor drainage.
Steps to clean the filter:
1. Remove bottom rack and spray arm.
2. Snap off the stainless-steel cover by pressing the side clips.
3. Take out the fine-mesh filter.
4. Soak in warm water with 1 to 2 drops of Dawn dish soap. For hard water, add CLR to dissolve mineral buildup.
5. Rinse thoroughly.
6. Check for trapped debris like seeds, plastic bits, or tea bags.
Reassemble by snapping the cover back in place, reattaching the spray arm (twist clockwise until it clicks), and replacing the racks. Clean the filter every 30 days to prevent future clogs.
Inspect the Drain Hose
A kinked or clogged hose stops water flow completely.
What to do:
1. Unplug the dishwasher and pull it out from under the counter.
2. Remove the lower access panel.
3. Disconnect the drain hose from the pump and garbage disposal.
4. Flush with water or use a pipe cleaner to clear gunk.
Install a high drain loop by looping the hose up to the underside of the countertop before it goes to the sink. This prevents sink water from backing into the dishwasher. Secure with a clip and never staple the hose.
Clear the Air Gap
If your sink has a chrome air gap cap, it might be clogged.
Cleaning steps:
1. Remove the cap and pull out the inner cylinder.
2. Wash all parts with soapy water.
3. Flush the line with vinegar or CLR to dissolve buildup.
Clean the air gap every 3 to 6 months to avoid backups.
Verify Garbage Disposal Connection
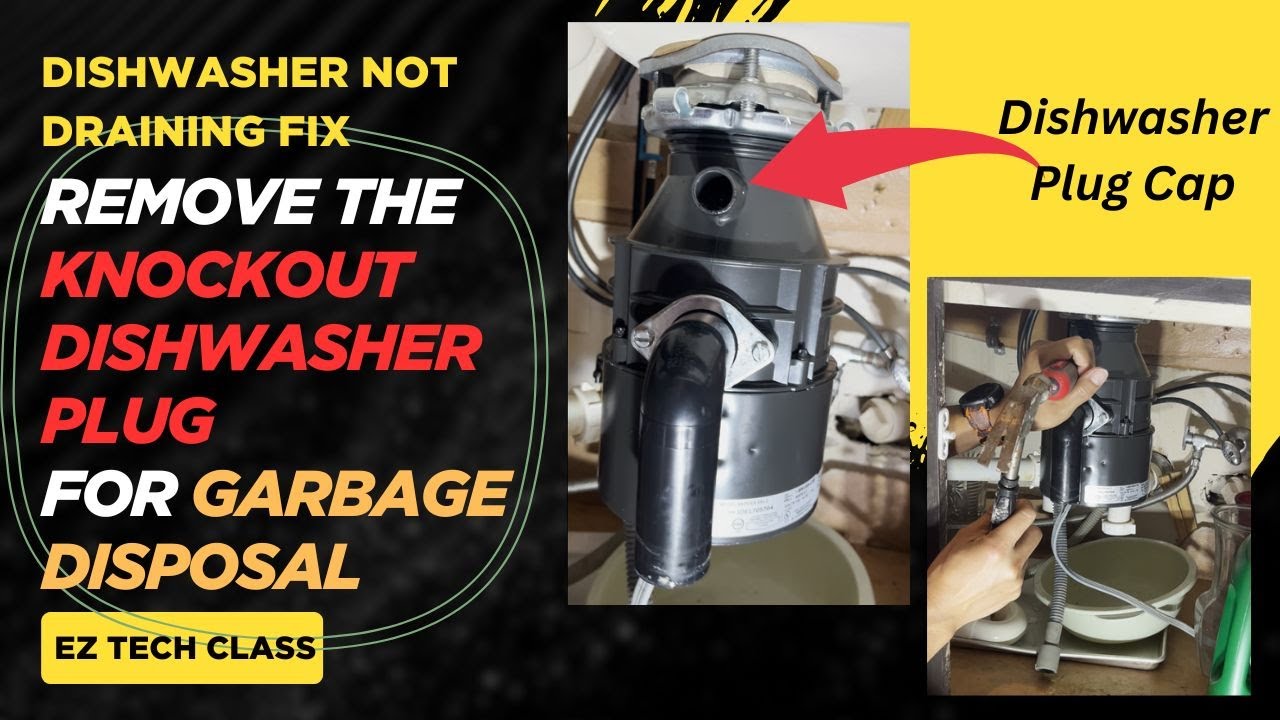
Even if your dishwasher drains into a disposal, it won’t work if the knockout plug is still in place.
Check the Knockout Plug
How to test:
1. Turn off power and disconnect the drain hose from the disposal inlet.
2. Look inside the port. If it’s a solid metal plug, it must be removed.
How to remove:
• Insert a screwdriver into the center.
• Tap with a hammer to punch it out.
• Reconnect the hose.
New disposals come with the plug intact, so removal is required even if water seems to drain partially.
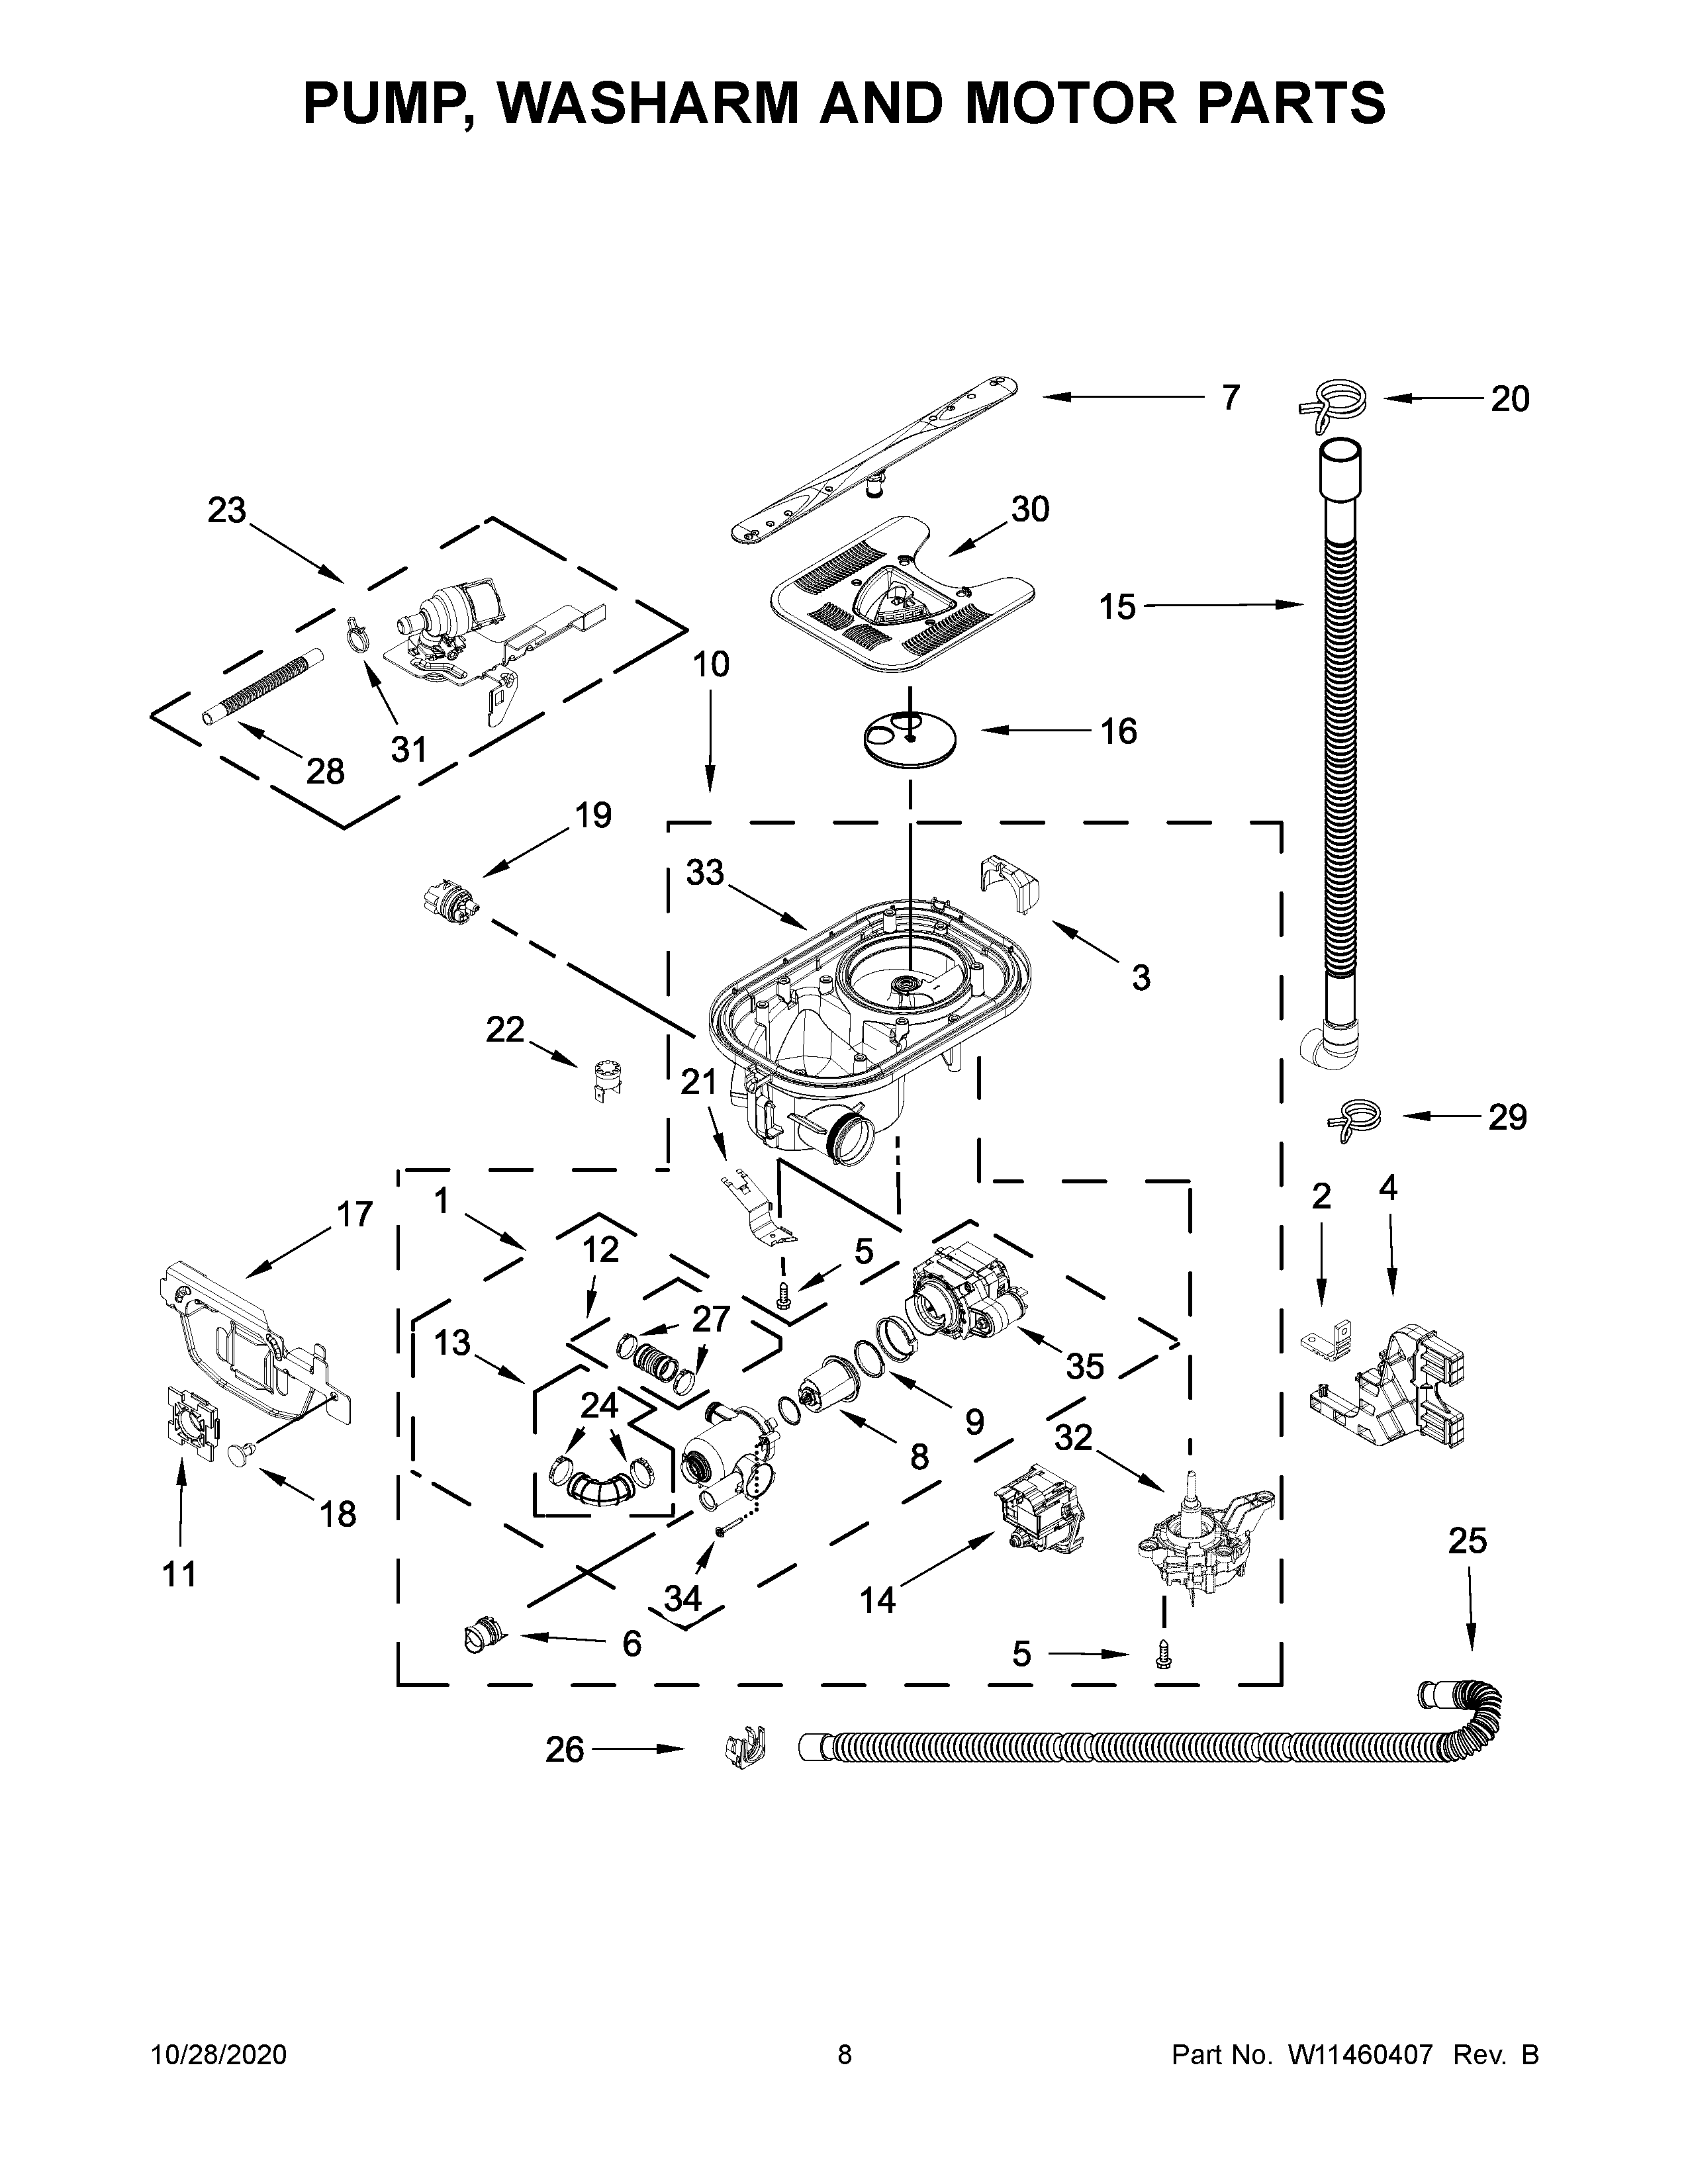
Test the Drain Pump
If cleaning doesn’t help, the pump may be failing, especially on older models like the MDB4949.
Listen for Pump Noise
• No sound: Electrical issue or dead pump.
• Pump runs but no water moves: Impeller failure.
• Pump works after waiting 5 minutes: Overheating due to worn motor.
Test for Power and Continuity
Safety first: Unplug the dishwasher before testing.
Steps:
1. Remove the toe-kick panel (screws at bottom).
2. Locate the drain pump under the tub.
3. Disconnect the electrical plug by pressing the small tab with a screwdriver.
4. Set multimeter to Rx1 and test terminals. Good pump shows near-zero ohms (continuity). Bad pump shows infinite resistance.
5. Test for 120V AC during drain cycle by reconnecting power, pressing “Cancel/Drain,” and measuring voltage at the connector.
Live voltage testing is dangerous. If you’re unsure, skip to replacement.
Replace the Drain Pump (M286 Model)
If the pump has no continuity or gets power but won’t run, replace it.
Installation steps:
1. Align new pump with housing at the 10 o’clock position.
2. Insert and rotate clockwise until both gray clips click into place.
3. Reconnect wires and replace toe-kick panel.
Run a full cycle to test. Water should drain completely.
Inspect the Impeller and Solenoid
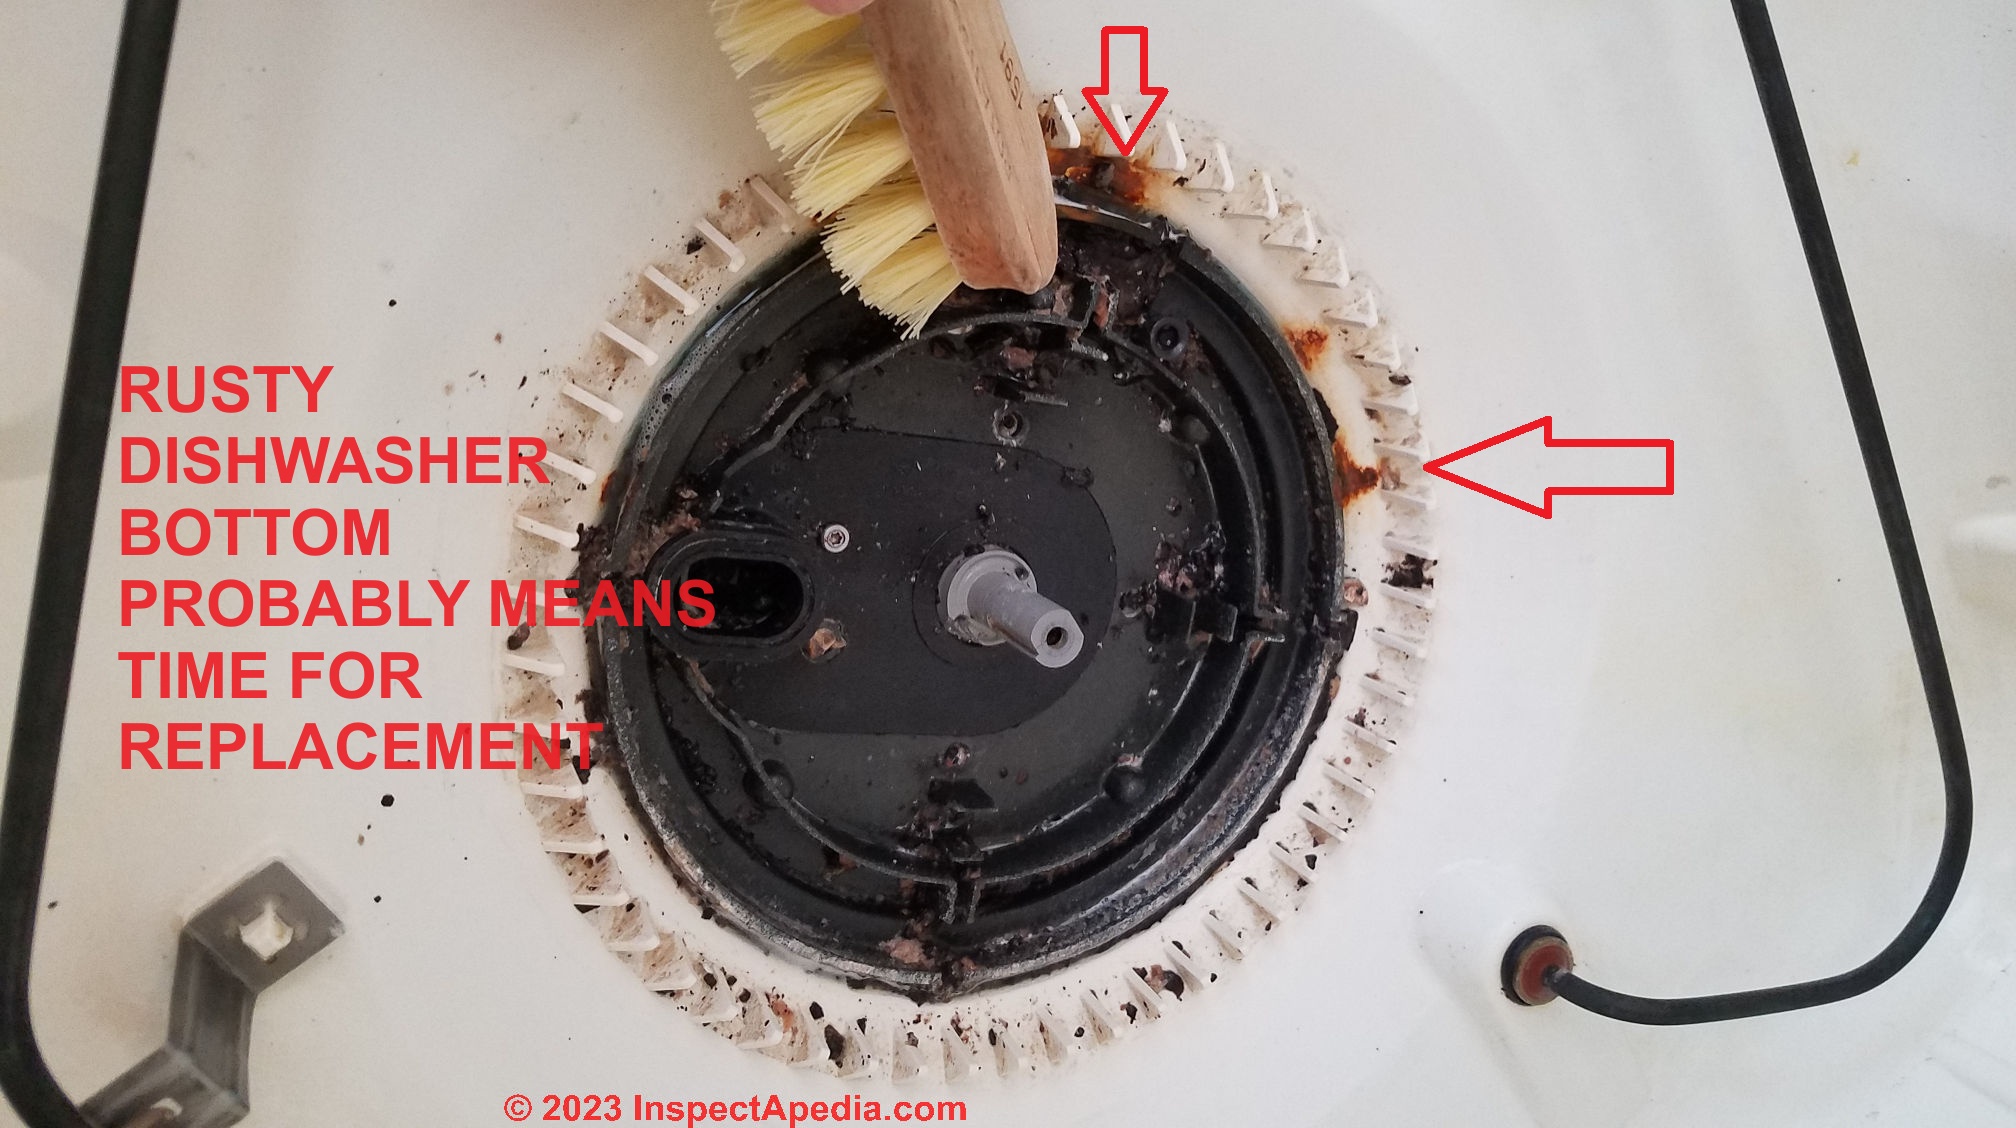
Even with a working motor, drainage can fail due to mechanical issues.
Check the Drain Impeller
Symptoms:
• Pump runs but no water drains.
• Impeller may be cracked, broken, or jammed with debris.
How to inspect:
1. Remove the pump and manually spin the impeller.
2. It should rotate freely with no wobble.
3. Look for missing vanes or visible damage.
Impellers aren’t sold separately. Replace the entire pump if damaged.
Test the Drain Solenoid
Some models use a solenoid-actuated flapper valve to open the drain path.
Failure signs:
• Pump runs but water stays in tub.
• Valve stuck closed.
Testing:
1. Unplug dishwasher and locate solenoid near pump.
2. Use multimeter to test for continuity. No reading means replace the solenoid.
3. Check for mechanical movement when powered.
Examine the Piston and Nut Assembly
Found under the sump cover, this check valve prevents backflow.
Inspect for Free Movement
Steps:
1. Remove sump cover and locate piston at the bottom.
2. Push it up and down. It must move smoothly.
3. In the down position, it must seal tightly.
Fix by cleaning debris from the seat. Replace piston and nut if worn.
Rule Out Wiring and Control Board Issues
Electrical problems can mimic pump failure.
Check for Hidden Wire Damage
A KitchenAid (shared platform) had no power to pump but the control board was fine. A crimped wire inside the insulation was the real cause.
What to do:
1. Inspect wires from control board to pump.
2. Look for pinched insulation, corrosion, or broken connector tabs.
3. Test continuity with multimeter.
Even with a new control board, bad wiring can cause failure.
Test the Control Board
Symptoms:
• No response to “Drain” button.
• F9 E1 error code (drain timeout).
• Pump works manually but not automatically.
How to test:
1. Find the Technician Diagnostic Sheet behind the kick panel.
2. Use multimeter to check fuse on board and output voltage during drain cycle.
3. Should send 120V to pump.
Replace if no output, fuse is blown, or cracked solder joints are visible. Note that boards for MDB8989SHZ0 are often backordered. Check RepairClinic.com or AppliancePartsPros.com.
Avoid Detergent Mistakes
Using the wrong soap causes sudsing that blocks drainage.
Never Use Regular Dish Soap
Dawn, Palmolive, and similar soaps create foam that interferes with the pump. Only use dishwasher-safe detergent, pods, or gels.
If suds appear:
1. Stop the cycle.
2. Wait 30 minutes or more for foam to settle.
3. Wipe out excess and restart without additional detergent.
Prevention: Store hand soap away from dishwasher pods.
Follow This Diagnostic Flow
Use this checklist to find the cause fast:
- Is water above filter level? Yes, proceed.
- Press “Cancel/Drain.” Works indicates intermittent fault (check wiring, solenoid). Silent indicates electrical or pump issue. Runs but no drain indicates blockage or impeller failure.
- Check: knockout plug removed, air gap clear, hose kink-free, filter clean.
- Test electrically: voltage to pump, wire continuity, control board output.
- Inspect mechanically: impeller, solenoid, piston.
- Replace faulty part.
Prevent Future Drain Problems
Keep your dishwasher running smoothly with simple habits.
Maintenance Schedule
• Monthly: Clean filter and run affresh Dishwasher Cleaner. Check spray arms for clogs.
• Every 6 months: Clean air gap and inspect drain hose.
• Always: Scrape large food scraps before loading. Use rinse aid to reduce mineral buildup. Never overload racks.
Key Takeaways for Fixing Your Maytag Dishwasher
Ninety percent of drainage issues are fixable at home. Start with cleaning because clogs are the most common cause. Test before replacing expensive parts like control boards by checking wiring first. Maytag, Whirlpool, KitchenAid, and Kenmore share platforms, so parts are often interchangeable. With the right steps, your Maytag dishwasher can be back to draining perfectly in under an hour, no service call needed.
Frequently Asked Questions About Maytag Dishwasher Not Draining
Why does my Maytag dishwasher still have water in the bottom after a cycle?
Water remaining in the tub usually indicates a drain problem. Check the filter first, as a clogged filter is the most common cause. Also verify the “Cancel/Drain” button works and inspect the drain hose for kinks.
How do I know if my Maytag dishwasher drain pump is bad?
Listen for pump noise during the drain cycle. No sound suggests electrical failure. Pump runs but no water moves indicates impeller damage. Test with a multimeter for continuity. No continuity means replace the pump.
What does the F9 E1 error code mean on a Maytag dishwasher?
F9 E1 indicates a drain timeout. The dishwasher failed to drain within the expected time. Investigate the pump, solenoid, control board, or blockage in the drain path.
Can I use regular dish soap in my Maytag dishwasher?
Never use regular dish soap like Dawn or Palmolive. These create excessive foam that interferes with the pump and prevents drainage. Only use automatic dishwasher detergent, pods, or gels.
How often should I clean my Maytag dishwasher filter?
Clean the filter every 30 days to prevent clogs and maintain proper drainage. Soak in warm water with Dawn dish soap, and use CLR for hard water deposits.
Why does my dishwasher only drain after waiting several minutes?
This suggests pump overheating due to worn motor bearings or impeller. The thermal cutoff activates and requires cooling before the pump works again. Replace the pump assembly to resolve this issue.