How to Fix Whirlpool Dishwasher Buttons Not Working
You press the Start button on your Whirlpool dishwasher, but nothing happens. No beep, no light, no response. Just silence. This frustrating scenario affects thousands of Whirlpool owners, and the good news is that most cases stem from simple fixes you can handle yourself. Whether your control panel is completely dead, only some buttons respond, or the Start button refuses to initiate a cycle, this guide walks you through diagnosing and resolving the problem step by step.
In this article, you will learn how to rule out software glitches, test hardware components, and determine when repair or replacement is necessary. We cover everything from quick resets to component-level testing, with model-specific insights for popular Whirlpool units.
Reset Control Lock First
The most common reason Whirlpool dishwasher buttons stop working is the Control Lock being accidentally enabled. When active, all buttons become unresponsive, including Start and Cancel. A red padlock icon usually appears on the display, but sometimes the screen stays completely blank, leading many owners to mistakenly assume the machine is broken.
How to Disable Control Lock
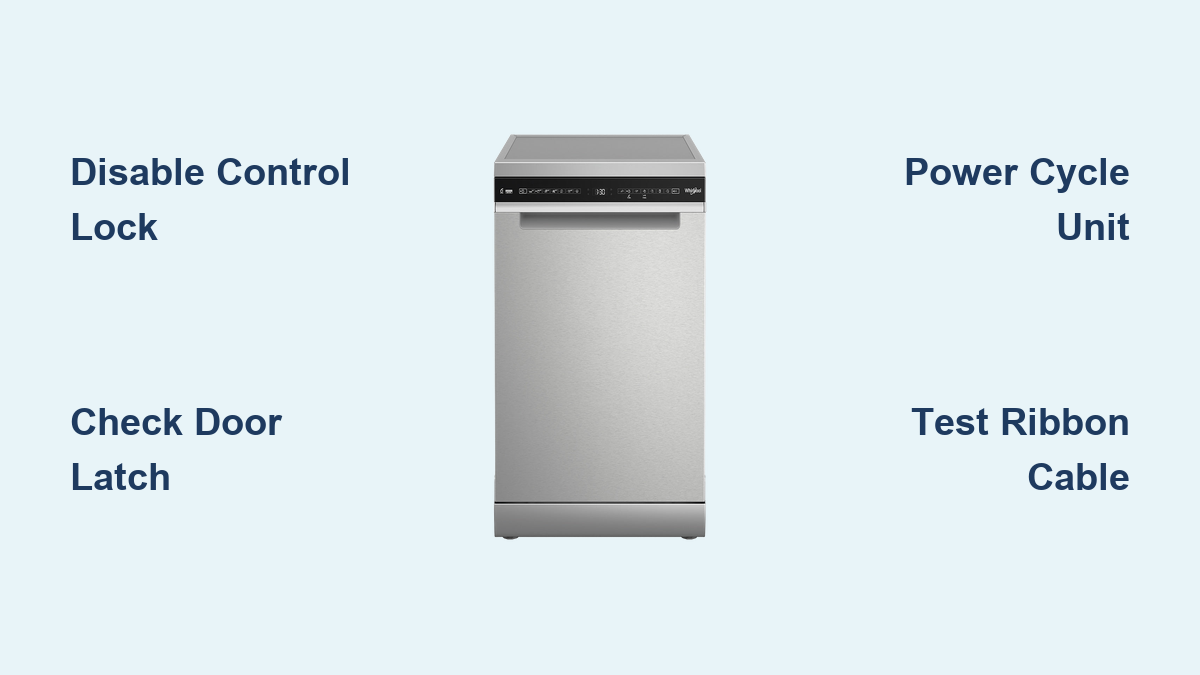
Press and hold the Control Lock button for 4 seconds. You should hear a beep and see the padlock icon disappear. If that does not work, try pressing and holding Heated Dry plus Normal simultaneously for 3 to 5 seconds. This alternate reset works on many Whirlpool and Maytag models that share the same control platform. After disabling Control Lock, test all buttons to confirm they respond. If the buttons work after this step, the issue was software related, not hardware.
Confirm Door Latch Is Fully Closed
A Whirlpool dishwasher will not start if the door is not securely latched, even if it appears closed. The control system requires confirmation from a microswitch inside the latch mechanism. Without this signal, the system ignores Start commands, making buttons seem broken when they are actually functioning fine.
Check for Physical Obstructions
Inspect the door opening for debris, food particles, or items blocking the latch. Also check whether the bottom rack was installed incorrectly. If the rack rails face forward instead of toward the back of the unit, the front edge can prevent the door from closing fully. Remove the rack and reinstall it with rails facing the rear of the dishwasher.
Test the Door Microswitch
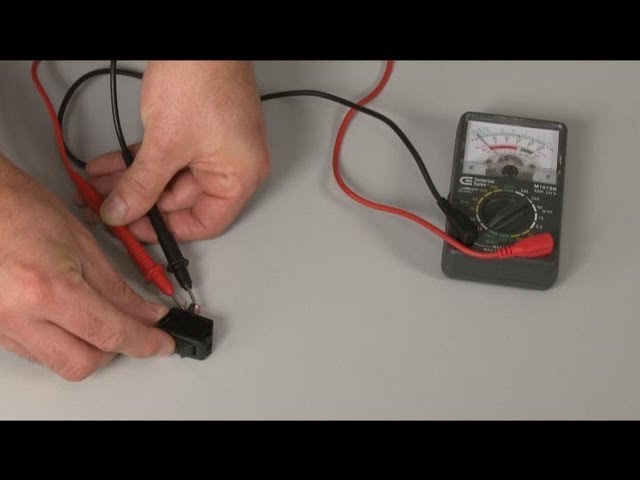
If the door clicks when closed but buttons still do not work, the microswitch may be faulty. Use a multimeter set to continuity mode. With power off, access the latch mechanism inside the door and touch the probes to the switch terminals. When the door is closed, resistance should read 0 to 10 ohms. If resistance reads 50 ohms or higher, or shows no continuity, the switch is defective and requires replacement. Replacement door latch assemblies cost $40 to $80.
Clear Delay Start or Error Memory
A blinking Start button or a display showing time delays like “2H” or “3H” indicates Delay Start is active. The dishwasher will not begin a new cycle until the timer expires or is manually cleared. Additionally, if power was interrupted during a cycle, the control may be stuck in an error memory state that blocks new commands.
Cancel Delayed Wash Mode
Press the Delay Start button repeatedly until the display reads 0 hours. This clears any pending delay and allows normal operation to resume.
Reset Control Memory After Power Failure
Press Cancel plus Drain twice in quick succession. This clears the control memory and resets the system logic. After resetting, attempt to start a normal wash cycle.
Power Cycle the Dishwasher
Whirlpool dishwashers contain electronic controls that can freeze or lock up, similar to a computer. A power cycle clears temporary software glitches and restores normal operation. This simple step resolves many button issues without requiring any parts or repairs.
Perform a Hard Reset
Turn off the dishwasher at the circuit breaker or unplug it from the outlet. Wait 5 to 10 minutes to allow residual power to drain completely. This forces the control board to reboot and clears any error states. After restoring power, test all buttons. Many users report full functionality returns after this procedure, especially on models like WDF320PADB0.
Check GFCI and Breaker
Before assuming the dishwasher is faulty, verify it has power. If the unit plugs into a GFCI outlet, which is common under kitchen sinks, the outlet may have tripped. Press the Reset button on the outlet. Also check the home electrical panel for a tripped 120V breaker. Use a multimeter to verify voltage at the unit if necessary.
Run Diagnostic Mode
If buttons still do not work after basic resets, running diagnostic mode helps determine whether the control board is functional. This test bypasses the touchpad and runs the dishwasher through a basic cycle using the main board directly.
Activate Test Cycle to Bypass Touchpad
On most Whirlpool models, press Heated Dry, Normal, Heated Dry, Normal in sequence, then close the door. The dishwasher should start a test cycle that runs through fill, wash, rinse, and drain operations. If the test cycle runs successfully, the main control board is working properly, meaning the problem lies with the touchpad, ribbon cable, or related connections.
Locate Technician Sheet for Your Model
The diagnostic procedure varies slightly by model. A technician service sheet with model-specific codes is often taped inside the kick panel beneath the front door. Open the panel to find exact button sequences and error code meanings. This sheet provides valuable information for accurate troubleshooting and is especially useful for advanced diagnostics.
Inspect for Loose Control Board

On some Whirlpool models, the main control board can become loose due to broken or worn mounting clips. When you press a button, the board flexes instead of registering the input. This creates symptoms that mimic a dead touchpad, leading to incorrect diagnoses and unnecessary part purchases.
Identify Flexing or Movement
Open the inner door panel and visually inspect the control board. While pressing a button, watch for any movement or flexing of the board. If it shifts or bends, that indicates a mounting problem rather than a failed component.
Stabilize with Non-Conductive Shim
You do not necessarily need to replace the board. Users have successfully fixed this issue by inserting a non-conductive shim behind the board to prevent movement. A piece of wood, plastic, or even a folded expired gift card works perfectly for this purpose. Slide the shim between the board and the door liner to stabilize it. Reassemble the door and test all buttons. This low-cost fix has resolved problems on multiple Whirlpool and Maytag units.
Test and Replace Faulty Components

If basic fixes do not resolve the issue, testing individual components helps identify the exact part causing the failure. These tests require a multimeter and basic electrical knowledge, but they prevent unnecessary part purchases.
Check the Thermal Fuse
A blown thermal fuse cuts power to the control panel, making it appear completely dead. The fuse is a small white or black cylinder located near the control board. With power off, set a multimeter to continuity mode and touch both ends of the fuse. A reading of OL (open loop) indicates the fuse is blown and must be replaced. Replacement thermal fuses cost approximately $30.
Examine Ribbon Cable Connections
A loose or damaged ribbon cable connecting the touchpad to the control board causes intermittent or total button failure. Open the door panel and unplug the cable from both ends. Inspect for bent pins, corrosion, or fraying. Clean the contacts with isopropyl alcohol and re-seat the cable firmly. Test continuity across the pins with a multimeter. Any break in continuity means the cable must be replaced, typically costing $15 to $40.
Test the Touchpad Membrane
The touchpad uses a conductive membrane that can wear out over time. Set a multimeter to resistance mode and test across the contacts for the unresponsive button. When pressed, the reading should be 0 to 10 ohms. If resistance is 50 ohms or higher, or shows no change when pressed, the membrane is damaged. Individual buttons cannot be replaced. You must install a complete control panel membrane assembly, which costs $110 to $350 depending on the model.
Verify Control Board Voltage Output
If all other components test correctly, the main control board may be faulty. With power restored, measure voltage at the touchpad input pins on the board. You should see 5V or 12V DC depending on the model. No voltage at all indicates the board is not sending power and has failed. Replace the board only after confirming all other potential causes have been ruled out.
Replace Control Panel Assembly
When the touchpad is worn, the board is faulty, or LED backlights have failed, replacing the entire control panel assembly becomes necessary. On many Whirlpool models, the touchpad and control board are integrated into a single unit that must be replaced as a whole.
When to Replace the Full Unit
Replace the control panel assembly if the touchpad membrane is worn through, the control board shows signs of failure, or LED backlights are out. On models like WDF320PADB0, the LED backlights are integrated into the control board itself, not the touchpad. This means dark buttons do not always indicate a bad membrane. Common replacement part numbers include W10380381 and W11259125.
Step-by-Step Replacement Process
Turn off power at the breaker before beginning. Remove screws from the inner door panel and carefully slide it down and out. Unscrew the control panel from the door and disconnect all cables. Transfer the button actuators and light tube from the old panel to the new one. Install the new board, reconnect all wiring, and reassemble the door panel. Restore power and test all functions. This repair takes 30 to 60 minutes and can save $100 or more in professional service fees.
Prevent Future Button Failures
Taking preventive measures extends the life of your dishwasher controls and reduces the likelihood of future button problems. Simple maintenance habits go a long way toward keeping your appliance functioning reliably.
Keep the Control Panel Clean
Use a damp microfiber cloth to wipe the control panel regularly. Avoid harsh cleaners, abrasive cloths, or spray chemicals that can damage the membrane surface. Built-up grime or sticky residue can cause short circuits in the touchpad over time.
Avoid Slamming the Door
Closing the door firmly but gently prevents stress on mounting clips and internal components. Hard closures can loosen the control board and damage latch mechanisms over time.
Install a Surge Protector
Voltage spikes can blow the thermal fuse or damage the control board. Plug the dishwasher into a surge-protected outlet or consider whole-home surge protection to safeguard your appliances.
Allow Cooling Between Cycles
Running back-to-back cycles increases thermal stress on electronic components. Allow at least 30 minutes between cycles to let the unit cool down properly.
Check Rack Alignment Regularly
Periodically verify that the bottom rack is installed correctly with rails facing the back of the dishwasher. Incorrect installation can repeatedly cause door latching issues that mimic button failure.
Key Takeaways for Fixing Whirlpool Dishwasher Buttons
Approximately 75% of Whirlpool dishwasher button problems do not require new parts. Starting with Control Lock reset, door latch verification, and power cycling resolves most issues quickly and at no cost. Only attempt component-level testing and replacement after ruling out these simpler causes. The thermal fuse, door switch, ribbon cable, and touchpad membrane are the most common failing parts, and each can be tested with a multimeter before purchasing replacements. When replacing the control panel assembly, ensure you transfer all reusable components like button actuators and light tubes to avoid delays. With the right diagnostic approach, you can restore full function to your dishwasher without paying for expensive technician visits.
Frequently Asked Questions About Whirlpool Dishwasher Buttons Not Working
Why do Whirlpool dishwasher buttons stop working suddenly?
The most common cause is the Control Lock being accidentally activated, which disables all buttons. Other frequent reasons include door latch issues, delayed start settings, and temporary software glitches that a power cycle can resolve.
How do I know if my dishwasher door is latching properly?
Close the door firmly and listen for a solid clicking sound. If you do not hear a click, or if the display shows the door is open, there may be an obstruction or the latch mechanism is faulty. Check for items blocking the door and verify the bottom rack is installed correctly.
Can I replace just one button on my Whirlpool dishwasher?
No, individual buttons cannot be replaced separately. The touchpad uses a membrane assembly that must be replaced as a complete unit. This is true for most modern Whirlpool models.
What does it mean when the Start button blinks but nothing happens?
A blinking Start button usually indicates Delay Start is active, showing how many hours remain before the cycle begins. Press Delay Start repeatedly until the display shows zero, or press Cancel plus Drain twice to clear the timer.
Is it worth repairing an older Whirlpool dishwasher?
If your dishwasher is more than 7 years old and experiencing control panel issues, consider the repair cost versus replacement. Professional repairs cost $200 or more, while a new energy-efficient model may offer long-term savings. Evaluate your specific situation based on the appliance age and repair requirements.