How to Use Rinse Aid in Dishwasher: Quick Guide
You’ve loaded the dishes, added detergent, and hit start, only to open your dishwasher later and find water spots, streaks, or wet glassware. If this sounds familiar, the missing piece might be rinse aid. Rinse aid is essential for spot-free drying, especially in areas with hard water. It works by reducing water’s surface tension so it sheets off dishes instead of beading up, which prevents spotting and speeds drying. This guide walks you through exactly how to use rinse aid in your dishwasher, from locating the dispenser to adjusting settings and avoiding common mistakes.
Locate the Rinse Aid Dispenser
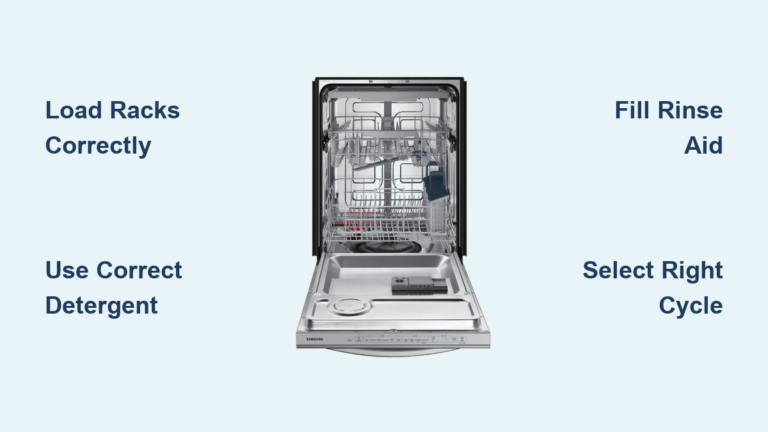
The rinse aid dispenser is almost always located inside the dishwasher door, near the detergent compartment. Most models include a small, labeled section with a water droplet symbol or marked “Rinse Aid.” On brands like Bosch, Samsung, and LG, it’s typically to the right or left of the main detergent cup. The compartment has a hinged lid that clicks open and seals tightly to prevent leaks.
Find the Visual Fill Indicators
Many models include a transparent window on the dispenser cap. When full, the rinse aid appears dark red or blue depending on the brand. When empty, the window turns clear. Some dishwashers also have a low rinse aid indicator light on the control panel, often a droplet or “RA” icon, that turns on when it’s time to refill.
Pro Tip: If your model lacks a light, mark your calendar to check the rinse aid level every few weeks, especially if you run the dishwasher daily.
Fill the Rinse Aid Dispenser Correctly
Knowing when and how to refill your rinse aid dispenser is essential for consistent performance.
Check When to Refill
Refill your rinse aid dispenser when:
– The indicator light is on
– The window shows low or empty
– Dishes start showing water spots or poor drying
Under normal use, which is three to five cycles per week, refill every four to eight weeks. Heavy usage may require more frequent refills.
Open the Compartment Safely
- Open the dishwasher door fully.
- Press the release tab on the back of the dispenser.
- Lift the lid until it clicks open. Don’t force it.
Warning: Never try to refill while the dishwasher is running or mid-cycle.
Pour Rinse Aid Without Spills
- Use only liquid rinse aid formulated for dishwashers, such as Finish, Jet-Dry, or store brands.
- Remove the bottle cap or use a spout for precision.
- Tilt the bottle slowly and pour along the side of the opening.
- Fill to the max line. Do not overfill.
- Stop immediately if you see bubbles rising or liquid near the brim.
Pro Tip: Place a paper towel around the dispenser to catch drips.
Seal and Clean Up
- Close the lid firmly until you hear a click.
- Wipe any spilled rinse aid with a damp cloth. Residue can cause sticky buildup or cloudy film inside the tub.
- Run a quick rinse cycle if significant spillage occurred.
Common Mistake: Forgetting to wipe spills leads to residue on dishes or malfunctioning sensors.
Adjust Rinse Aid Dosage Settings

Modern dishwashers allow you to adjust the amount of rinse aid dispensed per cycle. This helps optimize performance based on your water hardness and drying needs.
Access Digital Settings
On models with digital panels, such as Frigidaire or GE:
- Press and hold NORMAL plus DELAY for 3 seconds.
- The display shows the current level, such as L3.
- Press DELAY to increase or decrease. L0 is off, L6 is maximum.
- Press START or wait 5 seconds to save.
Best Practice: Start at L3, then adjust based on results.
Use Mechanical Dial Settings
On models with a mechanical dial, such as Bosch or Whirlpool:
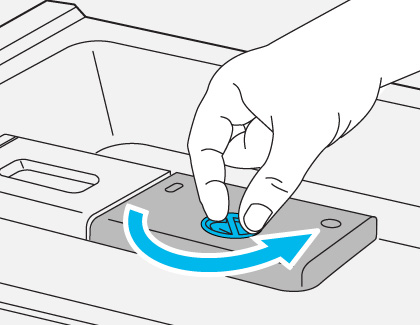
- Open the rinse aid cap.
- Turn the dial underneath with a screwdriver or fingertip.
- Rotate clockwise to increase, counterclockwise to decrease.
- Factory default is usually level 2 or 3.
Note: Bosch recommends starting at level 2 and increasing only if spots appear.
Optimize Based on Water Hardness
| Water Hardness | Recommended Setting |
|---|---|
| Soft (0–3 gpg) | L1–L2 |
| Medium (4–7 gpg) | L3–L4 |
| Hard (8+ gpg) | L5–L6 |
Tip: Test your water hardness with a home kit or check your local utility reports.
Fix Common Rinse Aid Problems
Even when used correctly, rinse aid can sometimes cause issues. Here’s how to troubleshoot the most common problems.
Dishes Have Water Spots
Cause: Not enough rinse aid or low dosage setting.
Fix:
– Refill the dispenser
– Increase dosage by one level
– Use a heated dry cycle instead of air dry
Expert Note: Air dry settings reduce heat, making rinse aid even more critical for drying.
Rainbow Streaks or Oily Film
Cause: Too much rinse aid being dispensed.
Fix:
– Lower the dosage setting
– Wipe down the interior door and gasket with a damp cloth
– Run an empty cycle with a cup of white vinegar on the top rack to clean residue
Warning: Excess rinse aid can leave a taste on dishes and damage rubber seals over time.
Dishes Stay Wet After Cycle
Cause: Missing rinse aid or disabled dispenser.
Fix:
– Confirm the dispenser is filled
– Ensure the lid is closed and latched
– Enable heated dry for best results, even with rinse aid
Myth: “All-in-one tablets make rinse aid unnecessary.”
Reality: While tablets contain some rinse aid, it’s often insufficient for hard water or optimal drying.
Oversudsing During Wash
Cause: Overfilling the dispenser or using dish soap as a substitute.
Fix:
– Stop the cycle and remove excess suds with towels
– Never use hand soap or vinegar in the rinse aid compartment
– Refill carefully to the max line only
Danger: Suds can overflow and damage the motor or flooring.
Use the Right Rinse Aid Safely
Using the correct type of rinse aid is just as important as using it properly.
Choose Commercial Liquid Only
Use only rinse aid products labeled for dishwashers. These are formulated with surfactants that safely break surface tension without damaging internal components.
Never use:
– Vinegar in the dispenser, which corrodes seals
– Baking soda mixtures, which can clog
– Dish soap, which causes sudsing
Handle With Care
Rinse aid is corrosive and can irritate skin or eyes.
- Wear gloves if you have sensitive skin
- Store out of reach of children and pets
- In case of contact with skin, rinse with water for 15 minutes
- In case of eye contact, flush immediately and seek medical help
Maximize Results With Best Practices
These additional tips will help you get the most out of your rinse aid.
Pair Rinse Aid With Heated Dry
For the driest results:
1. Add rinse aid to a filled dispenser
2. Set cycle to HEATED DRY
3. Avoid opening the door immediately after the cycle ends
Pro Tip: Let dishes cool for 10 to 15 minutes before unloading to reduce moisture re-condensation.
Maintain the Dispenser Monthly
- Wipe around the cap and hinge
- Check for clogs or sticky residue
- Clean with a damp cotton swab if needed
Benefit: This prevents leaks and ensures proper dispensing.
Replace Old or Cloudy Rinse Aid
If the liquid appears cloudy or separated, discard and replace with fresh product. Old rinse aid loses effectiveness over time, especially if stored in extreme temperatures.
Frequently Asked Questions About Rinse Aid in Dishwashers
Can I use vinegar instead of rinse aid?
No. Do not use vinegar in the rinse aid dispenser. While white vinegar can clean your dishwasher when used occasionally in a cup on the top rack, its acidity damages rubber seals and sensors over time. It also doesn’t provide consistent sheeting action like commercial rinse aid. Use vinegar monthly for deep cleaning, but never as a substitute.
Do I need rinse aid with all-in-one tablets?
Yes. Tablets contain a small amount of rinse aid, but it’s often not enough for hard water, plastic containers that stay wet, or glassware prone to spotting. Adding extra rinse aid ensures maximum drying and spot prevention.
What if my dishwasher has no dispenser?
Some compact or older models lack a built-in dispenser. In this case, don’t pour rinse aid directly into the tub because it will cause oversudsing. Instead, use rinse aid-enhanced detergent tablets, or place a vinegar-filled cup on the top rack occasionally to reduce spotting. This is not a full replacement, so consider upgrading to a model with a dispenser for better performance.
How often should I refill rinse aid?
Refill when the indicator light illuminates or the visual window shows a low level. Frequency depends on the number of cycles per week, the dosage setting, and your model capacity. Typical refill interval is every one to two months under normal household use.
What happens if I don’t use rinse aid?
Without rinse aid, drying performance drops significantly. Dishes emerge wet, and there’s an increased likelihood of water spots and mineral deposits, especially in hard water areas. Glassware and plastics may develop a cloudy film over time, and overall cleaning satisfaction diminishes despite adequate washing.
Key Takeaways for Using Dishwasher Rinse Aid
Using rinse aid correctly is one of the easiest ways to upgrade your dishwasher’s performance. The most important points to remember are keeping your dispenser filled and checking the indicator light regularly, using only commercial liquid rinse aid designed for dishwashers, and adjusting the dosage setting based on your water hardness and results. Pair rinse aid with a heated dry cycle for the best drying performance, and always clean up spills immediately to prevent residue buildup.
By filling the dispenser properly, adjusting the dosage, and avoiding common mistakes like using vinegar or dish soap in the dispenser, you’ll consistently get dry, spot-free dishes without the need for towel drying. Make rinse aid part of your routine, and you’ll wonder how you ever lived without it.