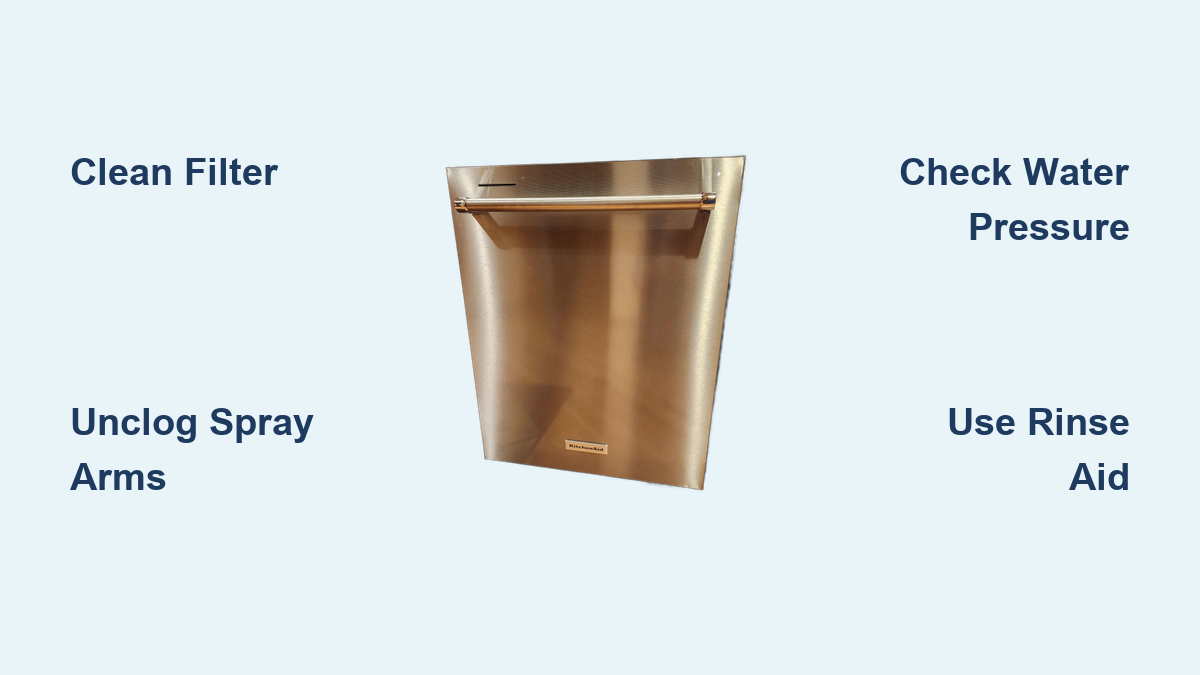
KitchenAid Dishwasher Not Rinsing? Fix It Fast
If your KitchenAid dishwasher is not rinsing properly, you’re dealing with one of the most common appliance problems. Dishes emerge dirty, especially on the upper rack, even after running full cycles with detergent and rinse aid. The good news: over 80% of rinsing failures stem from simple blockages you can fix in under 30 minutes. This guide covers every proven solution, from cleaning the macerator screen to checking water pressure, so you can restore spotless results without a technician.
You’ll learn exactly how to unclog spray arm jets, verify proper water flow, use the right detergent, and prevent recurring buildup. Whether you own a KUDS01LWH2 or another KitchenAid model, these steps work across most units. Let’s get your dishwasher rinsing like new.
Clean the Filter Assembly
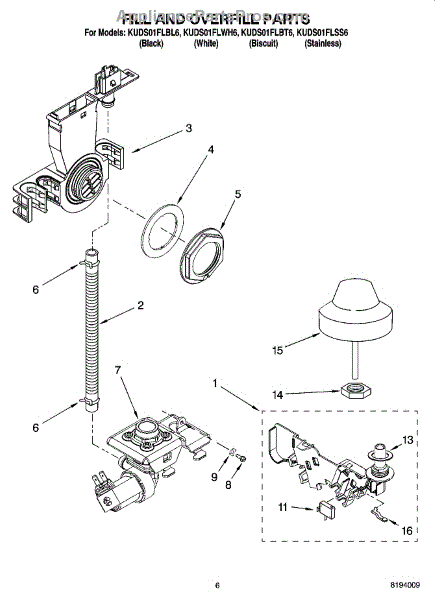
A clogged filter is the number one reason KitchenAid dishwashers fail to rinse. When debris builds up in the lower filter, it blocks water from reaching the circulation pump, starving the upper spray arm of pressure. Cleaning the filter restores flow and dramatically improves cleaning performance in most cases.
Remove and Disassemble the Filter
Start by removing both baskets. Pull out the lower basket first, then release the upper basket latches and slide it out. Place the upper basket upside-down to protect its spray arm during cleaning. Next, detach the lower spray arm by loosening the retaining nut and pulling it free. Remove the diffuser by sliding it out of the clip or removing a small Phillips screw. On most models, rotate it 45 degrees right to release it from the slot.
Now locate the five Torx T15 screws securing the filter assembly. Use a T15 screwdriver or star socket to remove them. Gently pry upward with a flat-head screwdriver at the front edge and lift the entire assembly out. Flip it over and remove the left-side T15 screw holding the gray housing. Lift off the cover to expose the silver macerator screen, which is where most clogs form.
Scrub the Macerator Screen and Sump
Rinse the screen under hot running water. Use an old toothbrush to scrub both sides of the mesh, focusing on grease, food fibers, and mineral deposits. Check the sump area for trapped glass shards or coffee grounds, as these can damage the pump if left inside.
Inspect the feed tube that connects to the upper spray arm. Use tweezers or a bent coat hanger to clear any blockages in the small holes leading upward. Even a partial clog here will stop water from reaching the top rack entirely.
Once clean, reassemble the filter by replacing the gray housing and securing the left T15 screw. Align the oblong filter piece into its slot until it clicks, then reinstall all five top screws. Make sure everything sits flush, as misalignment causes leaks and poor performance.
Clear Spray Arm Jets
Even with a clean filter, blocked spray arm nozzles will prevent proper rinsing. Water must exit through multiple angled jets to spin the arms and cover all dishes. Clogs from hard water scale or food residue disrupt this critical flow pattern.
Remove Upper and Mid-Level Spray Arms
To access the upper spray arm, unclip one side from the tower, rotate slightly, and pull it free as a single unit. Some models allow full removal, while others pivot for cleaning. Take it out completely if possible.
Place the arm under a garden hose or use compressed air while slowly rotating it. Watch for weak streams or dead spots, as these indicate clogged jets. Pay special attention to rear-facing nozzles and the inlet hole at the base where water enters from the tower.
Unclog Nozzles Without Damage
For stubborn clogs, insert a toothpick or plastic needle into each jet. Avoid metal tools like wire or pins, as they can scratch or enlarge holes and cause imbalance and reduced pressure. If you feel resistance, wiggle gently until the plug clears.
Check for cracks, warping, or leaks. A damaged arm will not seal properly and loses pressure. Replacement arms cost $10 to $15 and install in seconds. Reattach securely, ensuring the arm spins freely without hitting dishes.
Check Water Supply and Pressure

No amount of cleaning helps if your dishwasher is not getting enough water. Low pressure means weak spray, incomplete rinsing, and standing water after cycles. This issue is often overlooked but easy to diagnose.
Test Water Flow at the Inlet
Ensure the water supply valve under the sink is fully open. A partially closed valve restricts flow and mimics internal clogs. Inspect the supply line for kinks or crushing behind the unit, and straighten any bends you find.
Some homes use flood-prevention devices that limit flow above a certain threshold. If installed incorrectly, they can choke water delivery. Bypass the device temporarily to test, and if rinsing improves, the device is the culprit.
Measure Water Pressure
Optimal pressure for KitchenAid dishwashers is 20 to 120 psi. Below 20 psi, the unit will not fill properly, and above 120 psi risks damage to internal components. Use a water pressure gauge attached to a laundry faucet or dishwasher line to check your home’s pressure.
If pressure is low, investigate household issues like clogged faucet aerators, a failing pressure regulator, or shared line usage during high demand. Fix the root cause before expecting better dishwasher performance.
Use the Right Detergent and Rinse Aid
What you put in the detergent cup matters more than you might think. Using the wrong product leads to film, suds, and poor rinsing, even with perfect water flow and clean components.
Stop Using Dish Soap
Never add hand dish soap to your dishwasher. It creates suds that displace water, reduce pressure, and trigger overflow sensors. Suds also leave residue on dishes and inside the tub. Only use automatic dishwasher detergent, whether tablets, packs, or gel specifically designed for machines.
Switch to Pre-Measured Tablets
Low-quality powder or liquid detergents often leave a white film on glassware, especially in hard water areas. Upgrade to premium pre-measured tablets or packs that combine detergent, rinse aid, and enzymes for complete cleaning and filming reduction. Always close the detergent dispenser lid after loading, as an open lid prevents proper release during the cycle.
Keep Rinse Aid Reservoir Full
Rinse aid is not optional. It ensures water sheets off dishes instead of beading, which prevents spots and improves drying. Check the reservoir weekly and refill to the max line. Without rinse aid, rinsing efficiency drops by up to 40%.
Load Dishes Correctly
How you load the dishwasher directly affects water reach and spray arm rotation. Even minor missteps block key jets and create dead zones where water simply cannot reach.
Avoid Overloading
Packing too many items restricts water and detergent access to all dish surfaces. Leave space between plates and bowls, and do not stack items so tightly that spray cannot penetrate.
Angle Items for Drainage
Place bowls, cups, and containers at an angle so water does not pool on surfaces. Face soiled surfaces toward the center spray arms. Never let large items like cutting boards block the upper spray arm’s path.
Place Plastics in Upper Rack
Plastic containers on the lower rack may warp from heat and block spray nozzles. Always store plastics in the upper basket where temperatures are lower and water flow is stronger.
Prevent Hard Water Buildup
If your water is hard, meaning 15 or more grains per gallon, mineral deposits build up quickly in pumps, hoses, and spray arms. This leads to poor rinsing and can shorten your appliance’s life significantly.
Install a Water Softener
Use a built-in dishwasher water softener if your model supports it, or install a whole-house system. Softened water prevents scale, improves detergent effectiveness, and keeps internal components clean for longer.
Run Monthly Cleaner Cycles
Use affresh Dishwasher Cleaner every one to three months. Drop one or two tablets in the empty tub and run a hot water cycle. This dissolves film, lime, and grease from the pump, valves, and recirculation lines.
For a budget option, pour one to two cups of white vinegar in the bottom and run a hot rinse. This works for mild buildup and odor removal but is less powerful than affresh for severe cases.
Verify Upper Basket Alignment
One overlooked issue is that the upper basket must align perfectly with the tower inlet. If misaligned, water cannot flow up to the upper spray arm, leaving top-rack dishes completely untouched.
Align Basket with Tower Hole
When reinstalling the upper basket, slide it onto the rails until the wheels click into place. Push the blue latch inward to lock it. Look down into the tower to confirm there is a clear, unobstructed hole connecting to the basket’s base.
If the basket is offset, the water column breaks and the upper arm gets little to no flow. This misalignment mimics a clogged feed tube, so check this before disassembling anything else.
Test After Repairs
After cleaning and reassembling components, verify your fix with a quick functional test before running a full load.
Perform the Cup Test
Place a clear plastic cup upside-down in the upper basket. Run a short rinse cycle of about 10 minutes. After it stops, check the cup. If it is filled with water, the upper spray arm is receiving pressure and the fix worked.
If the cup is empty or nearly dry, recheck the filter reassembly, feed tube for blockage, upper basket alignment, and spray arm rotation. One of these is likely still causing the issue.
Run a Full Load Test
Once water flow is confirmed, load dirty dishes and run a normal wash cycle. After completion, inspect the upper rack glasses for streaks, plastic containers for residue, and cups and bowls for food particles.
If dishes come out clean, you have solved the problem. If not, repeat the cleaning process or consider calling a professional.
When to Call a Technician
Most rinsing problems are user-fixable with the steps in this guide. However, some issues require professional diagnosis and repair.
Seek Service for These Signs
Contact a technician if you notice a flashing light indicating the Leak Detection System is active, as this suggests water under the tub from a seal failure. Also seek help if the circulation pump is silent or noisy, which could mean motor failure or impeller damage. Other signs include no water filling despite an open valve and correct pressure, spray arms that will not rotate even when clean, or persistent film after using affresh, vinegar, and high-quality detergent.
For warranty-covered units, contact authorized KitchenAid service. For out-of-warranty repairs, DIY part replacement like a macerator blade for $10 to $15 is cost-effective, but pump or control board issues require professional diagnosis.
Frequently Asked Questions About KitchenAid Dishwasher Not Rinsing
Why is my KitchenAid dishwasher not rinsing the top rack?
The most common cause is a clogged filter or macerator screen that restricts water flow to the upper spray arm. Debris buildup blocks the circulation pump, starving the upper arm of pressure. Cleaning the filter assembly and clearing the feed tube usually fixes this issue.
How do I know if my water pressure is too low?
Optimal dishwasher water pressure is 20 to 120 psi. Use a pressure gauge on your dishwasher line to check. If pressure is below 20 psi, the unit will not fill properly and rinsing will be weak. Low pressure often comes from partially closed supply valves, clogged aerators, or shared water lines during high demand.
Can using dish soap damage my dishwasher?
Yes. Hand dish soap creates excessive suds that displace water, reduce spray pressure, and can trigger overflow sensors. Always use automatic dishwasher detergent specifically formulated for machines. Even a small amount of dish soap can cause poor rinsing and residue buildup.
How often should I clean the dishwasher filter?
Clean the filter assembly every one to two months, or more frequently if you notice poor rinsing or odors. Homes with hard water or heavy dish usage may need monthly cleaning. Regular maintenance prevents the 80% of rinsing issues that stem from filter blockages.
Will hard water cause permanent damage?
Hard water causes scale deposits in pumps, hoses, and spray arms over time. While not immediately destructive, ongoing hard water use shortens component lifespan and causes persistent film on glassware. Installing a water softener prevents this buildup and improves rinsing performance significantly.
Key Takeaways for Fixing Your KitchenAid Dishwasher Not Rinsing
A KitchenAid dishwasher not rinsing is usually caused by clogged filters or blocked spray arms, not mechanical failure. By cleaning the macerator screen, unclogging jets, verifying water pressure between 20 and 120 psi, and using the right detergent and rinse aid, you can restore full performance in under 30 minutes. The filter assembly is the most common culprit, so start there when troubleshooting.
Follow a monthly maintenance routine that includes cleaning the filter, inspecting spray arm jets, and refilling rinse aid. Proper loading techniques and water softening extend your dishwasher’s life and ensure spotless results every time. If all DIY steps fail and dishes still come out dirty or the Leak Detection System activates, it is time to call an authorized technician for professional repair.