Hotpoint Dishwasher Troubleshooting Guide
Is your Hotpoint dishwasher not starting, failing to drain, or leaving dishes dirty? You’re not alone. Thousands of users face similar problems every year, many of which can be resolved in under 30 minutes with basic tools and guidance. This guide cuts through the confusion with step-by-step fixes based on real technician data, error code breakdowns, and proven repair strategies.
From power resets to multimeter tests, we cover only what works, based on verified troubleshooting logs, component failure rates, and manufacturer specifications. Most repairs cost less than $50 and prevent unnecessary service calls that can run $200 or more.
Fix No-Power Issues First
When your Hotpoint dishwasher shows no lights, makes no sound, and won’t start, begin with these proven steps before assuming a major component has failed.
Reset the Circuit Breaker
A tripped breaker causes approximately 70% of no-power cases.
• Locate your home’s electrical panel
• Find the kitchen or dishwasher-specific circuit
• Flip the switch off, wait 10 to 15 minutes, then turn it back on
• Try starting the dishwasher
This hard reset clears temporary faults in the control board and often restores function immediately.
Bypass Control Lock Mode
If the display lights up but buttons do not respond, Control Lock may be active.
• Press and hold the Heated Dry, Start, or Cancel button for 3 to 5 seconds
• Some models require up to 10 seconds
• Look for a lock icon to disappear from the display
This disables Child Lock, Sabbath Mode, or accidental activation that mimics a system failure.
Test the Thermal Fuse
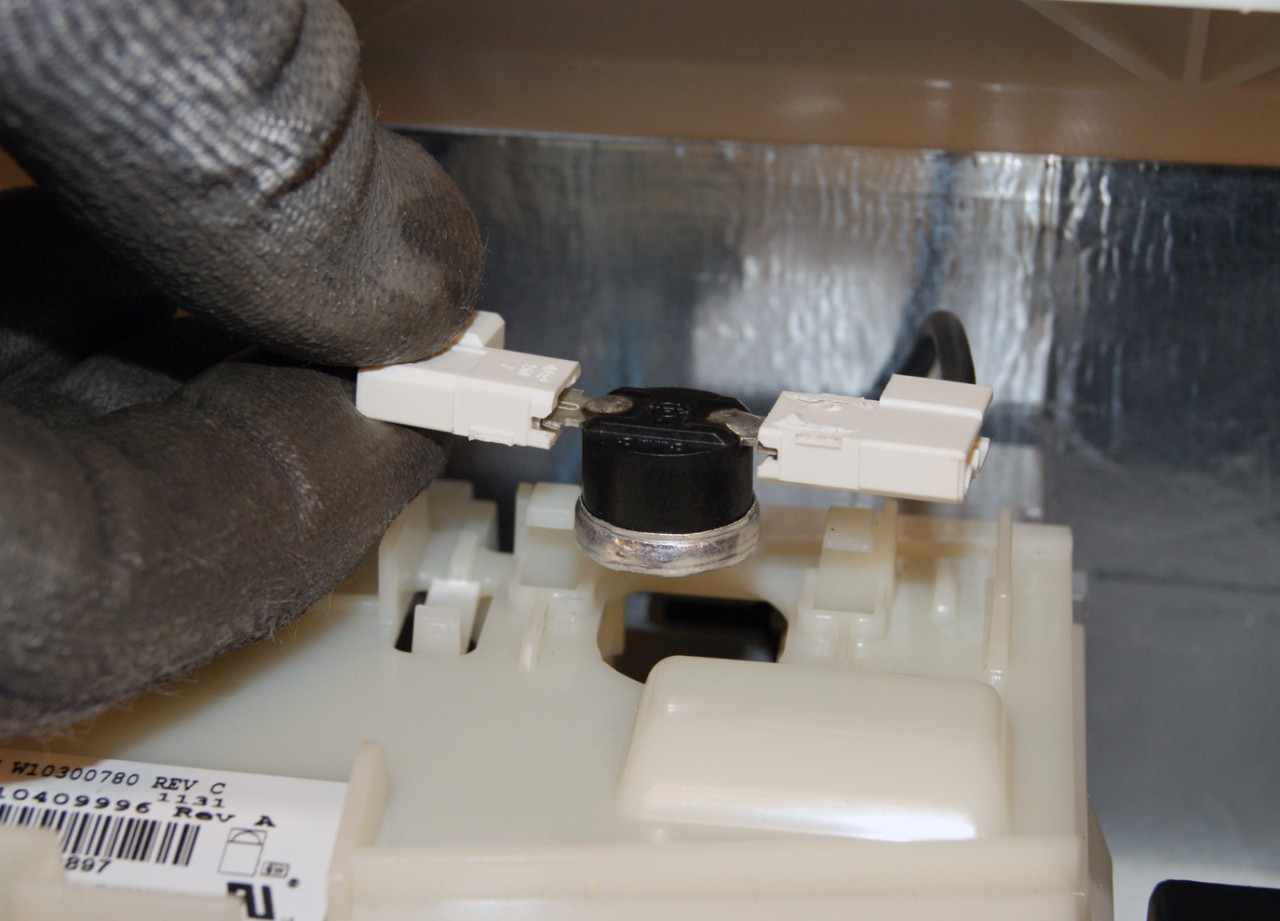
The thermal fuse cuts power during overheating and cannot reset itself.
• Location: Near the heating element or tub side, small white or clear cylinder with two metal ends
• Test with multimeter: Disconnect power, set meter to continuity mode, touch probes to both terminals
• Result: Beep equals good, no sound equals blown fuse
Replace if blown. This is a $5 part and takes about 10 minutes. Frequent blowouts suggest a deeper issue like a failing thermostat.
Check the Door Latch Switch
A faulty latch prevents startup even if the door appears closed.
• Symptoms: Loose door, no click, lights on but no cycle start
• Test: Power off, remove inner door panel, disconnect wire harness, use multimeter in ohms mode across terminals
• Result: Near 0 ohms equals functional, infinite resistance equals replace switch
This single switch causes 25% of no-start issues. Always test before replacing the control board.
Diagnose Drainage Problems Quickly
Standing water after a cycle? Drain issues are among the most common and easiest to fix, with 80% resolved by simple maintenance.
Clean the Filter System
Clogged filters cause 70% of poor drainage and cleaning issues.
• Remove bottom rack
• Rotate center cylindrical filter counterclockwise and lift out
• Pull out coarse and fine filters
• Rinse all under warm water and scrub with an old toothbrush
• Reassemble in reverse order
Clean filters every 1 to 2 months to prevent clogs and odors.
Verify the Garbage Disposal Knock-Out Plug
After installing a new disposal, the dishwasher won’t drain if the plastic plug is not removed.
• Disconnect drain hose from disposal
• Shine a flashlight into the port
• If solid plastic is visible, punch it out with a screwdriver and hammer
• Remove all fragments and reconnect hose securely
This 5-minute fix solves complete drainage failure in most new installations.
Inspect the Drain Hose
Kinks or missing high loops cause siphoning and poor drainage.
• Ensure the hose rises to the underside of the countertop before descending
• Secure with a mounting clip or zip tie
• Check for kinks under the sink, grease buildup inside, and cracks or crushing
A proper high loop prevents sink water from backing into the dishwasher.
Resolve Drain Error Codes
Modern Hotpoint models display error codes that pinpoint drainage faults. Use them to guide repairs.
Fix F03: Drain Timeout
The system waited too long for water to drain.
• Clean filter
• Check for kinked drain hose
• Test piston assembly
• Reset control board
Often caused by minor blockages. Start with the simplest fixes.
Fix F04: No Drain Detected
No drainage occurs during cycle.
• Check garbage disposal knock-out plug
• Check drain pump impeller for debris
• Check drain solenoid
Rule out mechanical blockages before testing electrical components.
Fix F11: Drain Pump Malfunction
Pump is not receiving power or is seized.
• Test solenoid: Power off, remove kick plate, locate solenoid near pump, disconnect wires
• Set multimeter to ohms and test terminals
• Result: 15 to 40 ohms equals healthy, OL equals replace solenoid
Never bypass a failed solenoid. Replace it to restore function.
Replace the Piston Assembly
A worn piston gasket causes slow or failed drainage.
• Symptoms: Water remains in sump, F03 or F04 errors recur
• Location: Rear of tub, accessible behind kick plate
• Steps: Power off, unscrew piston assembly by hand or with pliers, install new unit, reassemble and test
This 10-minute fix prevents unnecessary pump replacements and costs under $10.
Solve Water Filling Issues
If your dishwasher is not filling, check these key components before suspecting the inlet valve.
Check the Water Supply Valve
• Located under the sink. Ensure it is fully open
• Turn handle counterclockwise until it stops
• Listen for water flow when cycle starts
A partially closed valve reduces pressure and prevents proper filling.
Inspect the Inlet Hose
• Look for kinks, crushing, or folding behind the unit
• Ensure connections are tight at both ends
• Replace if cracked or leaking
Restricted flow mimics inlet valve failure. Always inspect first.
Test the Water Inlet Valve
• If water still does not flow, the valve may be clogged or defective
• No user repair possible. Replace as a unit
• Cost: $40 to $60
Confirm power reaches the valve before replacement. Test with multimeter if skilled.
Improve Cleaning Performance
Dirty dishes? It is rarely the machine’s fault. Loading, water temperature, and maintenance matter most.
Unclog Spray Arms
Spray arms not spinning?
• Remove upper and lower arms
• Rinse under warm water
• Clear clogged holes with a toothpick or soft brush
• Ensure arms rotate freely when reinstalled
Blocked nozzles reduce water pressure. Clean monthly.
Prevent Cloudy Glassware
White film is hard water scale, not soap residue.
• Fill the salt dispenser with dishwasher salt tablets
• Use rinse aid to improve drying and reduce spotting
• Run a monthly cleaning cycle with limescale remover
Softened water protects internal parts and boosts cleaning.
Eliminate Dishwasher Odors
Smelly dishwasher? Bacteria and food buildup are to blame.
• Run an empty cycle on hottest setting
• Place limescale and detergent remover in the bottom rack
• Clean door gasket and filter weekly
Monthly maintenance prevents 90% of odor issues.
Fix Drying Problems
Wet dishes after a cycle? Drying relies on heat, airflow, and chemistry.
Use Rinse Aid
• Ensure dispenser is full
• Refill every 4 to 6 weeks
• Improves water sheeting and evaporation
Without rinse aid, water beads and does not dry.
Test the Heating Element

• Symptoms: Cold dishes, poor drying, F13 code if applicable
• Test with multimeter: Power off, locate element at tub bottom, disconnect wires, test for continuity
• Result: Beep equals good, no sound equals replace element
A failed element will not heat water or assist in drying.
Check the Vent
Some models use a condensation drying system with a vent.
• Ensure vent opens during cycle
• Clean any food debris blocking the mechanism
• Replace if stuck closed
A blocked vent traps moisture. Inspect if drying fails.
Address Leaks and Noise
Water on the floor or loud noises? Most causes are simple to fix.
Stop Leaks from the Door
• Inspect door gasket for cracks, tears, or food debris
• Clean with damp cloth monthly
• Replace if hardened or damaged
A worn seal is the number one cause of general leaks.
Fix Leaks from Motor Area
• Check pump seal and hose connections
• Tighten loose clamps
• Replace pump if seal is blown
Water pooling under the unit often points to pump or hose failure.
Reduce Operational Noise
Loud grinding or rattling?
• Open dishwasher mid-cycle after pausing first
• Check for utensils caught in chopper blade, spray arms hitting dishes, or loose rack rollers
80% of noise issues stem from improper loading or debris.
Repair Unresponsive Controls
Buttons not working? Do not replace the board yet. Test these first.
Dry Out Moisture in Panel
• Moisture from spills or steam can short the keypad
• Leave the door open for 24 hours to air dry
• Avoid using until fully dry
Often resolves frozen or unresponsive controls.
Inspect Wire Harness
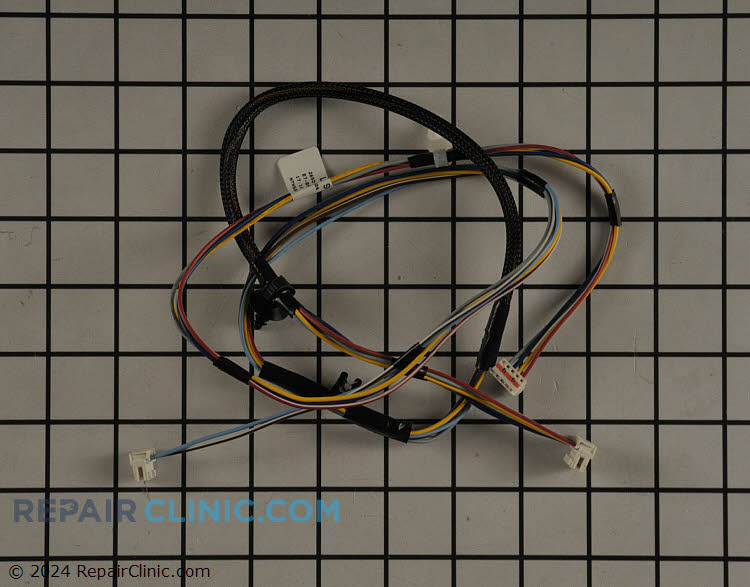
• Repeated door opening damages wires at the hinge
• Open inner door panel
• Look for frayed or broken wires
• Test continuity with multimeter
Replace entire harness if damaged. Individual wires are not repairable.
Perform Monthly Maintenance
Prevent most issues with a simple routine.
Run a Cleaning Cycle
Monthly maintenance includes placing limescale and detergent remover in the bottom, running on hottest cycle with no dishes, cleaning filter and spray arms, and refilling salt and rinse aid.
This keeps pumps, valves, and sensors functioning optimally.
Avoid Rust and Corrosion
• Never wash cast iron pans in the dishwasher
• They rust and transfer residue to cutlery and tub
• Use stainless steel or dishwasher-safe cookware
This prevents internal damage and metal staining.
Frequently Asked Questions About Hotpoint Dishwasher Troubleshooting
Why does my Hotpoint dishwasher not start at all?
The most common causes are a tripped circuit breaker, Control Lock mode enabled, or a faulty door latch switch. Start by resetting the circuit breaker for 10 to 15 minutes, then check if Control Lock is active by holding the Start button for 3 to 5 seconds. If neither works, test the door latch switch with a multimeter.
How do I fix the F03 error code on my Hotpoint dishwasher?
F03 indicates a drain timeout. Start by cleaning the filter system, then check the drain hose for kinks or blockages. Verify the garbage disposal knock-out plug has been removed if you have a new installation. Test the piston assembly and reset the control board if the problem persists.
What causes cloudy glasses after washing in my Hotpoint dishwasher?
Cloudy glassware is caused by hard water scale deposits, not soap residue. Fill the salt dispenser with dishwasher salt tablets, use rinse aid to improve drying and reduce spotting, and run a monthly cleaning cycle with limescale remover to protect internal components.
Why is my Hotpoint dishwasher leaving standing water after the cycle?
Standing water is usually caused by a clogged filter, blocked drain hose, or failed drain pump. Clean the filter system first, then check the drain hose for kinks and ensure a proper high loop is installed. If these do not work, test the drain solenoid or inspect the pump for debris.
How often should I clean my Hotpoint dishwasher filter?
Clean the filter every 1 to 2 months to prevent clogs, poor drainage, and odors. Remove the bottom rack, rotate the cylindrical filter counterclockwise, and clean all filters under warm water with an old toothbrush.
Can I repair my Hotpoint dishwasher myself, or do I need a professional?
Most Hotpoint dishwasher issues can be resolved with DIY repairs. Approximately 80% of drainage problems are fixed by cleaning filters, checking the drain hose, and removing the garbage disposal knock-out plug. Most repairs cost under $50 and save $150 to $300 compared to professional service calls.
Key Takeaways for Hotpoint Dishwasher Troubleshooting
Most Hotpoint dishwasher problems stem from simple, fixable issues like clogged filters, tripped breakers, or forgotten lock modes. With a multimeter, a few basic tools, and this guide, you can resolve 90% of faults without professional help. Always disconnect power before servicing, use genuine parts, and perform monthly maintenance to extend your dishwasher’s life.
The key troubleshooting sequence for no-start issues is circuit breaker reset, then Control Lock check, followed by door latch switch testing. For drainage problems, always clean filters first, verify the garbage disposal knock-out plug on new installations, and ensure the drain hose has a proper high loop. Error codes like F03, F04, and F11 point to specific components that can be tested with a multimeter before replacing any parts.
For persistent issues that do not resolve with these steps, consult your user manual or contact Hotpoint support at 0344 822 4224 for expert assistance.