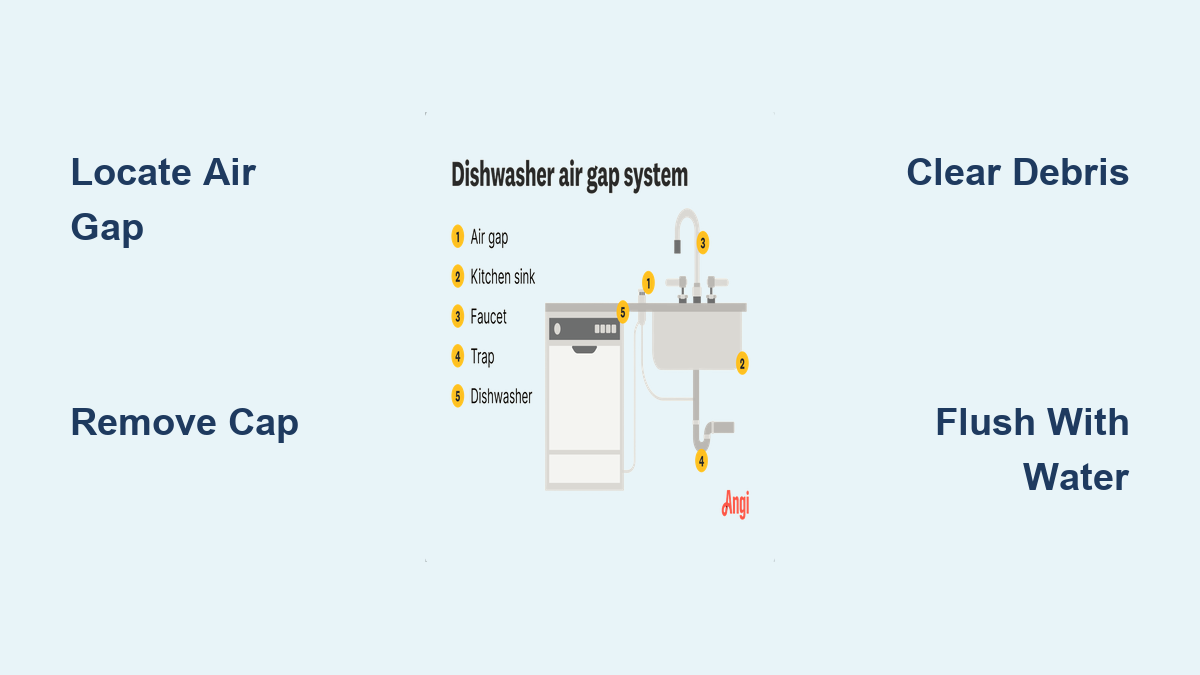
How to Clean Dishwasher Air Gap: Quick Steps
Is your dishwasher draining slowly or leaking water near the sink? One often-overlooked culprit could be a clogged dishwasher air gap. This small but critical component prevents contaminated water from backing up into your dishwasher, ensuring clean dishes and safe operation. When blocked by food debris, grease, or mineral buildup, it can cause drainage issues, foul odors, and even error codes on certain models. The good news? Cleaning it takes just minutes and requires no special tools. In this guide, you will learn how to quickly inspect, unclog, and maintain your air gap to keep your dishwasher running smoothly.
Locate and Identify the Dishwasher Air Gap
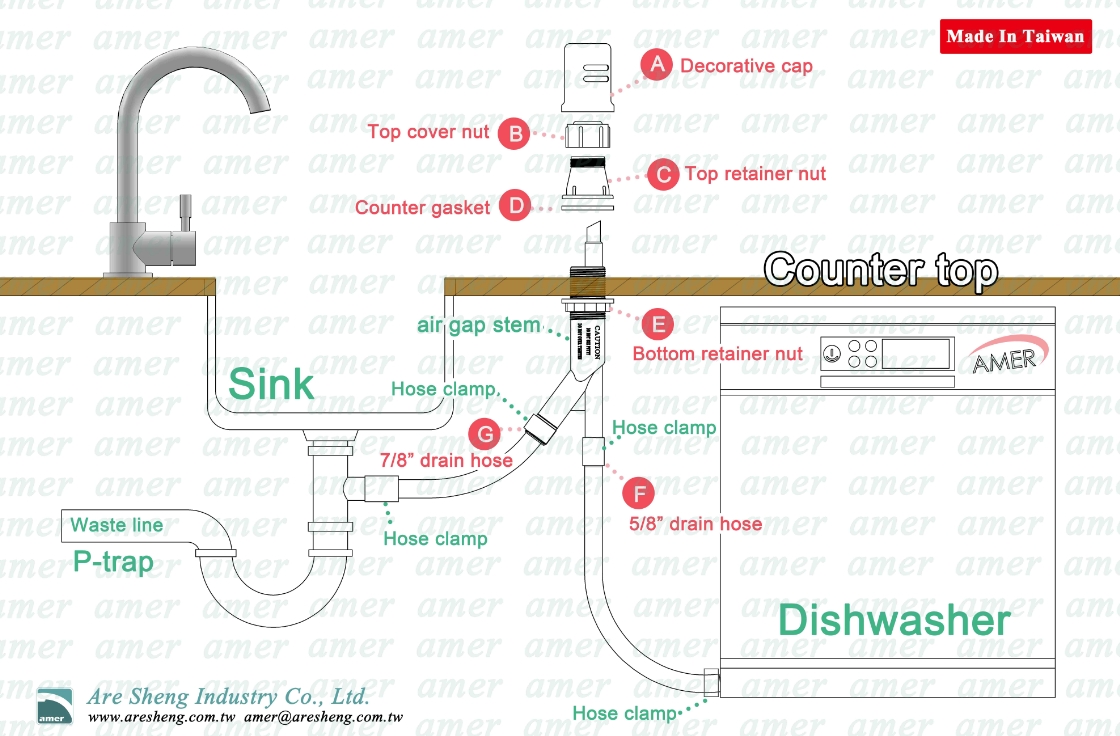
Before cleaning, confirm your dishwasher has an air gap. Most models installed in North America since the 1990s include one due to plumbing code requirements.
What the Air Gap Looks Like
The air gap is a chrome or plastic cylinder mounted on the countertop near the sink faucet, often positioned between the faucet and the edge of the sink. It has two small vent holes on top and a removable cap. Some modern installations hide the air gap under the sink using high-loop drain configurations, but visible air gaps remain common and required in many jurisdictions.
How to Find It If You Do Not See One
If you do not see an air gap on your countertop, check under the sink. Some newer dishwashers use alternative backflow prevention methods, but most homes still rely on the standard air gap.
Signs Your Air Gap Needs Cleaning
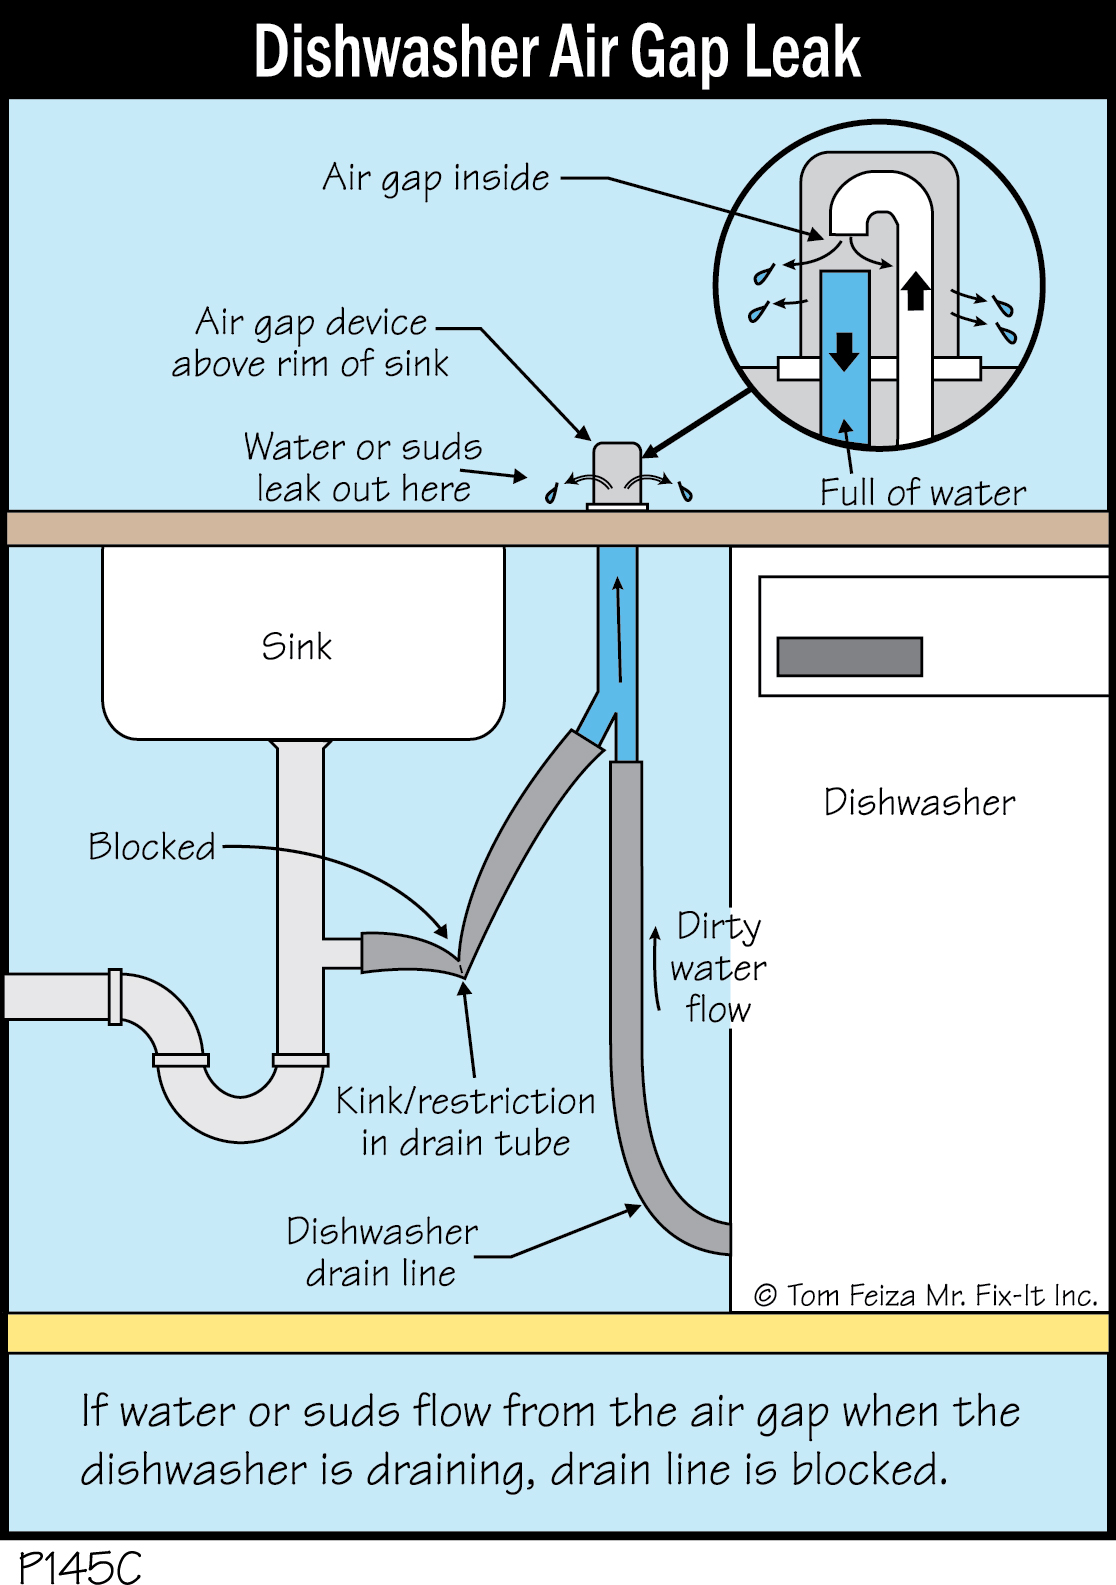
Catching early symptoms prevents bigger problems. Watch for these red flags that indicate a clogged air gap.
Water Leaks From the Top
During draining, water sprays or drips from the air gap vent holes. This is the most common sign of a blockage and should prompt immediate inspection.
Slow or Incomplete Drainage
Even with a clean filter, the dishwasher retains water because the drain path is restricted by debris accumulation.
Foul Odors From the Unit
Trapped food particles decompose inside the chamber, producing a musty or rotten smell that permeates your kitchen.
OE Error Code on LG Models
This specific error points to drainage failure and is often caused by a blocked air gap. Cleaning the air gap frequently resolves this error without professional service.
Gather Basic Cleaning Supplies
You will not need professional tools. Use items already in your home to perform this maintenance task effectively.
The supplies needed include tweezers or needle-nose pliers for removing solid debris, a toothpick or pipe cleaner for dislodging stuck particles, a 12-inch bottle brush for scrubbing interior tubes, paper towels for wiping down parts, hot water for flushing out residue, a shop vacuum for severe clogs, and rubber gloves for hygiene and grip. No chemicals are required, and you should avoid drain cleaners, which can damage plastic components.
Remove and Inspect the Air Gap Cap
This step-by-step process ensures safe access to the interior chamber where debris accumulates.
Turn Off Power First
Unplug the dishwasher or shut off its circuit breaker. Safety first, especially if water is pooling around the appliance.
Take Off the Cap
Most caps are either snap-on or screw-on. For snap-on caps, gently squeeze the sides and pull straight up. For screw-on caps, rotate counterclockwise to unscrew. If stuck, wrap a rubber band around the cap for better grip.
Inspect the Interior
Shine a flashlight into the larger opening connected to the dishwasher. Look for visible gunk such as corn kernels, coffee grounds, or plastic fragments. One homeowner pulled out a broken plastic spoon, proving even large items can end up in this chamber.
Clear Debris Manually
This fast method works for approximately 80% of clogs and takes less than five minutes to complete.
Use Tweezers or Pliers
Reach into the chamber and pull out any solid material. Work carefully to avoid pushing debris deeper into the drain line.
Dislodge Sticky Buildup
A toothpick or pipe cleaner helps scrape off grease or biofilm stuck to the walls of the interior chamber.
Clean the Cap and Rim
Wipe the underside of the cap and the top rim with a damp paper towel. Rinse under warm water if needed.
Reinstall and Test
Snap or screw the cap back on securely. Restore power and run a short rinse cycle. Watch for leaks or improved drainage. Success is confirmed when water no longer sprays from the top vents.
Clear Soft Clogs With Air Pressure
If manual cleaning does not fully restore flow, try this simple pressure test to dislodge remaining blockage.
Blow Into the Large Opening
Remove the cap again and ensure the chamber is clear of loose debris. Place your mouth over the larger hole connected to the dishwasher line and blow hard. If you feel resistance like sealed lips, a blockage remains. If you feel a sudden release, you have cleared the clog.
Flush Through Garbage Disposal
Remove the rubber baffle from the disposal inlet. Pour hot water through the opening using a funnel to push out residual gunk. Reassemble and test the dishwasher.
Deep Clean With a Bottle Brush
For greasy, stubborn buildup that tweezers cannot fix, use this deeper cleaning method.
Access the Full Channel
Some models have a removable plastic insert beneath the cap. Lift it out gently to expose the full channel.
Insert the Bottle Brush
Use a 12-inch bottle brush in the larger opening, not the small vent tube. Push the brush down slowly toward the garbage disposal. Have someone look inside the disposal inlet to confirm the brush tip comes through. This ensures full line access.
Scrub While Retracting
Rotate the brush as you pull it back to scrape off film and grime. Wrap a paper towel around the shaft to catch dripping debris.
Flush With Hot Water
Pour two to three cups of hot tap water down the air gap to rinse loosened material into the drain. Reinstall the cap and run a test cycle. Do not force the brush, as bending or breaking it inside the line can make the problem worse.
Use a Shop Vacuum for Severe Clogs
When other methods fail, this approach pulls out the tough blockages.
Disconnect the Hose Under the Sink
Locate the hose connecting the air gap to the garbage disposal or drain pipe. Use pliers to loosen the clamp and detach the hose.
Attach to Shop Vacuum
Connect the hose directly to the vacuum nozzle. Seal gaps with duct tape for maximum suction.
Turn On the Vacuum
Run for 30 to 40 seconds. You will often hear gurgling or see debris pulled through, which confirms the line is opening.
Flush the System
Pour one gallon of hot water into the drain line via the air gap to clear remaining grease.
Reconnect and Test
Secure the hose clamp, reinstall the air gap cap, and run a short cycle. Follow up by running hot water in the sink to dissolve any leftover oil.
Prevent Future Clogs With Routine Maintenance
Avoid repeat issues with simple habits that keep your air gap clear.
Clean Every Three to Six Months
Even if no symptoms appear, perform a quick inspection twice a year. Regular maintenance prevents errors, odors, and slow drainage.
Combine With Other Tasks
Pair air gap cleaning with dishwasher filter cleaning, garbage disposal flushing, and sink drain maintenance for comprehensive kitchen upkeep.
Scrape Dishes First
Do not rely on the dishwasher to handle large food scraps. Pre-rinsing reduces debris load and prevents clogs from forming.
Avoid Chemical Cleaners
Products like Drano can melt plastic tubing and void appliance warranties. Stick to mechanical cleaning only.
Avoid These Common Mistakes
Learn what not to do when maintaining your air gap to prevent causing additional problems.
Never Bypass or Remove the Air Gap
This is illegal in most areas and defeats its purpose of preventing contaminated water from siphoning back into your dishwasher. It violates plumbing codes and poses serious health risks.
Never Use Drain Cleaners
Chemical drain cleaners can melt plastic tubing and damage seals. They are unnecessary when simple manual cleaning works effectively.
Never Force Tools Too Deep
You risk breaking a bottle brush off inside the line, making the problem worse instead of better.
Never Misalign the Cap
An improperly seated cap will not seal correctly, leading to leaks during the draining cycle. Always reassemble carefully and test before closing up.
Frequently Asked Questions About Cleaning Dishwasher Air Gap
How Often Should I Clean My Dishwasher Air Gap?
Clean the air gap every three to six months as routine maintenance. Clean immediately if you notice drainage issues, leaks, or foul odors.
Can I Remove the Air Gap Instead of Cleaning It?
No. Removing or bypassing the air gap is illegal in most jurisdictions and violates plumbing codes. The air gap prevents contaminated water from siphoning back into your dishwasher, protecting your health and your dishes.
Why Does Water Spray From the Top of the Air Gap?
Water spraying from the top vents during draining indicates a clog in the air gap or drain line. The water has nowhere else to go and forces its way out through the vent holes.
What Tools Do I Need to Clean the Air Gap?
No specialized tools are required. Basic household items such as tweezers, toothpicks, a bottle brush, paper towels, and hot water are sufficient for most cleaning jobs.
Will Cleaning the Air Gap Fix My LG OE Error Code?
Yes, in many cases. The LG OE error indicates a drainage problem, and a clogged air gap is a common cause. Cleaning the air gap often resolves this error without needing professional service.
Key Takeaways for Maintaining Your Dishwasher Air Gap
The dishwasher air gap is essential, not optional. It prevents backflow and keeps your water safe from contamination. Clogs are common but easy to fix with basic tools and five to ten minutes of effort. If you see water leaking from the top vents, that is your number one signal to clean the air gap now.
No parts are needed for this maintenance task. DIY cleaning resolves nearly every case of drainage issues. Maintain the air gap every three to six months to prevent errors, odors, and slow drainage. Regular cleaning keeps your dishwasher running efficiently and extends the life of the appliance.
Action step: Locate your air gap today. Pop the cap, pull out any gunk, and flush it clean. Your dishwasher and your dishes will run better immediately.