How to Clean Dishwasher Heating Element
A poorly drying dishwasher can be frustrating, especially when plastic containers come out damp while everything else looks spotless. One of the most common culprits is a dirty or obstructed dishwasher heating element. Located at the bottom of the tub, this component heats water and air during the drying cycle to evaporate moisture from your dishes.
This guide walks you through everything from identifying buildup types to safely removing stubborn melted plastic using a thermal technique. You’ll learn how to clean the heating element effectively without damaging the coil, avoid common mistakes, and set up a maintenance schedule that keeps your dishwasher performing at its best.
Locate the Heating Element and Prepare for Cleaning
Identify Bottom Coil Design
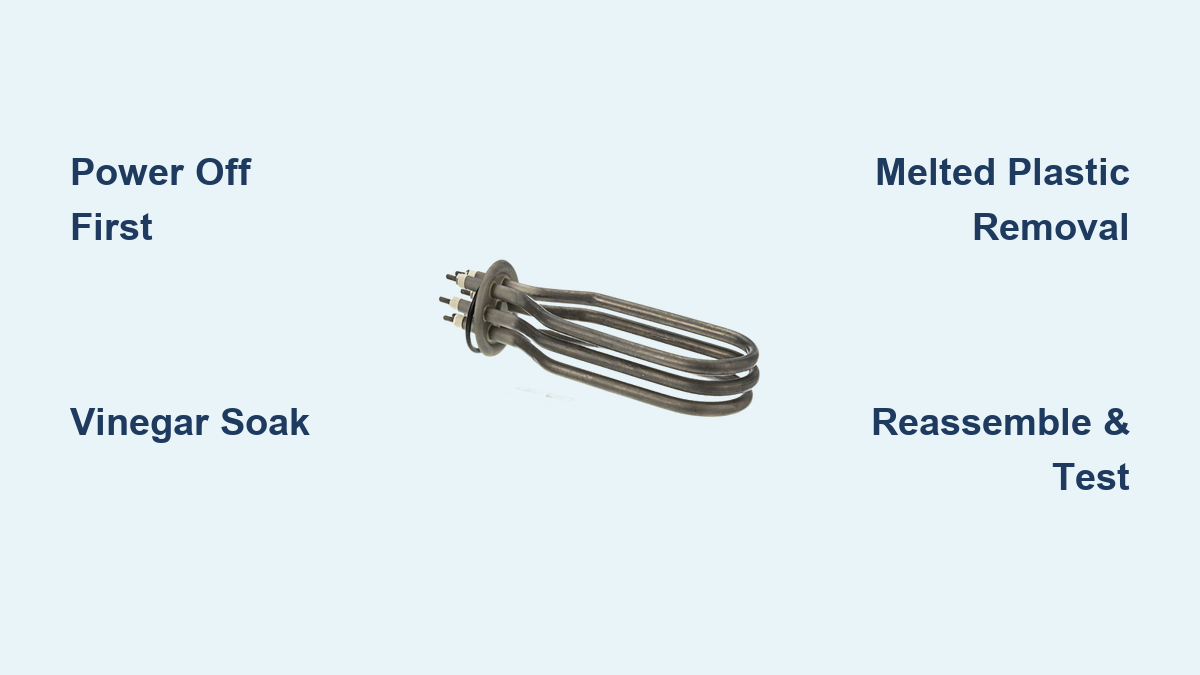
The heating element runs along the base of most dishwashers as a thick, coiled metal rod. It’s typically mounted horizontally across the tub floor and may appear shiny silver or slightly dull from use. Some models have a protective cover or ribbed housing partially shielding the coil.
Before cleaning, confirm your model has a visible heating element. Some modern dishwashers use condensation drying instead of active heat, meaning they don’t have a traditional heating coil. If you don’t see a coil and your dishes still dry slowly but evenly, your unit may not rely on active heating.
Inspect the coil for obvious blockages. Look for white crusty deposits indicating limescale, dark greasy film from food residue, or clumps of hardened material from melted plastic.
Safety First: Power Off the Unit
Never touch the heating element while the dishwasher is powered. Even unplugged appliances can retain electrical charge. To prevent shock, turn off the dishwasher at the circuit breaker, not just the control panel. Verify power is off by attempting to start a cycle. No lights or sounds should appear. Keep the unit disconnected throughout the entire cleaning process.
Remove Interior Components for Access
Take Out Racks and Filter
Clear the dishwasher completely. Remove both upper and lower racks, setting them aside to clean separately if needed. Next, locate and remove the filter assembly at the bottom rear of the tub. Most filters twist or lift out easily and trap food debris that could interfere with cleaning access.
Some models also have a sump cover or mesh screen protecting the drain area. Remove these parts per your user manual to expose the full base of the tub, including the heating element ends where buildup often accumulates.
Wash removed components in warm, soapy water. A clean filter ensures better water flow after reassembly and prevents future contamination.
Clear Standing Debris
Use a soft cloth or sponge to wipe away any standing water, loose food particles, or visible gunk from the tub floor. Pay attention to corners near the element’s anchor points. These areas collect debris and can harbor mold or odors.
Avoid using sharp tools to scrape the tub surface. Scratches can promote bacterial growth and reduce the dishwasher’s lifespan.
Clean Mineral Buildup with Vinegar
Apply Vinegar to Limescale Deposits
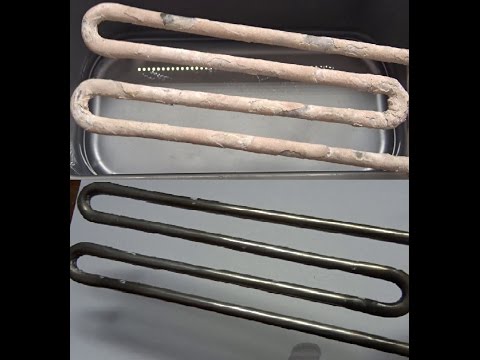
Hard water leaves behind calcium and magnesium deposits, visible as chalky white residue on the heating coil. These deposits insulate the element, reducing heat output and increasing energy use.
To dissolve limescale, soak a microfiber cloth or sponge in distilled white vinegar. Wrap the cloth around the affected section of the coil. Let it sit for 30 to 60 minutes to break down mineral layers.
For extra-stubborn buildup, repeat the soak after brushing lightly. Do not pour vinegar directly onto the element unless wiping. It can seep into electrical connections if pooled.
Scrub Gently with Soft Brush
After soaking, use a soft-bristled nylon brush or old toothbrush to gently dislodge loosened deposits. Work slowly along the coil, applying minimal pressure.
Avoid steel wool, abrasive pads, or metal scrapers. These scratch the element’s protective sheathing, exposing internal wires and creating fire hazards.
Wipe dry with a clean cloth once finished. Any remaining dampness will evaporate during the post-cleaning rinse cycle.
Use Baking Soda Paste for Grease
Grease and organic film appear as dark, sticky residue. This often comes from oily dishes or detergent issues. For these, mix baking soda and water into a thick paste.
Apply a small amount to the coil and let sit for 15 minutes. Then gently scrub with the same soft brush. Baking soda lifts grime without abrasion and neutralizes odors.
Rinse the area with a damp cloth afterward. Do not rinse with running water inside the dishwasher. Moisture near wiring is dangerous.
Remove Melted Plastic Safely
Why Regular Cleaners Fail
Melted plastic from containers left too close to the heating element cannot be dissolved with vinegar, baking soda, or chemical solvents. Acetone, nail polish remover, or degreasers may damage insulation or wiring and should never be used.
The only safe, effective method is controlled thermal softening. This melts the plastic just enough to lift it off without harming the coil.
Heat Plastic in Short Bursts
Wear heat-resistant gloves and safety goggles before starting.
Use a butane lighter or small torch to apply flame 1 to 2 inches away from the plastic-coated section. Heat in 3 to 5 second bursts, moving the flame back and forth. Watch for the plastic to darken and soften, but stop before it smokes or burns.
Overheating weakens the metal coil and risks warping or breaking it. Never hold the flame steady on one spot.
Scrape While Warm, Not Hot
Immediately after heating, use a metal or high-temp plastic scraper to gently lift softened plastic from the coil. Start at one end and work in small sections.
If the plastic hardens before removal, reapply heat in another short burst. Repeat the heat-and-scrape cycle 2 to 3 times per section until clean.
Do not force the scraper. Excessive pressure can cut through the element’s outer casing. If resistance increases, stop and reheat.
Inspect for Residue and Damage
Once all visible plastic is gone, inspect the coil closely. Run a finger gently or use a soft cloth over the surface to ensure smoothness.
Look for remaining sticky residue, scratches or nicks in the sheathing, and discoloration, warping, or exposed wire. If the element shows signs of damage, replacement is safer than continued use.
Reassemble and Flush the System

Replace All Interior Parts
Reinstall the filter, sump cover if applicable, and racks in their proper positions. Ensure the filter clicks or twists securely into place. Misalignment causes leaks and poor drainage.
Double-check that no tools or cloths were left inside the tub.
Run Empty Hot Water Cycle
With everything reassembled, restore power at the circuit breaker.
Run a full cycle on the hottest setting with no dishes or detergent. This flushes out any loosened debris and eliminates lingering odors.
For added freshness, place 1 cup of white vinegar in a dishwasher-safe bowl on the top rack. Or use a commercial dishwasher cleaner tablet. Avoid using bleach. It can corrode metal components and damage rubber seals.
Test Drying Performance
Check for Improved Results
After the cleaning cycle, open the door and assess the following. Are dishes significantly drier, especially plastics? Is there any smoke, burning smell, or unusual noise during operation? Does the interior feel warm at the end of the cycle?
Improved drying confirms the heating element is functioning properly.
If performance doesn’t improve, verify the heating element is receiving power. Test for continuity with a multimeter. A healthy coil reads between 10 and 30 ohms, depending on model. Check the thermistor or control board for faults if no heat is detected. Persistent issues may require professional diagnosis or part replacement.
Prevent Future Buildup
Prevention beats repair. To minimize future contamination, scrape food off dishes before loading. Don’t rely on the dishwasher to handle large debris. Use rinse aid to improve drying and reduce water spotting. Clean the filter weekly to prevent clogs and overflow onto the heating element. Inspect the bottom rack placement. Keep plastic items upright and away from direct contact with the coil.
Maintenance Schedule for Longevity
Weekly: Run Cleaning Cycle
Once a week, run an empty hot cycle with 1 cup vinegar in a top-rack bowl, or use a commercial dishwasher cleaner. This keeps internal surfaces, spray arms, and hidden areas free of biofilm and mineral buildup.
Monthly: Inspect Filter and Spray Arms
Remove and rinse the filter under running water. Check the spray arm holes for clogs. Use a toothpick or pipe cleaner to clear them. Blocked arms reduce water pressure and increase residue accumulation near the heating element.
Every 3-6 Months: Deep-Clean Heating Element
Even without visible issues, inspect the coil every few months. Wipe it down with a vinegar-dampened cloth and soft brush. In hard water areas, do this more frequently, every 2 to 3 months.
Annually: Full System Check
Consider a full descaling treatment annually if you have hard water. Some manufacturers recommend professional servicing or internal inspection every 12 months to check electrical connections and overall system health.
Frequently Asked Questions About Cleaning Dishwasher Heating Element
Can I use vinegar to clean the heating element directly?
Yes, you can use distilled white vinegar to clean mineral deposits on the heating element. Soak a cloth in vinegar and wrap it around the coil for 30 to 60 minutes, then gently scrub with a soft brush. Avoid pouring vinegar directly onto the element, as it can seep into electrical connections.
How do I remove melted plastic from the heating element?
Melted plastic requires controlled thermal softening. Use a butane lighter to heat the plastic in 3 to 5 second bursts, keeping the flame 1 to 2 inches away. Immediately scrape softened plastic with a metal or high-temp plastic scraper. Repeat the heat-and-scrape cycle 2 to 3 times per section until clean.
How often should I clean my dishwasher heating element?
Inspect and clean the heating element every 3 to 6 months. In households with hard water or frequent dishwasher use, do this every 2 to 3 months. Weekly empty cleaning cycles with vinegar help maintain overall hygiene and prevent buildup.
What happens if I don’t clean the heating element?
A dirty heating element insulates the coil, reducing heat transfer efficiency and increasing energy use. It can cause poor drying performance, unusual odors, and smoke or burning smells during operation. In severe cases, neglected buildup can lead to premature element failure.
Can I use steel wool to scrub the heating element?
No, never use steel wool, wire brushes, or abrasive pads on the heating element. These tools scratch or damage the protective sheathing, exposing internal wires and creating fire hazards. Always use soft-bristled nylon brushes or gentle cloths.
Why is my dishwasher still not drying dishes after cleaning the heating element?
If performance doesn’t improve after cleaning, check the heating element for power using a multimeter. A healthy coil reads between 10 and 30 ohms. Faulty thermistors or control boards may also prevent proper heating. Professional diagnosis may be needed for persistent issues.
Key Takeaways for Cleaning Your Dishwasher Heating Element
The heating element is essential for proper drying performance and should be inspected and cleaned regularly. Mineral deposits from hard water can be safely removed with vinegar soaks and gentle scrubbing using soft-bristled brushes. Melted plastic requires a controlled thermal softening method using a butane lighter and scraper. This is the only reliable way to remove it without damaging the coil.
Always power off the unit at the circuit breaker before any manual cleaning. Never use abrasive tools, steel wool, or harsh chemical solvents on the heating element. After cleaning, run an empty hot water cycle to flush out debris and eliminate odors.
Regular maintenance prevents costly repairs and extends the life of your dishwasher. By following these steps and performing periodic inspections every 3 to 6 months, you’ll keep your heating element functioning properly and your dishes coming out dry and spotless.