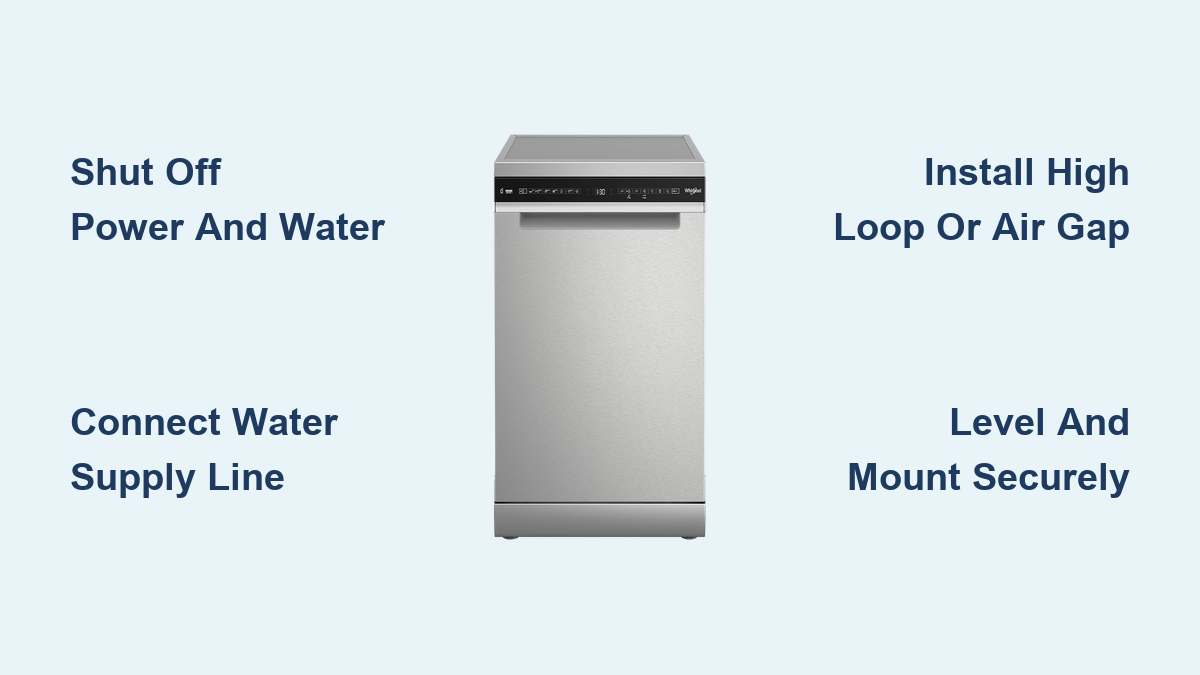
How to Install a Whirlpool Dishwasher
Is your old dishwasher on the fritz? Replacing it with a new Whirlpool dishwasher is a smart upgrade known for reliability, quiet operation, and advanced cleaning technology. But before you start loading dishes, you need to get it installed correctly. A faulty installation can lead to leaks, electrical hazards, or poor performance. The good news is that with the right tools and guidance, you can install your Whirlpool dishwasher yourself even if you are a DIY beginner.
This guide walks you through every step from shutting off utilities and removing your old unit, to making secure electrical and plumbing connections, leveling the new dishwasher, and running a successful test cycle. We will cover both plug-in and hardwired models, ensure code compliance, and help you avoid common mistakes.
Shut Off Power and Water Before Installing
Before touching any wires or pipes, safety comes first. One mistake with electricity or water can lead to shock, fire, or flooding. Never skip this section, no matter how experienced you are.
Cut Electrical Supply at the Breaker
Go to your home’s circuit breaker panel and turn off the 15-amp dedicated circuit that powers the dishwasher. Most Whirlpool models require 120V AC, 60 Hz, copper wiring only, so aluminum or galvanized wire is not permitted. If your old unit was hardwired, use a voltage tester or multimeter to confirm no power is reaching the wires under the sink. Never assume the breaker is labeled correctly.
Close the Water Valve Under Your Sink
Locate the 3/8-inch shutoff valve under your sink, usually near the hot water line. Turn it clockwise until fully closed. Place a bucket beneath the water supply connection to catch any leftover water in the line. Open the old dishwasher door and run a quick rinse cycle to drain residual water from the pump.
Remove Your Old Dishwasher Safely
Now that utilities are off, it is time to remove the old unit without damaging cabinets or plumbing. This step sets the stage for a smooth new installation.
Disconnect Power and Label Wires
If your dishwasher is plug-in, unplug the 3-prong cord from the outlet often hidden behind a panel under the sink. If it is hardwired, disconnect the wires at the junction box and take photos to label each wire (black for hot, white for neutral, green for ground) before disconnecting. This prevents confusion during reconnection.
Detach Water and Drain Lines
Use an adjustable wrench to loosen the water supply nut at the inlet valve. Let any remaining water drain into your bucket. For the drain hose, loosen the clamp connecting it to either the garbage disposer, P-trap, or air gap. Slide the hose off and drain completely. Wrap electrical connectors in plastic and cap water lines to keep debris out while you work.
Unmount and Pull Out the Unit
Open the dishwasher door and locate the two mounting screws at the top front that secure the unit to the underside of the countertop. Remove the screws with a Phillips screwdriver or nut driver. Then use pliers or an Allen key to lower the leveling legs. Gently pull the dishwasher forward, guiding all cords and hoses through the cabinet. Have a helper assist to avoid back strain and pinched hoses.
Unbox and Prepare Your New Whirlpool Dishwasher
With the old unit out, it is time to set up your new Whirlpool dishwasher. Proper preparation ensures a trouble-free installation.
Unpack With Care
Cut open the box from the bottom and remove all packaging. Peel off protective films and tapes. Check the contents against the list:
- Dishwasher unit
- Insulation blanket
- Drain hose with red and green clamps
- Mounting brackets and screws
- Kick plate
- Handle (if separate)
- Installation manual
Install the Handle on Compatible Models
Some Whirlpool models like the WDT750SAKZ ship with the handle as a separate tube. Align the top into the upper door channel, insert the bottom, and secure with set screws using the included rubber-tipped Allen key. Tighten gently because over-tightening can strip plastic threads. Peel back the protective film before final tightening.
Connect Electrical System for Your Dishwasher
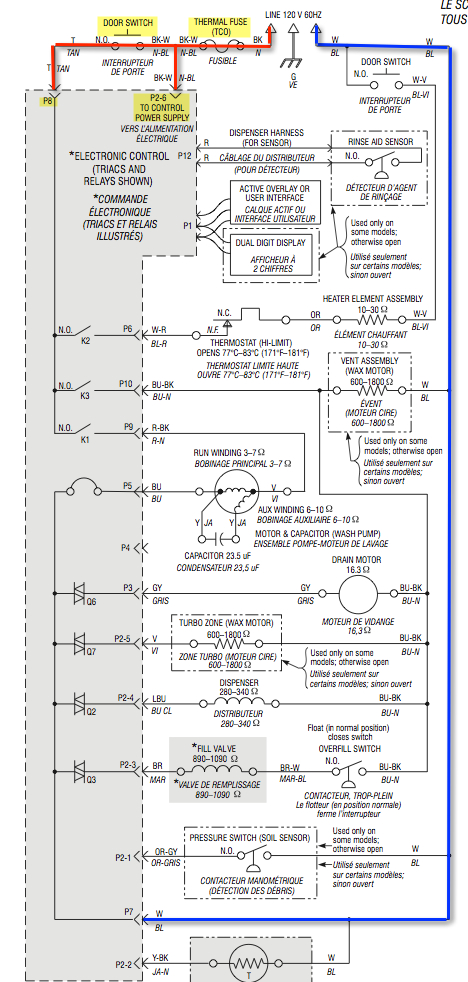
Whirlpool supports two electrical setups: plug-in and hardwired. Choose based on your cabinet setup and local code requirements.
Hardwire the Dishwasher
Remove the lower access panel using a quarter-inch hex driver or T20 Torx bit. Install a UL-listed metallic strain relief on the right-side entry hole with screws facing left. Feed 14/2 Romex cable with ground through the strain relief. Inside the terminal box, connect the green ground wire to the grounding screw with an upside-down crown washer. Connect the white neutral and black hot wires using wire nuts. Tighten the strain relief and reattach the panel. Leave wires slack and never let them touch the motor or tub.
Install a Plug-In Cord Instead
If using a plug, follow the same terminal connections but route the cord out the back of the unit. Use a UL-listed 3-prong NEMA 5-15P cord. Keep it unplugged until after leak testing. The plug-in option is easier for future removal, safer for servicing, and accepted by most inspectors.
Hook Up Water Supply Line

A reliable water connection ensures proper cleaning and prevents leaks at every cycle.
Use the Right Supply Line
Install the 72-inch braided stainless steel line included in new connection kits. Never reuse old hoses, especially if over 10 years old. The fittings include a 3/4-inch threaded end for the dishwasher inlet and a 3/8-inch compression with 90-degree elbow for the shutoff valve. No Teflon tape or pipe dope is required because the rubber gasket seals it.
Connect to the Dishwasher and Shutoff Valve
Attach the 90-degree brass elbow to the supply line with the rubber washer properly seated. Thread the elbow into the inlet valve on the dishwasher. Hand-tighten, then give a quarter to half turn with a wrench. Never over-tighten. Route the line to the stub-out under the sink and connect the compression end to the valve with a hand-tight plus quarter turn. Ensure no kinks or bends in the line.
Install Drain Hose Properly

Improper drain setup causes backups, odors, and code violations. Take this step seriously.
Connect to the Dishwasher
Slide the red (small) clamp onto the hose. Insert the small end into the rubber discharge port on the dishwasher. Push until it hits the black rubber section or clamp mark. Position the red clamp between the two molded stops and tighten.
Route to Sink or Disposer
Choose one connection point based on your setup. For a garbage disposer, find the knockout plug on the side inlet and use a screwdriver and hammer to drive it inward. Remove with needle-nose pliers and attach the hose with the green (large) clamp. For a P-trap connection, cut the hose end to 5/8 inch to fit standard drain and clamp securely. Never connect directly to a standpipe because you risk sewage backflow.
Create High Loop or Air Gap
Plumbing code requires one of two anti-siphon methods. Form a U-shaped high loop in the drain hose that reaches at least 20 inches above the floor and secure it to the underside of the countertop. If your drain connection is below 20 inches, install an air gap fitting on the countertop or sink deck. An air gap is mandatory in most areas if a high loop is not possible.
Slide In and Mount the Dishwasher
Now it is time to position the dishwasher in the cabinet for a secure fit.
Position With Proper Clearance
Slide the unit into the opening with 6 inches of front clearance. Guide the water line, drain hose, and power cord through the cutout. Ensure no hoses or wires are pinched between the cabinet and unit.
Choose the Right Mounting Type
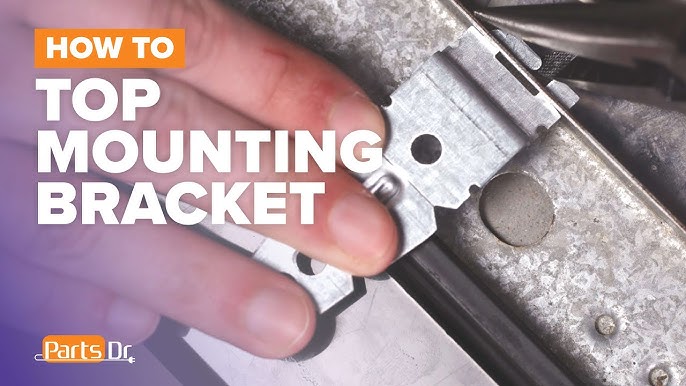
For standard top mounting, insert mounting brackets into top frame slots, bend metal tabs down to lock, and screw into the underside of the countertop. Do not overtighten particleboard. For narrow cabinets, break brackets at scored lines to fit the width, insert into side frame slots, and pre-drill pilot holes to avoid splitting MDF. For granite or stone countertops, use brackets as a template and drill through into the cabinet structure. For wood countertops, apply moisture-barrier tape to the front edge to prevent condensation damage.
Level and Adjust Height

An unlevel dishwasher vibrates, leaks, and does not close properly. Get this right before proceeding.
Adjust the Leveling Feet
Loosen the locking nut with a wrench. Turn the front feet manually to raise or lower. Rear feet adjust via screwdriver or pliers. Standard height is 33.5 inches, adjustable up to 35 inches. If your cabinet opening is under 34 inches, remove the rear legs and spacers.
Verify Level With a Tool
Place a bubble or digital level on the door frame or tub. Adjust until the unit is level side-to-side and front-to-back, using the floor as reference, not the countertop. Rock the unit gently. No wobble means it is stable. Ensure at least a quarter-inch gap between the closed door and the countertop. If the door rubs, lower the front legs slightly or use site mounting to shift the unit back.
Reinstall Panels and Finalize Setup
Secure all access points and prepare the dishwasher for testing.
Reattach Insulation and Kick Plate
Tuck the insulation blanket around the tub and secure at rear corners. Make sure it does not block the float switch or door spring. Slide the kick plate into the bottom track and use a flathead screwdriver to turn each side a quarter turn clockwise to lock.
Reinstall the Access Panel
Align the lower front panel with the floor. Secure with a 5/8-inch nut driver and turn quarter-turn fasteners clockwise to lock.
Restore Power and Run Test Cycle
The final step is to verify everything works safely before completing the job.
Turn On Utilities
Slowly open the water supply valve. Plug in the cord or restore the circuit breaker. Watch for drips at all connections.
Run the Installation Test Cycle
Most Whirlpool models have a leak check or diagnostic cycle. Hold “Heated Dry” and “Normal” buttons for three to five seconds on compatible models. Let it run without dishes or detergent. Monitor key functions including water filling to float switch level (not overflowing), no leaks under the unit, spray arms rotating freely, and the pump draining completely. Keep the access panel off during the first run to inspect for leaks visually.
Final Checks and User Prep
Once the test cycle passes, complete the job with these final steps.
Inspect for Leaks
Use a flashlight and paper towels to check the water inlet, drain hose connections, under the tub, and the door gasket. Even slow seepage must be fixed immediately.
Test Door Operation
Open and close the door three to four times. Ensure smooth, quiet movement with no scraping or binding and that the latch engages fully.
Prep for First Use
Run an empty cleaning cycle with dishwasher cleaner or one cup of white vinegar in a bowl on the top rack. This removes manufacturing oils and residues. Register your appliance at whirlpool.com for full warranty coverage.
Maintenance for Long Life
Keep your Whirlpool dishwasher running like new with regular care.
Routine Care Schedule
Clean the filter weekly by removing and rinsing it under tap water. Wipe the door gasket monthly with a damp cloth. Inspect spray arms monthly for clogs. Run a cleaning cycle with vinegar or cleaner every three months. Inspect the water inlet hose annually for wear and verify electrical connections are tight.
Frequently Asked Questions About Installing a Whirlpool Dishwasher
Do I need a professional to install a Whirlpool dishwasher?
No, most homeowners can install a Whirlpool dishwasher themselves if they have basic DIY skills. The process involves shutting off utilities, making electrical and plumbing connections, and leveling the unit. However, if your home has older wiring or you are uncomfortable with any step, hire a professional.
What tools do I need to install a Whirlpool dishwasher?
You will need a 5/8-inch nut driver, quarter-inch hex driver or T20 Torx bit, Phillips screwdriver, adjustable wrench, needle-nose pliers, hammer, flathead screwdriver, level, measuring tape, and wire nuts. A second person is recommended because the unit weighs 60 to 80 pounds.
Can I reuse my old dishwasher power cord?
Yes, you can reuse your old power cord if it is in good condition and UL-listed. Some Whirlpool models like the WDF520PADM do not include a power cord in the box, so reusing the old one or purchasing a UL-listed replacement is necessary.
Why does my dishwasher drain hose need a high loop?
A high loop prevents wastewater from siphoning back into the dishwasher. Plumbing code requires the drain hose to rise at least 20 inches above the floor. If your connection point is lower than that, you must install an air gap fitting on the countertop.
How long does it take to install a Whirlpool dishwasher?
The installation typically takes two to four hours for first-time installers. Experienced DIYers may complete it in under two hours. Budget extra time if you encounter any complications with old plumbing or electrical connections.
Key Takeaways for Installing Your Whirlpool Dishwasher
Installing a Whirlpool dishwasher is a manageable DIY project when you follow safety rules and code requirements. Remember to always shut off power and water before starting, use the proper connections for electrical and plumbing, and create a high loop or install an air gap for the drain hose. Level the unit carefully to prevent vibration and leaks, and run a test cycle without dishes before regular use. Whether you are upgrading a broken unit or remodeling your kitchen, a proper installation ensures quiet, efficient, and leak-free performance for years. Now that it is done, all that is left is loading it up and hitting Start.