How to Use KitchenAid Dishwasher: Quick Guide
Your KitchenAid dishwasher is one of the most versatile appliances in your kitchen, but getting spotless results every time requires more than just pressing start. From loading the racks correctly to choosing the right cycle and maintaining the machine, there are proven techniques that separate mediocre results from professional-level cleaning. Whether you are a new owner or want to maximize your current model’s performance, mastering these skills will save you time, water, and energy while delivering perfectly clean and dry dishes.
This guide walks you through every essential step, from proper rack loading and detergent use to cycle selection, maintenance, and troubleshooting. By the end, you will know exactly how to use your KitchenAid dishwasher like a seasoned pro.
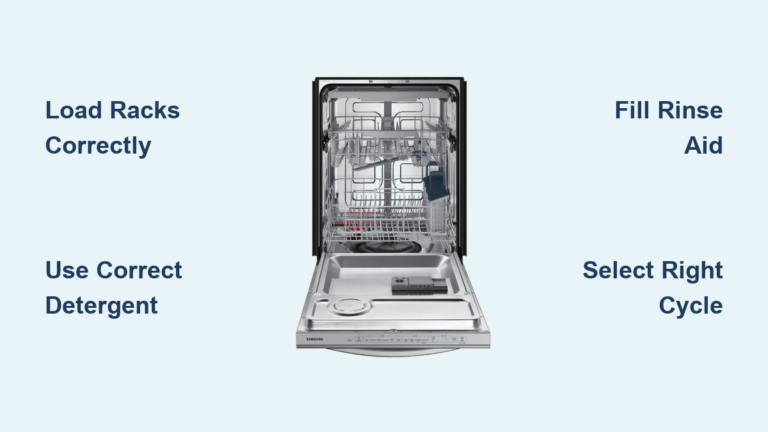
Load Your KitchenAid Dishwasher the Right Way
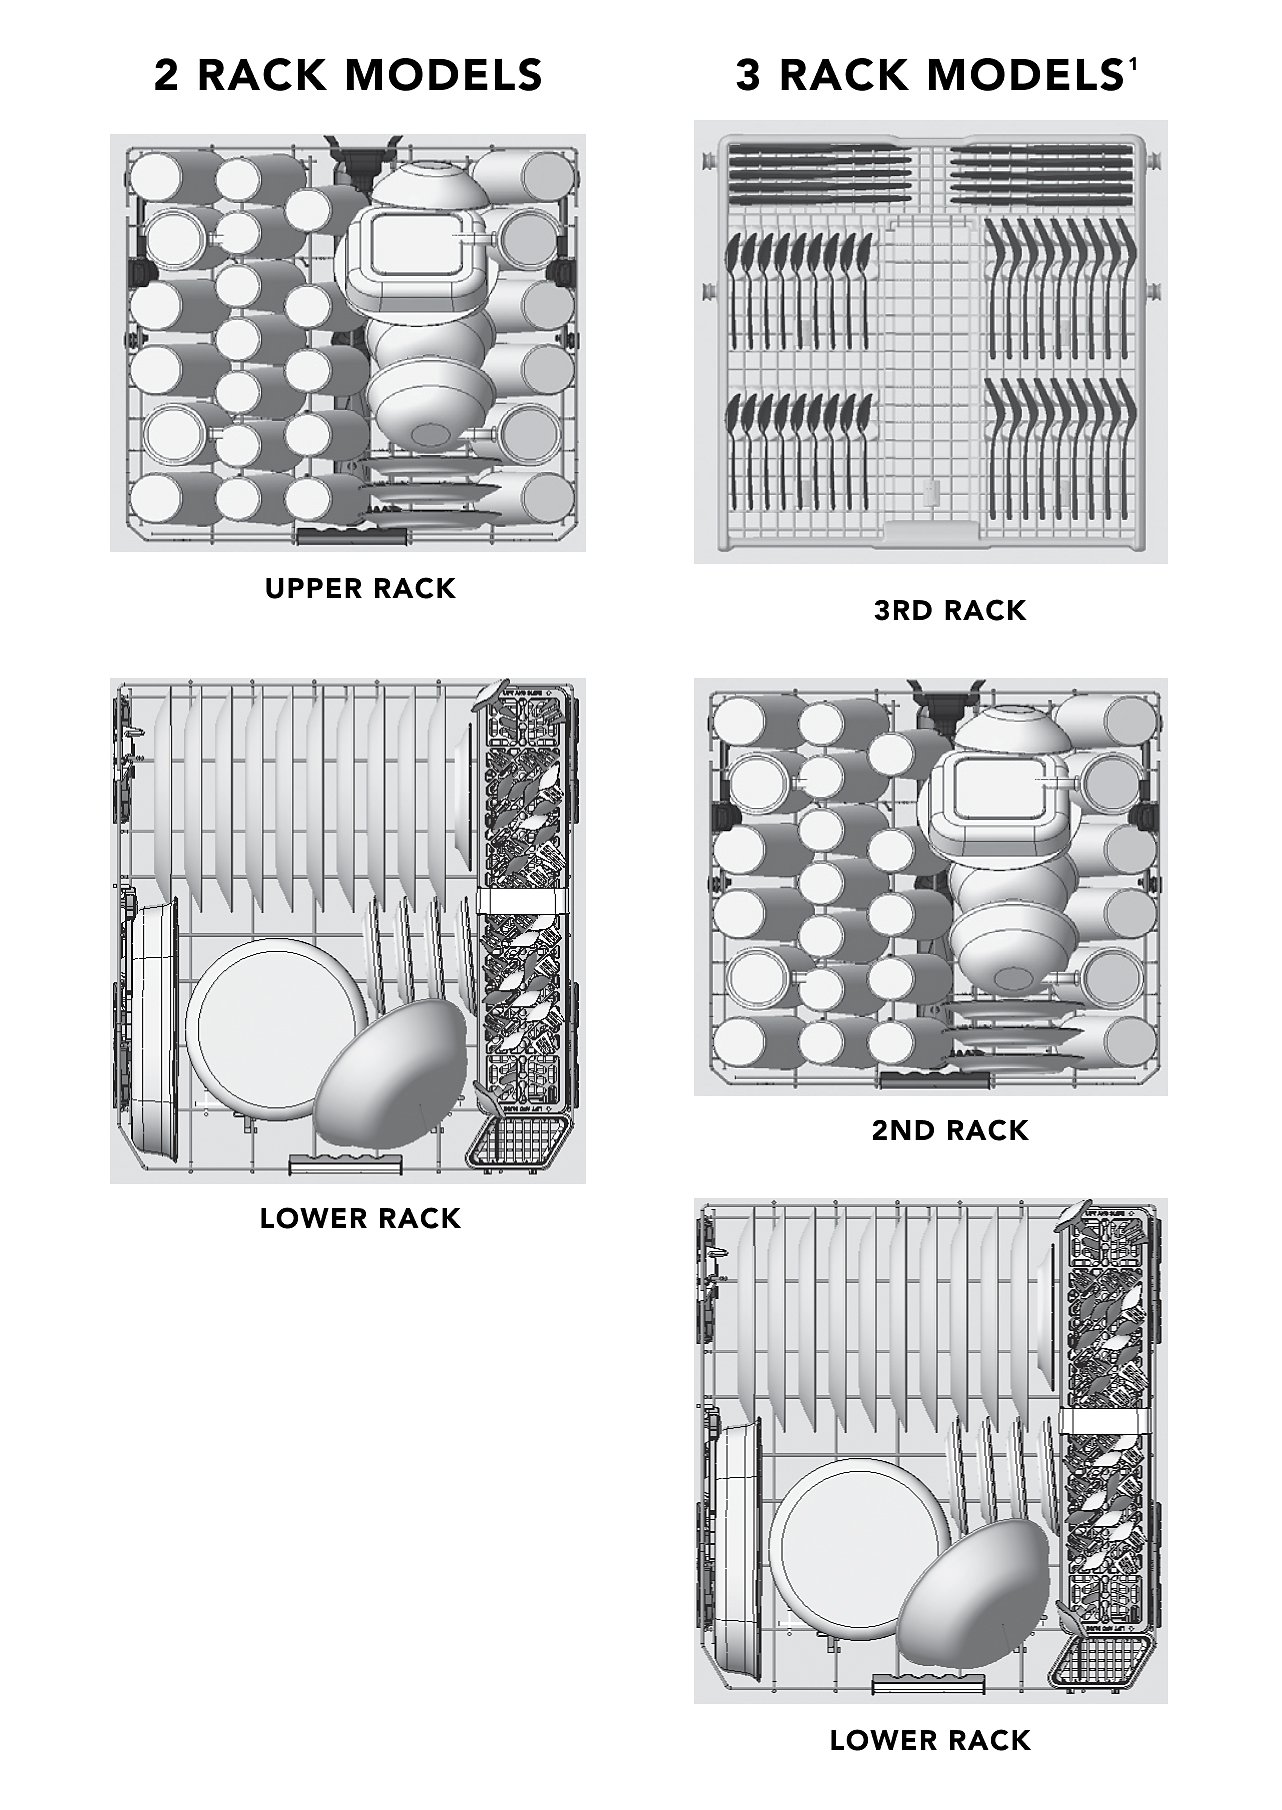
Proper loading is the foundation of effective cleaning. KitchenAid dishwashers feature intelligent rack designs, but they only work when dishes are positioned to allow water and detergent to reach all surfaces.
Upper Rack Guidelines
Place glasses, mugs, and stemware on the upper rack, facing downward at an angle to allow water drainage. Use wine-stem holders to secure delicate glasses and prevent chipping during the wash cycle. This rack also accommodates small bowls, baby bottles, and espresso cups.
The cutlery holder at the front can be removed to create space for long utensils or ladles. If your model has an adjustable upper rack, use the red tabs on the side rails to raise it for tall items or lower it for better stability with stemmed glasses.
Lower Rack Guidelines
The lower rack holds heavy-duty items such as dinner plates, bowls, pots, pans, and baking sheets. Place plates between the tines, facing the center. For oval dishes, use the thicker back supports to keep them upright. Large bowls should be tilted forward in the back corner so water can reach inside.
Never place pots or pans flat, as they will pool water. Angle them downward for full spray coverage.
Third Rack Usage
Select high-end models feature a third rack above the upper rack, perfect for utensils, small tools, and hard-to-place items. This rack includes targeted jets that blast water directly into the compartment for thorough cleaning. Use the propping points to angle cups or small bowls for optimal water exposure.
Use the Correct Detergent and Rinse Aid
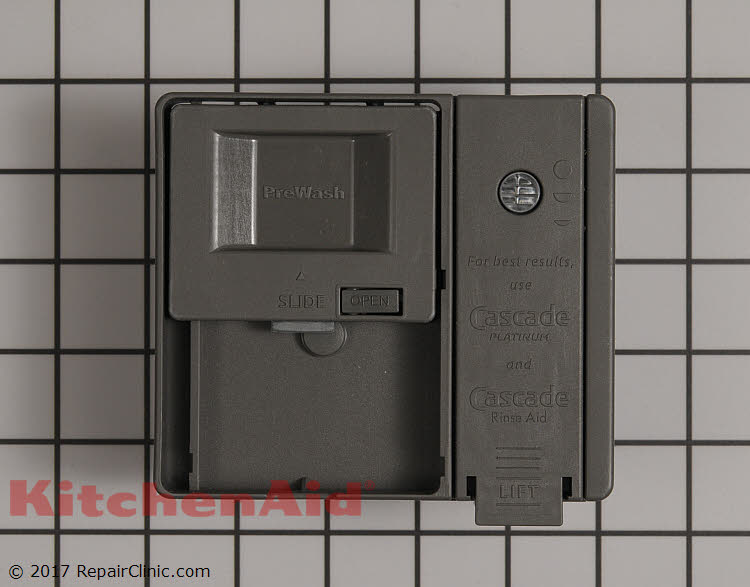
Using the right cleaning agents and loading them properly makes a significant difference in wash performance.
Detergent Loading
Use one pod, tablet, or measured dose of powder or gel in the main detergent compartment. It opens automatically during the main wash. Never overfill, as excess detergent will not dissolve and can leave a filmy residue on dishes.
If using pre-wash detergent, add 8 cc of liquid or powder to the small upper compartment. Never place tablets or pods in this section, as they will dissolve too early and reduce cleaning power.
Only use dishwasher-specific detergents. Regular dish soap causes overflow and can damage your machine. Store detergent in a cool, dry place to prevent clumping or premature activation.
Rinse Aid Essentials
Rinse aid is essential for dry, spot-free dishes. The blue-cap dispenser holds approximately 5 oz (150-175 mL). Refill when the float drops to the add line, which is typically every four to six weeks.
To refill, turn the cap counterclockwise, pour rinse aid until full, wipe away spills to prevent foaming, and replace the cap securely. Using colored rinse aid makes it easier to monitor levels through the transparent window.
Choose the Right Wash Cycle for Your Load
KitchenAid offers multiple cycles designed for different soil levels and time constraints.
Pro Wash for Heavy Loads
Use Pro Wash for baked-on food, greasy pans, or full-family loads. This cycle uses soil sensors to adjust cleaning intensity and runs for 120 to 180 minutes. It is ideal for pots, casserole dishes, and post-dinner cleanup.
Normal Wash for Daily Use
The standard cycle for mixed loads balances cleaning power and time, lasting 60 to 90 minutes. This is perfect for everyday plates, glasses, and utensils.
Express Wash for Speed
Express Wash (60 minutes or less) uses high water temperature for lightly soiled loads. It is great for mid-day refreshes or quick prep when you need clean dishes fast.
Light Wash for Delicates
Use Light Wash or Glass Care for fine china, stemware, or baby bottles. Gentle water pressure prevents damage while ensuring cleanliness.
Select Key Cycle Options for Better Results
Customizing your cycle with the right options improves cleaning, drying, and sanitization.
High Temp Wash
This option boosts water temperature during the main wash, breaking down grease faster and improving detergent activation. It is recommended for oily or sticky residues.
Sanitize Rinse
Sani Rinse heats rinse water to 150°F (65.5°C), killing 99.999% of bacteria. This option is ideal for baby bottles, cutting boards, pet dishes, and items requiring hygienic cleaning.
Heated Dry
Heated Dry activates a heating element to evaporate moisture, resulting in dry ceramic, glass, and metal. Plastic items may still be damp due to low heat retention. If Heated Dry is off, open the door immediately after the cycle ends to release steam and speed air drying.
Delay Start
Schedule your dishwasher to start later, up to 24 hours in advance. This is useful for running during off-peak electricity hours, avoiding noise at night, or having clean dishes ready when you need them.
To set Delay Start, choose your cycle, press Delay until the desired time appears, then press Start and close the door.
Start and Cancel a Wash Cycle
Knowing how to properly start and stop your dishwasher prevents operational issues.
Starting the Dishwasher
Load racks properly, add detergent, and ensure rinse aid is filled. Press Power if required, then select your cycle and desired options. Press Start and close the door within seconds. The cycle begins immediately unless Delay Start is active.
Canceling a Cycle
Press Cancel or Cancel/Drain to stop the cycle. The dishwasher will stop, drain water, and unlock the door. Use this to adjust loading or switch cycles. Avoid opening the door mid-cycle, as steam loss reduces drying efficiency.
Optimize Water Temperature for Cleaning Power
Water temperature significantly impacts cleaning and drying performance.
Ideal Temperature Range
KitchenAid dishwashers work best with hot water from the start. The minimum temperature should be 120°F (49°C), with the ideal range being 120 to 140°F (49 to 60°C). Cold water reduces cleaning power and prevents detergent from dissolving properly.
Pre-Run Hot Water
Before starting the dishwasher, run the kitchen sink’s hot water until it is hot, typically 30 to 60 seconds. This ensures hot water enters the dishwasher immediately, cutting cycle time and boosting performance. Hotter dishes also dry faster and reduce spotting.
Maintain Your Dishwasher Monthly
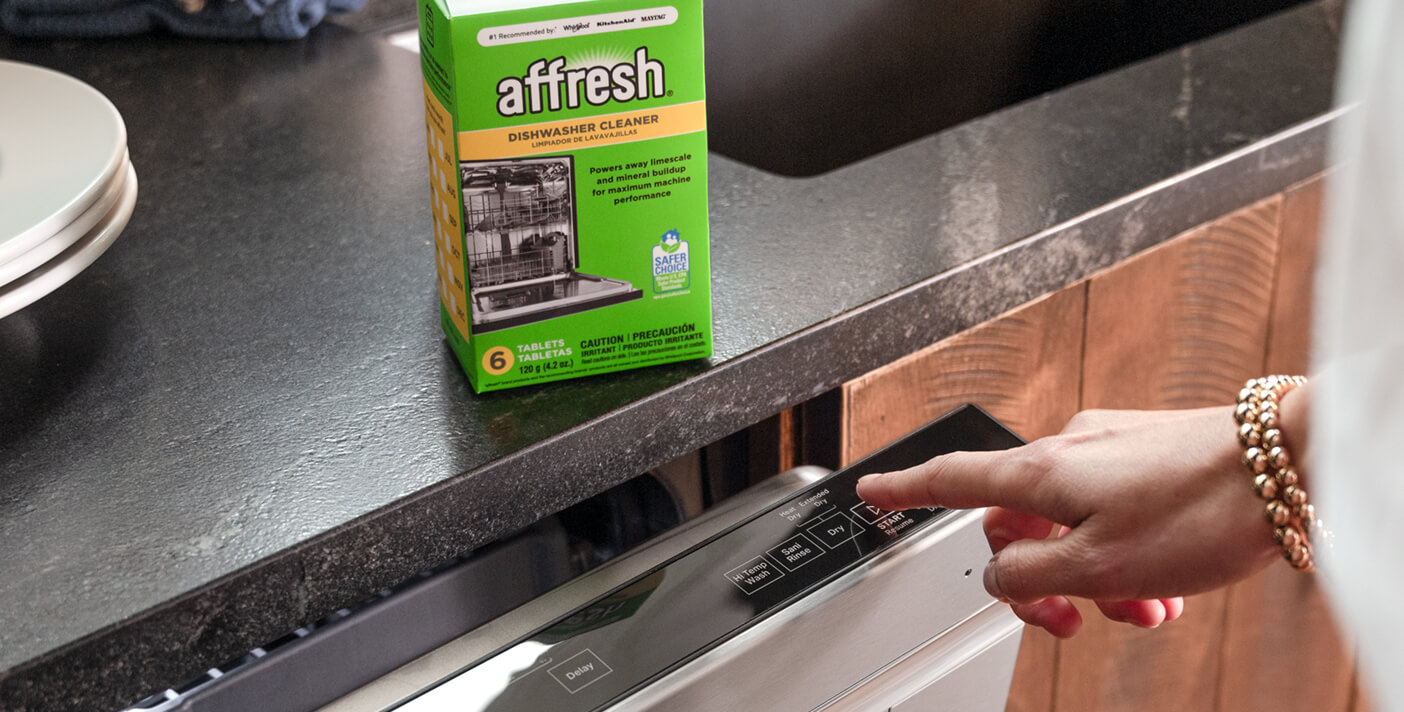
Regular maintenance prevents odors, clogs, and poor performance.
Monthly Cleaning with affresh
Run an empty cycle with one affresh tablet at the bottom of the tub. Remove racks and dishes, place the tablet in the tub, run a Normal or Heavy cycle with no detergent, and wipe the gasket after completion. This removes buildup in pumps, hoses, and valves while eliminating musty smells.
Filter Care
Most models have self-cleaning filters, but inspect them monthly. Remove large debris and rinse under running water if dirty. Do not disassemble unless instructed. A clogged filter causes standing water and poor cleaning.
Spray Arm Maintenance
Before starting each cycle, spin each spray arm by hand. They should rotate freely. If they do not, check for large utensils, bowls, or food debris blocking their path. Clean spray arms monthly by removing large chunks, unscrewing or lifting arms if removable, rinsing under running water to clear clogged holes, and reinstalling securely.
Door Gasket Cleaning
Use a damp cloth to clean the rubber door seal monthly. This prevents mold, mildew, and leaks.
Maximize Drying Results
Even the best wash means nothing if dishes emerge wet.
Use Heated Dry
Turn on Heated Dry for the best results. Ceramic and metal dry completely. Plastics may still have moisture due to low heat retention.
Open Door After Cycle
If Heated Dry is off, crack the door open as soon as the cycle ends. This lets steam escape and promotes air drying. Place a towel near the opening to absorb excess humidity.
Load Plastics Strategically
Place plastic containers on the bottom rack, closer to the heating element. Avoid overcrowding to allow proper airflow.
Avoid These Common Mistakes
Blocking Spray Arms
Never let large pots, pans, or bowls block the lower or upper spray arms. This creates dead zones where dishes stay dirty.
Overloading Racks
Crowding reduces water circulation. Leave space between items for detergent and water to reach all surfaces.
Using Wrong Detergent
Regular dish soap causes suds and overflow. Only use dishwasher-specific detergents in the correct compartment.
Ignoring Rinse Aid
Skipping rinse aid leads to water spots, film, and wet dishes, especially on glassware.
Troubleshoot Typical Problems
Dishes Not Clean
Check spray arms for blockages. Use Pro Wash for tough loads. Ensure detergent is fresh and the compartment is dry. Pre-run hot water at the sink.
Water Not Draining
Clean the filter. Check the drain hose and garbage disposal if connected.
Film on Glassware
Use rinse aid. Switch to high-quality detergent tablets. Consider a water softener if you have hard water.
Detergent Not Dissolving
The compartment may be wet before loading. Water temperature may be too low. Pre-run hot water.
Unusual Noises
Loose dishes or spray arm obstruction may be the cause. Re-secure items and check for trapped utensils.
Frequently Asked Questions About Using a KitchenAid Dishwasher
What is the best way to load a KitchenAid dishwasher?
Load heavy items like pots and plates on the lower rack, and place glasses, mugs, and delicate items on the upper rack. Always angle dishes downward to allow water drainage, and never block the spray arms with large items.
How much detergent should I use in my KitchenAid dishwasher?
Use one pod, tablet, or measured dose of powder or gel in the main detergent compartment. Never overfill, as excess detergent will not dissolve properly and can leave residue on dishes.
Which KitchenAid dishwasher cycle is best for heavily soiled dishes?
Pro Wash is the best cycle for heavily soiled loads. It uses soil sensors to adjust cleaning intensity and is ideal for baked-on food, greasy pans, and full-family loads.
How often should I add rinse aid to my KitchenAid dishwasher?
Refill the rinse aid dispenser every four to six weeks under normal use. The dispenser holds approximately 5 oz (150-175 mL).
Why are my dishes still wet after the wash cycle finishes?
If Heated Dry is disabled, dishes may remain wet. Enable Heated Dry for best results, or open the door immediately after the cycle ends to allow steam to escape. Plastic items may retain moisture due to low heat retention.
Can I use regular dish soap in my KitchenAid dishwasher?
No. Only use dishwasher-specific detergents. Regular dish soap causes overflow, suds, and potential damage to your dishwasher.
Key Takeaways for Using Your KitchenAid Dishwasher

Mastering your KitchenAid dishwasher comes down to three core habits: loading smart, choosing the right cycle, and maintaining the machine regularly. Always load racks to allow water and detergent to reach all surfaces, avoiding spray arm obstruction. Select Pro Wash for heavy loads and Normal Wash for everyday cleaning, using options like High Temp Wash for grease and Sani Rinse for sanitization.
Maintain your dishwasher monthly by running affresh cleaner, cleaning the filter and spray arms, and wiping the door gasket. Skip pre-rinsing, use quality detergent tablets, and keep rinse aid filled for spot-free, dry results. With these practices, your KitchenAid dishwasher will deliver professional-quality cleaning for years to come.