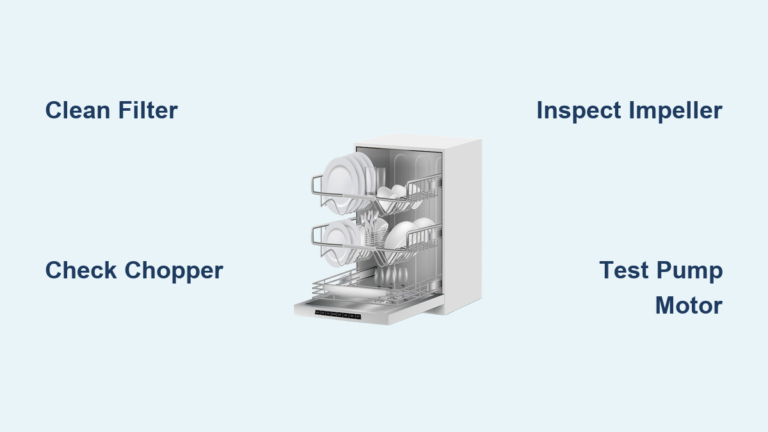
Dishwasher Heating Element Not Working: Quick Fix Tips
Your dishwasher runs a full cycle, but when you open the door, the dishes are cold, damp, and do not smell clean. The problem? Dishwasher heating element not working. Without proper heat, your machine cannot sanitize, dry, or clean effectively, leaving behind grease, bacteria, and water spots.
A faulty heating element is one of the most common reasons dishwashers fail to perform. But here is the good news: you can diagnose and fix this issue yourself in most cases. Whether it is a burned-out element, a failed thermostat, or a hidden sensor glitch, this guide walks you through every step to get your dishwasher heating again, no technician needed.
You will learn how to confirm if the heating element is truly dead, test key components with a multimeter, reset control lockouts that block heating, replace the element and related parts, and prevent future failures with simple maintenance. Let us start troubleshooting.
Run a Heat Performance Test
Before opening the dishwasher, verify that heat is not being generated. This initial test saves time by confirming whether the heating system is actually failing.
Check Drying and Wash Results
Start a normal cycle using Hi-Temp Wash or Sani-Rinse mode. At the end of the cycle, feel the dishes. Are they warm or room temperature? Are plastic items still wet? Is there steam inside the tub?
No heat combined with wet dishes equals heating system failure. Never touch the heating element immediately after a cycle because it can stay hot for minutes.
If the interior feels cool and no drying occurs, the heater is not working. Move to the next step to continue diagnosing.
Use Diagnostic Mode to Reset Control
Many modern dishwashers, especially KitchenAid, Whirlpool, and GE models, have built-in diagnostic test modes that reset safety lockouts. For KitchenAid and Whirlpool models, press Heat Dry, then Hi Temp, then Sani-Rinse three times within five seconds. All lights illuminate. Press Start to begin the self-test.
The system checks internal circuits and may restart the heater relay if it was disabled by a false reading, such as low inlet water temperature. This diagnostic procedure fixed one user’s heating issue without replacing any parts. Their dishwasher had locked out due to cold incoming water, which is common in winter.
Run the test and retest the cycle. If heat returns, the problem is solved. If not, continue diagnosing.
Inspect the Heating Element Visually
Power off the dishwasher at the circuit breaker before any inspection. This step prevents electrical shock during troubleshooting.
Remove Lower Rack and Expose Element
The heating element runs along the bottom of the tub. Clear the lower rack and look down to examine it.
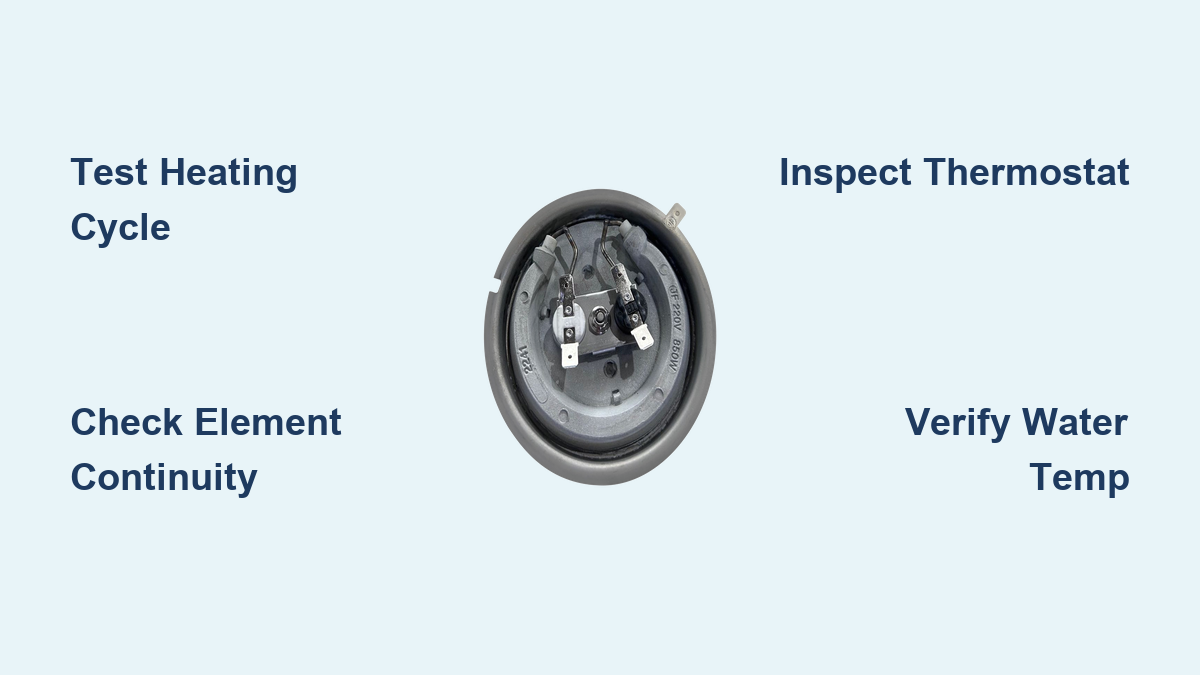
Check for visible damage including cracks or splits in the metal sheath, blistering, blackening, or corrosion, mineral crust from hard water, and sagging or bent sections. Any visible damage means the element is dead and must be replaced.
You cannot repair a heating element. It is a sealed unit, so you must replace it entirely. If the element looks intact, proceed to electrical testing.
Test the Element with a Multimeter
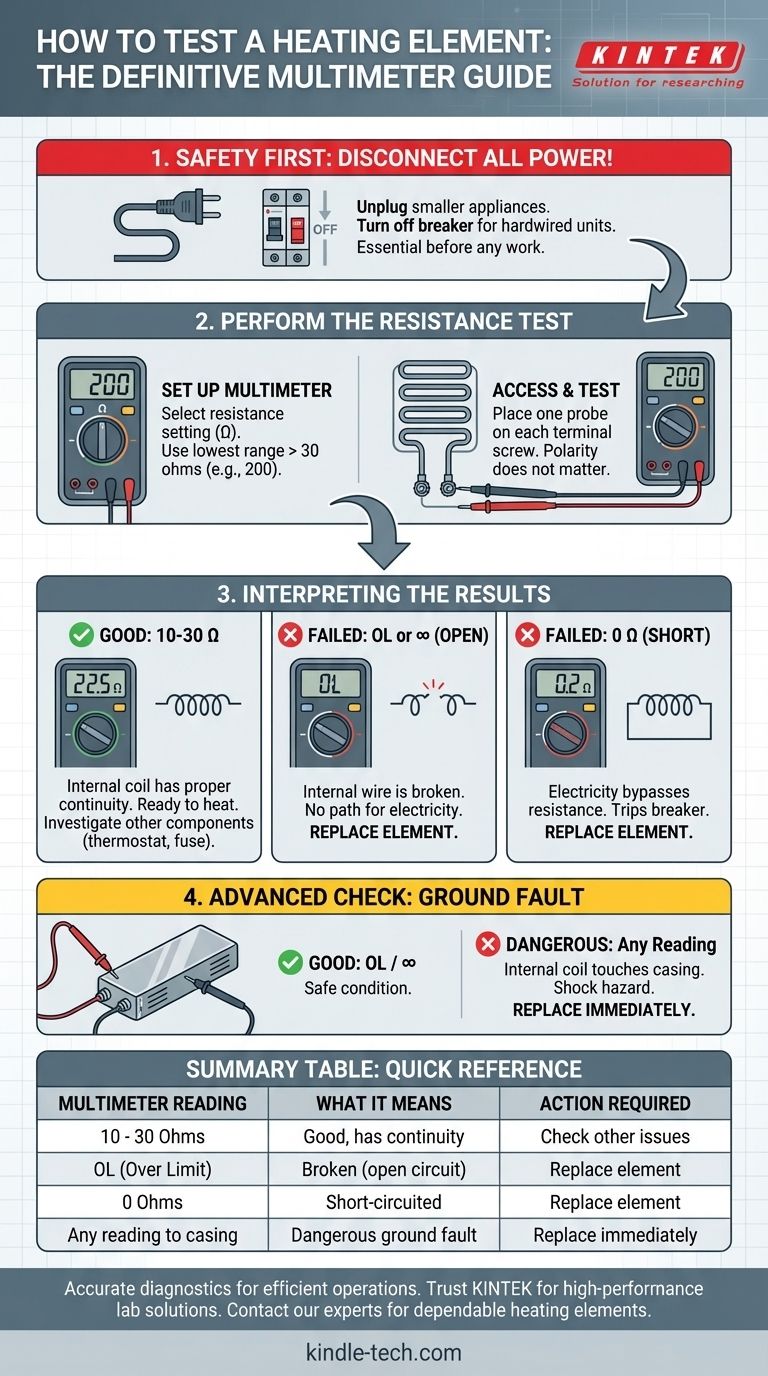
Even if the element looks fine, it may have an internal break. A multimeter test confirms whether the element is electrically functional.
Disconnect Power and Wires
Turn off power at the breaker. Pull the dishwasher out slightly if it is under a cabinet. Open the toe kick panel and disconnect wires from the element terminals. Label or photograph wire positions before disconnecting.
Measure Resistance
Set your digital multimeter to ohms. Place one probe on each terminal of the heating element.
A reading between 10 and 50 ohms is normal and varies by model. A reading of 0 ohms indicates a short circuit. A reading of OL (infinite) means the element is dead and must be replaced.
For example, a 2400W element on 120V should read approximately 6 ohms, but most household dishwashers use lower wattage, so 15 to 40 ohms is typical. If you get OL or 0, replace the heating element.
Replace the Heating Element
Use a model-specific part and do not guess. Universal elements may not match your dishwasher’s specifications.
Step-by-Step Replacement
Cut power at the breaker. Remove the lower rack and access panel if needed. Disconnect wires from the terminals, taking photos first. Unscrew the mounting nuts securing the element to the tub. Pull out the old element carefully. Insert the new one, aligning with the holes. Reattach mounting hardware and tighten. Reconnect wires to the correct terminals. Push the dishwasher back in and restore power. Run a test cycle with no dishes.
Apply dielectric grease to terminals before reconnecting to prevent corrosion. After replacement, run a Sani-Rinse cycle. Dishes should come out hot and dry.
If not, the problem is not just the element.
Check the High-Limit Thermostat
Even with a new element, the high-limit thermostat may be open and blocking power. This safety device prevents overheating but can fail.
Locate the Thermostat
It is usually clipped to the underside of the tub, near the element. You may need to remove the lower spray arm or access panel to reach it.
Test for Continuity
Disconnect power. Remove both wires from the thermostat. Set the multimeter to continuity or ohms. Touch probes to both terminals.
A reading near 0 ohms when cool is expected. A reading of OL means the thermostat has failed and must be replaced.
A shorted heating element can overload and blow the thermostat. Always test it after element failure. Replace the thermostat if open, then retest heating.
Diagnose Control Board Failure

No heat after replacing the element and thermostat? The control board may not be sending power to the heating circuit.
Run Heater Test in Diagnostic Mode
Re-enter diagnostic mode using the Heat Dry, Hi Temp, Sani-Rinse sequence. Initiate the heater test function. You should hear a relay click inside the board.
Test for Voltage Output
With power on, set the multimeter to AC voltage. Place probes on heater circuit wires at the control board, usually black and red. Start the heater test.
A reading of 120V during the test means the board is working. A reading of 0V indicates a faulty relay or board.
The control board contains a relay that switches power to the heater. If the old element shorted, it may have burned out this relay. If no voltage is present, replace the control board.
Board replacement requires opening the door panel. Label all wires and take photos before disconnecting to ensure correct reassembly.
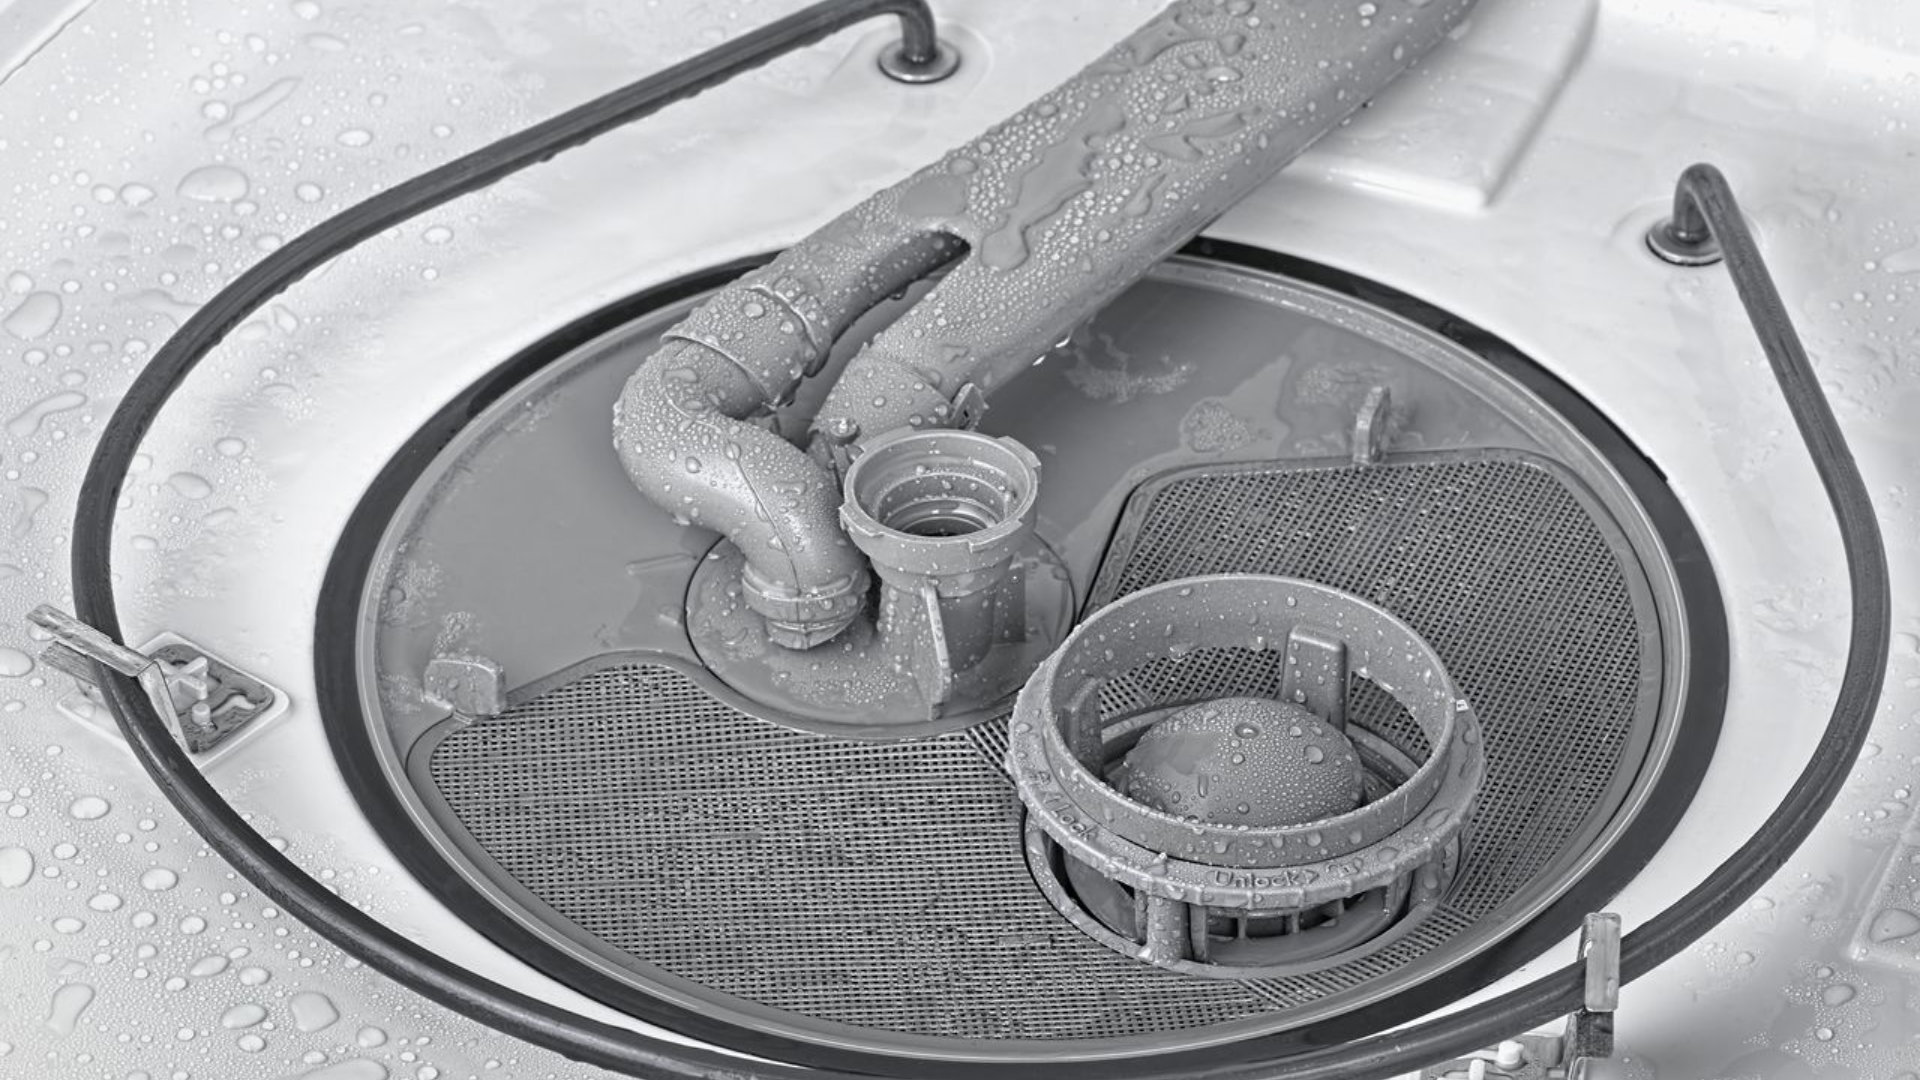
Test the Thermistor in Flood Switch
One often-missed culprit is the thermistor, usually inside the flood switch assembly at the base. This component tells the control board the water temperature.
Why It Matters
If the thermistor fails, the board thinks the water is already hot, so the heater never turns on. Even with a good element and board, a bad thermistor blocks heating completely.
Test Resistance
Locate the thermistor, often near the sump. Disconnect and remove it. Measure resistance with the multimeter. Compare to manufacturer specifications, which vary by model and temperature.
At room temperature around 70F, a typical reading is 10 to 15 k ohms. At 120F, expect 5 to 7 k ohms. A reading far outside this range means failure.
After replacing the element, thermostat, and board with no success, one user replaced the flood switch and thermistor assembly for $25. Heat returned immediately. Replace the entire flood switch if the thermistor is faulty.
Verify Incoming Water Temperature
Your dishwasher needs hot water to start heating effectively. Cold inlet water triggers safety lockouts in many models.
Minimum Temperature Requirement
The minimum is 120F (49C). The ideal range is 120 to 140F (49 to 60C). If incoming water is too cold, the dishwasher may extend the cycle or disable the heater until reset.
Simple Fix
Run hot water at the sink for 30 to 60 seconds before starting the dishwasher. This ensures hot water reaches the inlet valve instead of cold water sitting in the supply line.
Confirm Connection to Hot Line
Check that the dishwasher is connected to the hot water supply, not the cold line. This is a common installation mistake that causes heating problems.
If you have hard water, install a water softener or use rinse aid to prevent scale buildup on the element.
Prevent Future Heating Failures
A little maintenance goes a long way toward preventing heating element failure.
Clean the Filter Monthly
A clogged filter reduces water flow, causing overheating and element stress. Remove and rinse it under the tap every month.
Use Rinse Aid
Rinse aid improves drying and reduces mineral deposits on the element. Refill the dispenser weekly for best results.
Inspect for Scaling Annually
In hard water areas, calcium builds up on the element. Wipe with a vinegar-soaked cloth or use a dishwasher cleaner like affresh annually.
Run Cleaning Cycle Monthly
Use a dishwasher-safe cleaner on an empty tub once a month. This removes grease, lime, and biofilm from pumps, sensors, and the heating system.
Avoid Overloading
Crowded dishes block water spray and reduce cleaning efficiency. Leave space between items for proper circulation.
Summary: Common Causes and Fixes
The table below summarizes the most common symptoms, likely causes, and solutions for dishwasher heating problems.
Dishes cold and wet typically indicate a failed heating element. Replace the element after testing. A new element with no heat suggests a blown high-limit thermostat. Test and replace the thermostat. No power to the heater points to a dead control board relay. Replace the control board. Heater only works in dry cycle means a faulty thermistor. Replace the flood switch or thermistor. System locked out usually means low inlet water temperature. Run the tap first and use the diagnostic reset. Intermittent heat indicates loose or corroded wiring. Inspect and clean connections.
Final Tips for Success
Always run diagnostic mode first because it fixes software lockouts fast without any part replacement. Test every component in the heating circuit, not just the element. Check water temperature because a simple tap flush can solve the issue. Inspect the thermistor, especially in KitchenAid and Whirlpool models, as this is commonly overlooked. Replace the control board if no voltage is present during the heater test because relays cannot be repaired. Call a professional only if all else fails because multiple replacements without success may indicate deeper board or sensor issues.
With the right tools and this guide, 90% of dishwasher heating element not working issues can be fixed in under an hour, saving you $200 or more in service calls. Now go restore that heat and enjoy truly clean, dry dishes.
Frequently Asked Questions About Dishwasher Heating Element Not Working
How do I know if my dishwasher heating element is bad?
Run a high-heat cycle and check if dishes come out warm and dry. If they are cold and wet, the element likely failed. Use a multimeter to test for continuity. A reading of infinite resistance (OL) or 0 ohms means the element is dead and needs replacement.
Can I replace a dishwasher heating element myself?
Yes, most homeowners can replace the heating element with basic tools. Disconnect power, remove the lower rack, unscrew the old element, and install the new one. Take photos of wire connections before disconnecting. The entire process takes 30 to 60 minutes.
Why does my dishwasher only heat during the dry cycle?
This usually indicates a faulty thermistor or temperature sensor. The thermistor tells the control board the water temperature. If it fails, the board thinks water is already hot and skips heating during the wash cycle. Replace the thermistor or flood switch assembly.
What causes a dishwasher heating element to burn out?
Common causes include mineral buildup from hard water, a failed high-limit thermostat allowing overheating, a shorted heating element, or repeated dry runs without water. Regular maintenance and proper water temperature help extend element life.
How much does it cost to replace a dishwasher heating element?
A new heating element costs $30 to $150 depending on your dishwasher brand and model. Professional labor adds $150 to $300. Doing it yourself saves the labor costs. High-limit thermostats cost $15 to $40, and control boards range from $100 to $300.
Why is my dishwasher not heating even after replacing the element?
The problem may be a failed high-limit thermostat, faulty control board relay, bad thermistor, or low incoming water temperature. Test each component systematically. Many heating issues persist after element replacement because the underlying cause was elsewhere in the circuit.