How to Fix Dishwasher Drain Pump Not Working
You run a cycle, open the door, and there is water pooled at the bottom of your dishwasher. No drainage. You press “drain,” but nothing happens. The dishwasher drain pump not working is a common but frustrating issue that can halt your kitchen routine. Ignoring it can lead to mold, odors, and even floor damage. But before you call a technician or replace the entire unit, you need to know: the problem might be simpler and cheaper than you think.
In fact, a clogged filter or lodged foreign object causes over 80% of apparent drain pump failures. With basic tools and 30 minutes, you can diagnose and fix most issues yourself. This guide walks you through every step: from identifying symptoms and testing electrical continuity to replacing the pump and preventing future failures.
Confirm Drainage Failure Before Deeper Diagnostics
Before tearing anything apart, verify the dishwasher is not draining properly. Start a full wash cycle and check the tub immediately after it ends. If water sits more than one-quarter inch deep at the bottom, drainage is incomplete. But do not jump to conclusions. Wait 30 minutes and recheck. If the water level drops, you are likely dealing with a siphon effect, not a broken pump.
Siphoning occurs when the drain hose outlet sits lower than the water level in the tub, creating a continuous suction loop. This mimics pump failure but is easily corrected by adjusting hose height. Only proceed to deeper diagnostics if water remains unchanged after 30 minutes.
Check for Standing Water After Cycle
If water stays put, rule out the simplest causes first. Ensure the filter is clean and properly seated. Confirm the drain hose is not kinked under the sink. Check that the air gap, if installed, is not clogged. If these look fine, move to the next step: listen for pump activity.
Listen for Pump Sounds During Drain
Press “cancel” or “drain” and listen closely. No sound means the pump is not receiving power. Check wiring, control board, or solenoid. A low hum for about five seconds indicates the impeller may be partially blocked. Grinding or buzzing sounds mean debris is likely jamming the impeller or bearings. Continuous running suggests the anti-flood switch may be triggered due to a leak. These sounds guide your next move.
Clean the Filter and Sump Area
This is the number one fix for most drainage problems. A clogged filter traps food, grease, and debris, preventing water from reaching the pump. Even if the filter looks clean, gunk can hide in the sump cavity below.
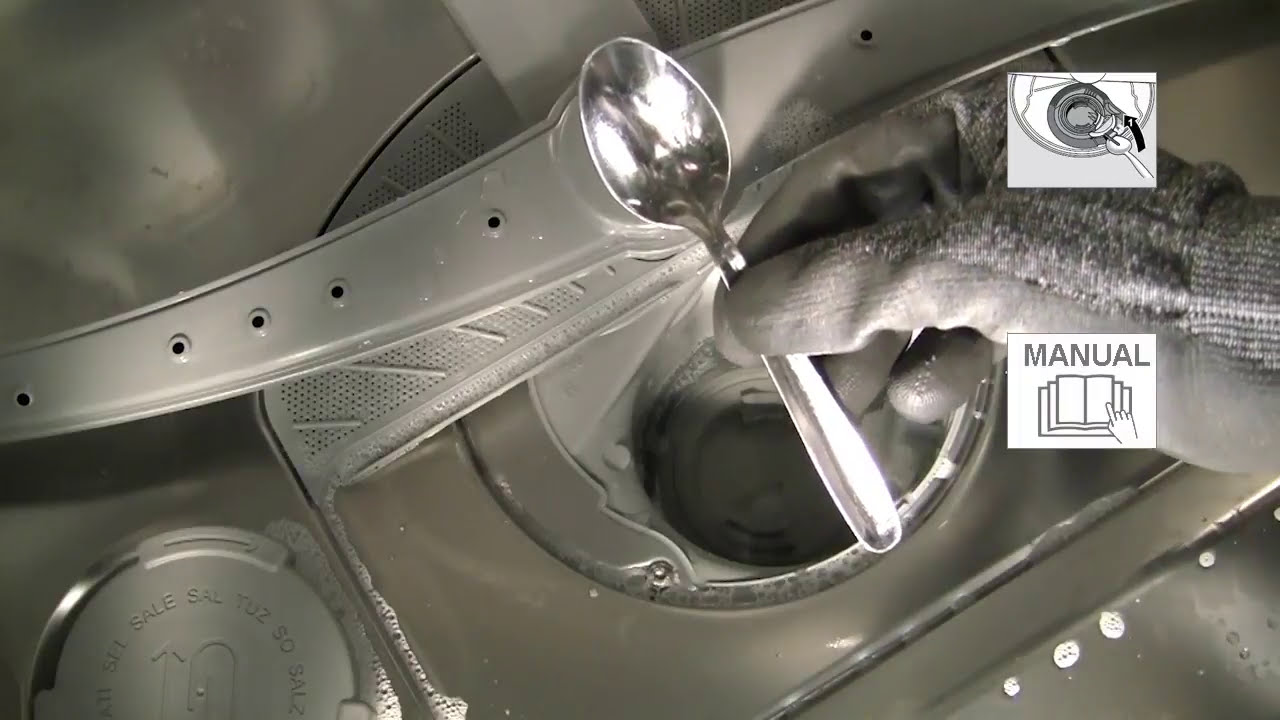
Remove and Inspect the Filter
Pull out the bottom rack. Twist and lift the filter assembly, usually clockwise to unlock. Rinse under hot water, scrubbing with a soft brush. Check the bottom of the sump cavity. Use a flashlight to spot glass shards, toothpicks, or plastic bits. A melted plastic cap or dishwasher pod wrapper can wedge tightly around the impeller. Even small items stop drainage.
Reinstall the filter only when completely clean. Run a short drain cycle. If water exits, you have solved it. If not, proceed to pump inspection.
Access the Drain Pump Safely

To test or replace the pump, you need physical access. This requires pulling the dishwasher out and laying it on its back.
Disconnect Power and Water First
Unplug the dishwasher or turn off the circuit breaker. Shut off the water supply valve under the sink. Working on live appliances risks shock or flooding. Never skip this step.
Remove the Dishwasher From Under the Counter
Pull the unit out from under the counter. Disconnect the inlet hose and drain hose. Carefully lay the dishwasher on its back. Keep the drain hose elevated to avoid spilling dirty water. Never trap or kink the drain hose. Residual water can leak into the base and trigger the anti-flood switch.
Remove Baseplate and Locate Pump
Unscrew the four baseplate screws. Detach the anti-flood switch wiring, a small float switch that clicks into place. Lift off the baseplate. The drain pump is a compact, plastic-cased motor near the front base, connected to hoses and wires.
Inspect Pump and Impeller for Blockages
With the pump exposed, check for mechanical blockages. Most failures are not electrical. They are caused by debris jamming the impeller.
Remove the Pump From Its Housing
Disconnect the two electrical connectors. Press the tabs to release them. Unscrew the one or two mounting screws, which varies by model. Gently twist and pull the pump free from its housing.
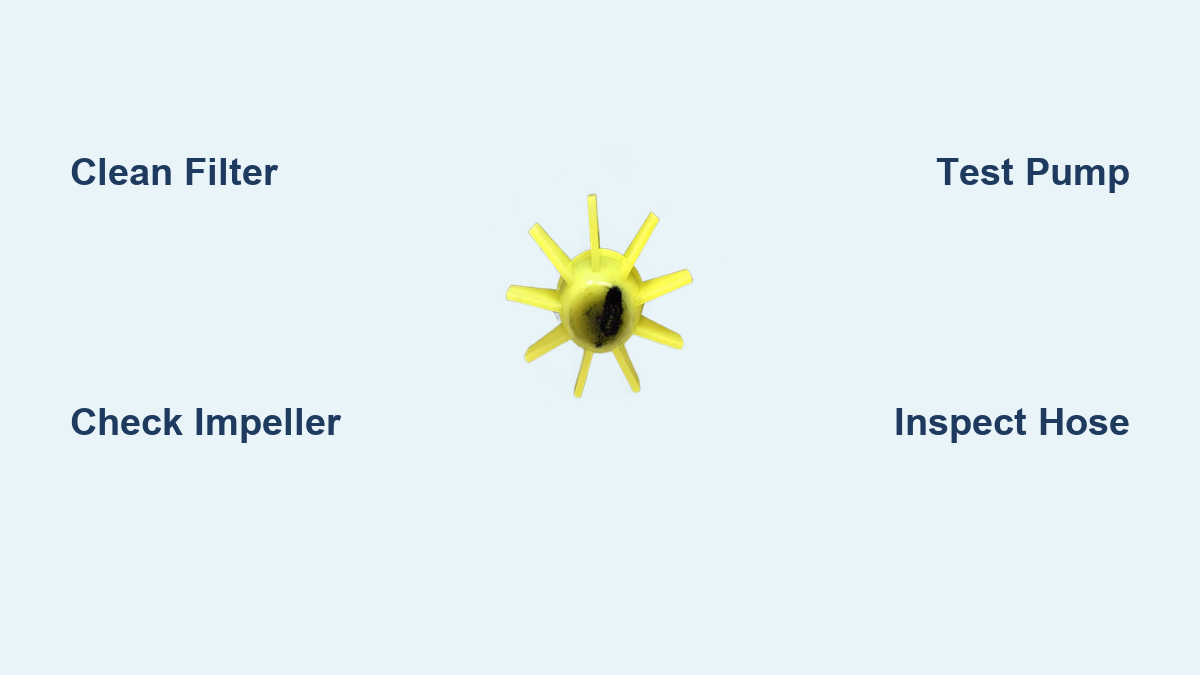
Test Impeller Rotation Manually
Insert a finger or small tool into the impeller opening. Try to spin it clockwise. Slight resistance or jerky motion is normal due to internal magnets. Stiffness, grinding, or complete seizure indicates a problem. If it will not turn, debris is jamming it. Use needle-nose pliers to extract foreign objects like bottle caps, fork tines, melted Lego pieces, or twist ties.
Once clear, retest rotation. If it spins freely, reinstall and test. If still stuck or damaged, replace the pump.
Test Pump Electrical With Multimeter

Electrical failure is less common than blockages but critical to rule out. A multimeter helps identify whether the motor is dead.
Check Resistance Across Pump Terminals
Set multimeter to measure resistance, shown as omega symbol. Touch probes to the two pump terminals. Read the display. Normal reading is approximately 200 ohms. Faulty readings show infinite resistance or zero ohms. A pump can show continuity but still fail mechanically, so this test is not foolproof. But if there is no continuity, the motor is dead and must be replaced.
Verify Power Reaches the Pump
Even with a good pump, no power means no drainage. Reconnect the pump. Restore power. Start a drain cycle. Carefully test for voltage at the connector using insulated probes. No voltage means the issue is upstream: control board, solenoid, or wiring. One verified case involved a wire broken inside the insulation. The owner soldered it back and the pump worked like magic.
Inspect Flap Valve and Drain Hose
A working pump means nothing if water cannot exit. Two common culprits are the check valve and the drain hose itself.
Examine the Flap Valve
Disconnect the drain hose from the pump outlet. Look inside for a rubber flap. This is the check valve. It should open when the pump runs and close when off. Common issues include debris jamming the flap open or shut, sticky degraded rubber that adheres to the housing, and cracks or tears in the seal. Clean with mild soap and a soft brush. Replace if damaged.
Flush the Drain Hose
Kinks or clogs in the hose prevent flow. Disconnect both ends, from pump and sink or disposer. Squeeze or blow through it to clear obstructions. Flush with hot water. Reconnect securely, ensuring no sharp bends.
Fix Siphon Effect From Improper Installation
Improper hose routing tricks you into thinking the pump failed. If water slowly drains after the cycle ends, siphoning is likely.
Elevate the Drain Hose Loop
Form a high loop under the sink. Secure it to the countertop. Use the plastic high-loop bracket most manufacturers include. Ensure the hose outlet is higher than the tub water level. This breaks the siphon and prevents backflow. Never route the hose directly into a floor drain without an air gap. It violates plumbing codes and risks contamination.
Diagnose Control Board and Solenoid Issues
No power to the pump? The fault may lie in the control system rather than the pump itself.
Test the Drain Solenoid
Some models use a solenoid to open the drain valve. If the solenoid fails, the pump will not engage. Listen for a click during drain mode. Test for continuity with a multimeter. No continuity means replace the solenoid or pump assembly.
Inspect the Control Board
If wiring is intact and no signal reaches the pump, inspect the board for burn marks or bulging capacitors. Consult the technician diagnostic sheet, often behind the kick panel. Consider professional repair or replacement if the board is damaged.
Replace the Drain Pump When Necessary
When cleaning and testing fail, replacement is the next step. DIY replacement is feasible if you are comfortable with basic tools and wiring.
Gather Required Tools
You will need screwdrivers, pliers, a bucket and towels, a multimeter, and a model-specific replacement pump. Use OEM or compatible parts. Verify your model number before ordering.
Step-by-Step Replacement Process
Unplug and drain residual water. Remove kick plate and baseplate. Disconnect hoses and wires from the old pump. Unscrew and remove the unit. Install the new pump and reconnect all parts. Reassemble and test. Most replacements take 45 to 60 minutes.
Prevent Future Drain Problems
Prevention beats repair. A few habits extend pump life and avoid clogs.
Monthly Maintenance Routine
Clean the filter weekly if you cook often. Run a vinegar cycle: pour one cup white vinegar in the tub and run a hot wash. This melts grease and mineral buildup. Scrape large food bits before loading, but do not pre-rinse. Modern detergents need some grease to activate. Avoid overloading. Keep the bottom rack clear around the filter.
Repair or Replace: Make the Final Decision
Not every dishwasher deserves a new pump. Consider the age and overall condition before spending money.
Choose Repair When
The unit is under seven years old. The rest of the appliance is in good shape, with no rust, leaks, or control errors. The repair cost is under 250 dollars. DIY pump replacement costs 150 to 200 dollars in parts. Labor adds 100 to 200 dollars.
Choose Replacement When
The dishwasher is over 10 years old. The repair exceeds 300 dollars. There are multiple recurring issues, such as pump, motor, and board failures. Average dishwasher lifespan is 10 to 12 years. Drain pump life is 7 to 10 years with care.
Final Diagnostic Checklist
Use this to ensure nothing is missed. Check for standing water post-cycle. Recheck 30 minutes later for siphon test. Clean filter and sump cavity. Listen for pump noise during drain. Lay dishwasher on back safely. Remove baseplate and anti-flood switch. Disconnect pump wires and hoses. Inspect and rotate impeller. Test pump resistance at approximately 200 ohms. Inspect wiring for breaks or crimps. Test for voltage at pump during cycle. Check flap valve and drain hose. Verify high-loop hose installation. Replace pump or solenoid if needed.
Frequently Asked Questions About Dishwasher Drain Pump Not Working
Why does my dishwasher have water at the bottom after the cycle ends?
Water pooling at the bottom usually indicates a drainage problem. The most common cause is a clogged filter trapping debris. Other causes include a jammed impeller, kinked drain hose, or failed pump motor. Start by cleaning the filter and checking for visible obstructions.
How do I know if the drain pump is broken or just clogged?
Listen carefully during the drain cycle. No sound suggests an electrical problem. A grinding or buzzing noise indicates debris jamming the impeller. A low hum for a few seconds means partial blockage. Clean the filter and inspect the impeller first before assuming the pump is dead.
Can I replace the drain pump myself?
Yes, if you have basic tools and can follow instructions. You need to unplug the dishwasher, remove it from the cabinet, access the pump through the base, and reconnect hoses and wiring. Replacement pumps cost 150 to 350 dollars. The job takes 45 to 60 minutes for most homeowners.
What causes a dishwasher drain pump to fail?
The most common cause is foreign objects blocking the impeller, such as broken glass, plastic caps, or food debris. Electrical failures include burned-out motors, broken wiring, and failed solenoids. Wear on pump bearings over time also leads to failure, typically after 7 to 10 years of use.
How much does it cost to repair a dishwasher drain pump?
DIY repair costs 150 to 200 dollars for the part. Professional repair adds 100 to 200 in labor, totaling 250 to 400 dollars. If the dishwasher is over 10 years old and the repair exceeds 300 dollars, replacement is often the smarter choice.
Key Takeaways for Fixing Your Dishwasher Drain Pump
The dishwasher drain pump not working is rarely a mystery. Start simple: clean the filter, check for debris, and listen to the pump sounds. Most fixes take under an hour and cost nothing. When electrical or mechanical failure strikes, testing with a multimeter and inspecting wiring can save hundreds of dollars. With regular maintenance, your pump and dishwasher can last a decade. Do not replace the entire unit until you have ruled out the obvious causes first.