Fisher & Paykel Dishwasher Repair Guide
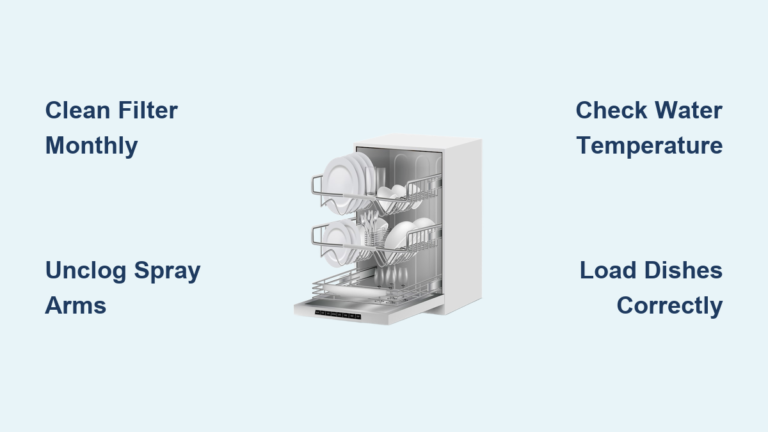
If your Fisher & Paykel dishwasher won’t drain, makes loud grinding noises, or leaves dishes dirty, you are not alone. These premium DishDrawer models are built for durability, but their compact design makes them prone to blockages from debris like toothpicks and plastic fragments. Most Fisher & Paykel dishwasher repair issues can be fixed in under 10 minutes without any tools.
This guide walks you through step-by-step fixes for the most common problems, from clearing a clogged pump to resetting error codes. You will learn how to access the pump assembly, clean the filter, and perform essential maintenance that prevents future issues.
Decode Common Fisher & Paykel Dishwasher Error Symptoms
Standing Water or No Drain
Water remaining in the drawer after a cycle is the most reported issue with Fisher & Paykel dishwashers. The culprit is usually a clogged filter or blocked pump, not a failed component. Before calling a technician, check these areas.
• Filter assembly is responsible for 80% of drainage issues. Remove and clean it thoroughly under running water.
• Drain hose under the sink may have kinks or obstructions. Inspect the full length.
• Pump cavity often traps foreign objects like toothpicks, skewers, or plastic packaging bits.
Never run a cycle with standing water. Bail it out manually first or use the drain-only function if your model has one.
Grinding or Loud Humming Noises
A grinding, buzzing, or high-pitched whine during operation indicates an object is trapped in the impeller or pump housing. This is the number one reported fault across DishDrawer models.
Common culprits include toothpicks, plastic packaging fragments, and utensil pieces. Continuing to run the dishwasher with a blocked pump can damage the motor permanently. Shut it down immediately when unusual noise occurs.
Dishwasher Not Filling with Water
When the unit runs but no water enters, check the water supply valve under the sink first. Ensure it is fully open. Inspect the inlet hose for kinks or clogs. If the valve clicks but no water flows, sediment may be blocking the line.
Poor Cleaning Performance
Dishes coming out with food residue usually stems from clogged spray arm nozzles, a dirty filter restricting water flow, or using the wrong detergent. Excessive suds reduce cleaning pressure significantly. Rinse aid that is overfilled or expired can also cause problems.
Clean the spray arms and filter first. This resolves most poor cleaning cases.
Control Panel Locked or Unresponsive
A frozen display or buttons that will not respond often indicates a software glitch, not hardware failure.
- Turn off power at the circuit breaker.
- Wait 5 minutes to allow the control board to reset.
- Restore power and try operating the dishwasher again.
This procedure clears temporary glitches in most cases.
Access the Pump in Six Steps
Remove Interior Components
To reach the pump, clear the drawer completely.
- Fold back the upper and lower trays.
- Remove the silverware basket.
- Pull out the main rack.
- Lift off the spray arm by pushing the fit hub gently. No tools are needed.
The spray arm lifts straight up with gentle pressure. There are no screws or clips to remove.
Lift Out the Filter Assembly
The filter is located at the bottom center of the drawer.
• Grasp the handle and pull straight up.
• Inspect for food debris, scaling, or cracks.
• Rinse under running water, paying special attention to the fine mesh section.
Clean the filter every one to two weeks to prevent 90% of recurring issues.
Unlock the Large Disc (Impeller Cover)
This disc sits directly under the spray arm base.
• Place fingers on the grip points.
• Turn counter-clockwise 90 degrees to unlock.
• Lift out carefully.
Do not force this mechanism. It is designed to be hand-operated only.
Remove the Pump Assembly
The drain and wash pump sits beneath the disc.
• Rotate the pump counter-clockwise 90 degrees.
• Pull straight out.
• Set it aside on a clean surface.
This quarter-turn system is standard across DD60, DD24, and other DishDrawer models.
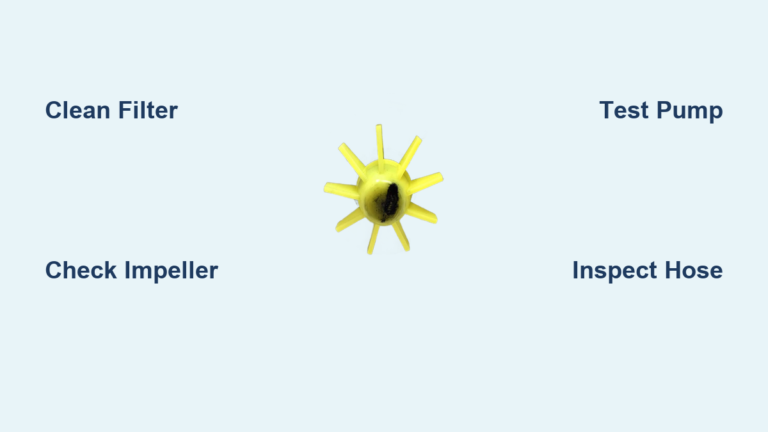
Inspect for Debris and Damage

Check these areas thoroughly.
• Impeller blades should spin freely without cracks or obstructions.
• Pump chamber often contains trapped objects. Look for toothpicks and plastic shards.
• Inlet port should be clear of sediment from the sump area.
• Gasket and seal must show no tears or misalignment.
A documented repair case found two toothpicks wedged between the impeller and housing, causing grinding noise and reduced drainage.
Flush and Clear the Cavity
• Use fingers or plastic tweezers to remove debris.
• Flush with water to clear residue.
• Manually rotate the impeller to confirm smooth movement.
Never use metal tools, as they can scratch or damage plastic components.
Reassemble and Test Your Dishwasher
Lock the Pump Back In
• Align the pump with the housing tabs.
• Insert and rotate clockwise 90 degrees until it locks.
• Test by tugging gently. It should not come loose.
Replace the Impeller Cover
• Position the disc correctly.
• Turn clockwise until it seats fully.
• Press down to ensure a tight fit.
Reinstall Filter and Spray Arm
• Press the filter into place until it clicks.
• Align the spray arm with the hub and press down firmly.
Restore Power and Run a Test Cycle
• Close the drawer.
• Power on at the circuit breaker.
• Start a quick wash cycle.
Success signs include no unusual noise, water that fills and drains completely, and a spray arm that spins freely. First-time users complete this entire process in under 10 minutes.
Troubleshoot Specific Error Codes

E1 or E2: Drain Pump Fault
These codes indicate a drain blockage or pump failure.
• Clear the filter and pump cavity using the procedure above.
• Reset the control board by turning off the circuit breaker for 5 minutes.
• If the code returns, the pump motor may be faulty and requires professional repair.
No Fill or Inlet Error
This means no water was detected during the fill phase.
• Confirm the water valve is open.
• Check the inlet hose for kinks.
• Test the inlet valve for continuity. This requires a technician.
Leak Detection Alert
Moisture in the base pan triggers this warning.
Possible causes include a cracked sump or housing, a failed door seal, or overfilling due to a faulty inlet valve. Continued use can lead to water damage. Shut off power and inspect immediately.
Motor Failure Code
This indicates the circulation pump or motor has burned out.
• Verify no blockage is causing an overload.
• If the pump is clear, the motor or control board has likely failed.
• Call a technician for part replacement and diagnostics.
Prevent Future Fisher & Paykel Dishwasher Problems
Clean the Filter Every One to Two Weeks
• Remove and rinse the filter under the tap.
• Use a soft brush for stubborn residue.
• Reinstall fully, as misalignment causes leaks.
In areas with hard water, clean weekly to prevent scaling buildup.
Monthly Spray Arm Maintenance
• Pull out and inspect the nozzles.
• Clear clogs with a paperclip or toothpick.
• Soak in vinegar if mineral buildup is visible.
Descale Every Six Months
Use citric acid or a Fisher & Paykel-approved cleaner.
- Run an empty hot cycle.
- Place the cleaner in the detergent cup.
- Start a normal wash.
This prevents scale buildup in the pump and spray system.
Use Genuine Water Filters
Available through the official support portal, genuine filters reduce sediment and chlorine while extending pump life. They are required in hard water areas. Replace every six months.
Avoid Common Detergent Mistakes
• Use only low-sudsing detergent designed for dishwashers.
• Do not overfill rinse aid. Stay at or below the max fill line.
• Never use regular dish soap, as it causes dangerous overflow.
When to Call a Professional Technician
Pump Motor Will Not Run
If the pump is clear but silent during the cycle, an electrical failure is likely. This requires a multimeter test and part replacement. An authorized repair is recommended.
Persistent Error Codes After Reset
Recurring E1, E2, or motor faults suggest a failed control board, wiring issue, or internal sensor failure. Incorrect diagnosis can lead to unnecessary part swaps.
Water Leaking from Base or Drawer Seal
Visible pooling under the unit means a cracked sump, failed door gasket, or loose hose connection. Act fast, as moisture can trigger safety shutoff or damage flooring.
Drawer Will Not Extend Smoothly
Sticking, misalignment, or grinding when opening indicates damaged rail mechanisms, worn rollers, or guides. This requires disassembly and realignment best handled by a professional.
Warranty-Eligible Repairs
If the unit is under warranty, repairs must be done by authorized technicians. DIY fixes or non-genuine parts void coverage. Many providers offer free service calls when repair is performed.
Find Authorized Repair Services Near You
Local Service Centers
• Honolulu, Oahu (HI): Call (808) 663-9773 or (808) 518-2966 for island-wide coverage.
• Seattle, WA (Puget Sound): Call (206) 365-9310, Monday through Friday, 7:30 AM to 4:00 PM.
• Los Angeles, CA: Contact (818) 637-5789 through Lerman Appliances Inc.
• National Network: Mr. Appliance at (888) 998-2011.
Most providers offer ZIP code locators and digital service requests for convenient booking.
Why Use Certified Technicians
• Access to genuine Fisher & Paykel parts like part number 426038P for the pump.
• Use of factory diagnostic tools.
• Three-year parts warranty and 90-day labor coverage.
• No risk of voiding existing warranty.
Many technicians also service Miele, Sub-Zero, and Bosch, enhancing diagnostic accuracy across premium brands.
Fisher & Paykel Dishwasher Repair vs. Replacement Decision
Repair If the Dishwasher Is Under 15 Years Old
• Only one component has failed, such as the pump or filter.
• Repair cost is under $500 compared to $1,500 or more for a new model.
• You value energy efficiency, as DishDrawers use approximately 2.4 gallons per cycle.
Repairing extends the appliance lifespan and reduces electronic waste.
Consider Replacement If Multiple Systems Are Failing
• Both the pump and control board have failed.
• The appliance is over 15 years old with chronic issues.
• Repair cost exceeds 50% of a new unit price.
• You want SmartHQ connectivity or updated features.
Newer models offer Wi-Fi alerts, quieter operation at approximately 44 dBA, and improved filtration.
Key Takeaways for Fisher & Paykel Dishwasher Repair
Most Fisher & Paykel dishwasher problems are not mechanical failures. They are blockages. By learning to access the pump and clean the filter, you can solve the vast majority of issues yourself without tools or service calls.
Regular maintenance is the key to long-term reliability. Clean the filter every two weeks, inspect the pump cavity every three months, and descale every six months. Keep your model and serial numbers handy, located behind the drawer on the left side, when ordering parts or calling for support.
When professional help is needed, use authorized technicians to maintain warranty coverage and ensure access to genuine parts. With proper care, your Fisher & Paykel dishwasher can deliver 10 or more years of trouble-free performance.
Frequently Asked Questions About Fisher & Paykel Dishwasher Repair
How do I reset my Fisher & Paykel dishwasher control panel?
Turn off the power at the circuit breaker, wait five minutes, then restore power. This clears most software glitches and frozen displays.
Why is my Fisher & Paykel dishwasher making a grinding noise?
The most common cause is a foreign object trapped in the pump impeller or housing. Remove the pump assembly and check for debris like toothpicks or plastic fragments.
How often should I clean the filter on my Fisher & Paykel dishwasher?
Clean the filter every one to two weeks with daily use or in hard water areas. This prevents 90% of recurring drainage and noise issues.
Can I repair my Fisher & Paykel dishwasher myself?
Yes. Most maintenance and minor repairs require no tools. The pump, filter, and spray arm are designed for hand-level disassembly. Complex electrical issues or persistent error codes should be handled by a certified technician.
Where are the model and serial numbers located?
They are located behind the drawer on the left side. Pull both drawers out to access the information needed for parts ordering or service calls.
Is it worth repairing my Fisher & Paykel dishwasher?
If the unit is under 15 years old and only one component has failed, repair is cost-effective. Repairs typically cost a few hundred dollars versus $1,500 or more for a new model.