Bosch Dishwasher Leaking? Fix It Fast
You’re not alone if your Bosch dishwasher is leaking. A puddle under the door or dampness on the cabinet side is a common frustration, especially with Bosch 300 to 800 series and newer models. But here’s the good news: most leaks aren’t caused by a cracked tub or failed door seal. Instead, they stem from drainage issues, improper installation, or user habits, all fixable without calling a technician.
The primary keyword, bosch dishwasher leaking, isn’t just a search term. It points to one of several root causes. Whether you own an SHEM63W56N/13, SHX43M05UC/48, or any Serie 6 or 8 model, this guide will help you diagnose the real source, stop the leak, and prevent future water damage. You’ll learn how to test components, clean critical systems, and make low-cost repairs, often in under an hour.
Track Down the Leak Source
Observe Leak Timing and Location
Not all leaks are equal. The when and where of water appearance tells you more than any tool. Start with a dry cycle test. Wipe down the dishwasher, floor, and adjacent cabinets, then run a full wash cycle while watching for water.
Watch for these key indicators:
- Spraying during operation points to a gasket or latch issue
- Pooling after the cycle ends suggests drainage failure or overflow
- Left-side cabinet dampness is common in Bosch models due to left-side drain routing
If water appears only after the cycle, don’t assume the door seal is bad. More often, it’s overflow from poor drainage slowly wicking into nearby wood.
Distinguish True Leak vs. Overflow
A true leak means water escapes the sealed cavity during operation, visible as spraying or dripping while the machine runs. An overflow happens when water cannot drain fully and spills out when the door opens. This mimics a leak but originates from internal buildup, not a breach.
Key clue: If the tub holds more than 1/4 inch of water after the cycle, drainage is the culprit.
Check for Active Spraying
Open the door mid-cycle, after the fill phase, and look for streams shooting toward the door bottom or sides. If you see this, inspect spray arm alignment, confirm racks are not blocking arms, and look for cracks redirecting water pressure. Spraying indicates mechanical failure, not seal wear.
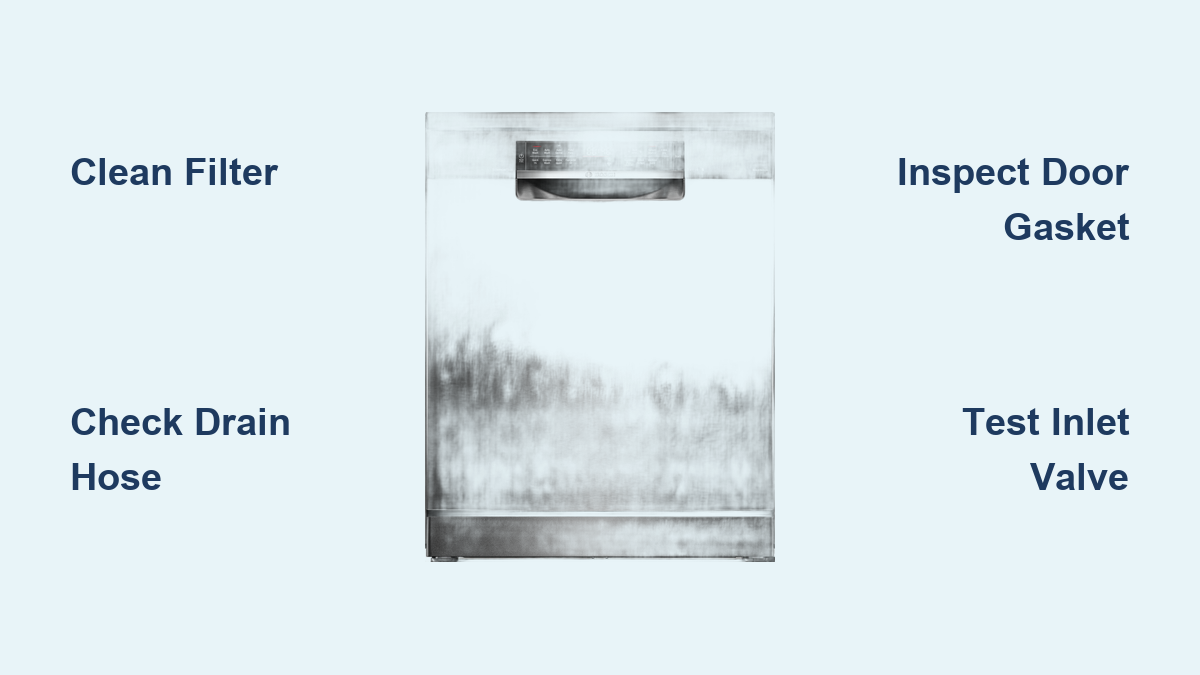
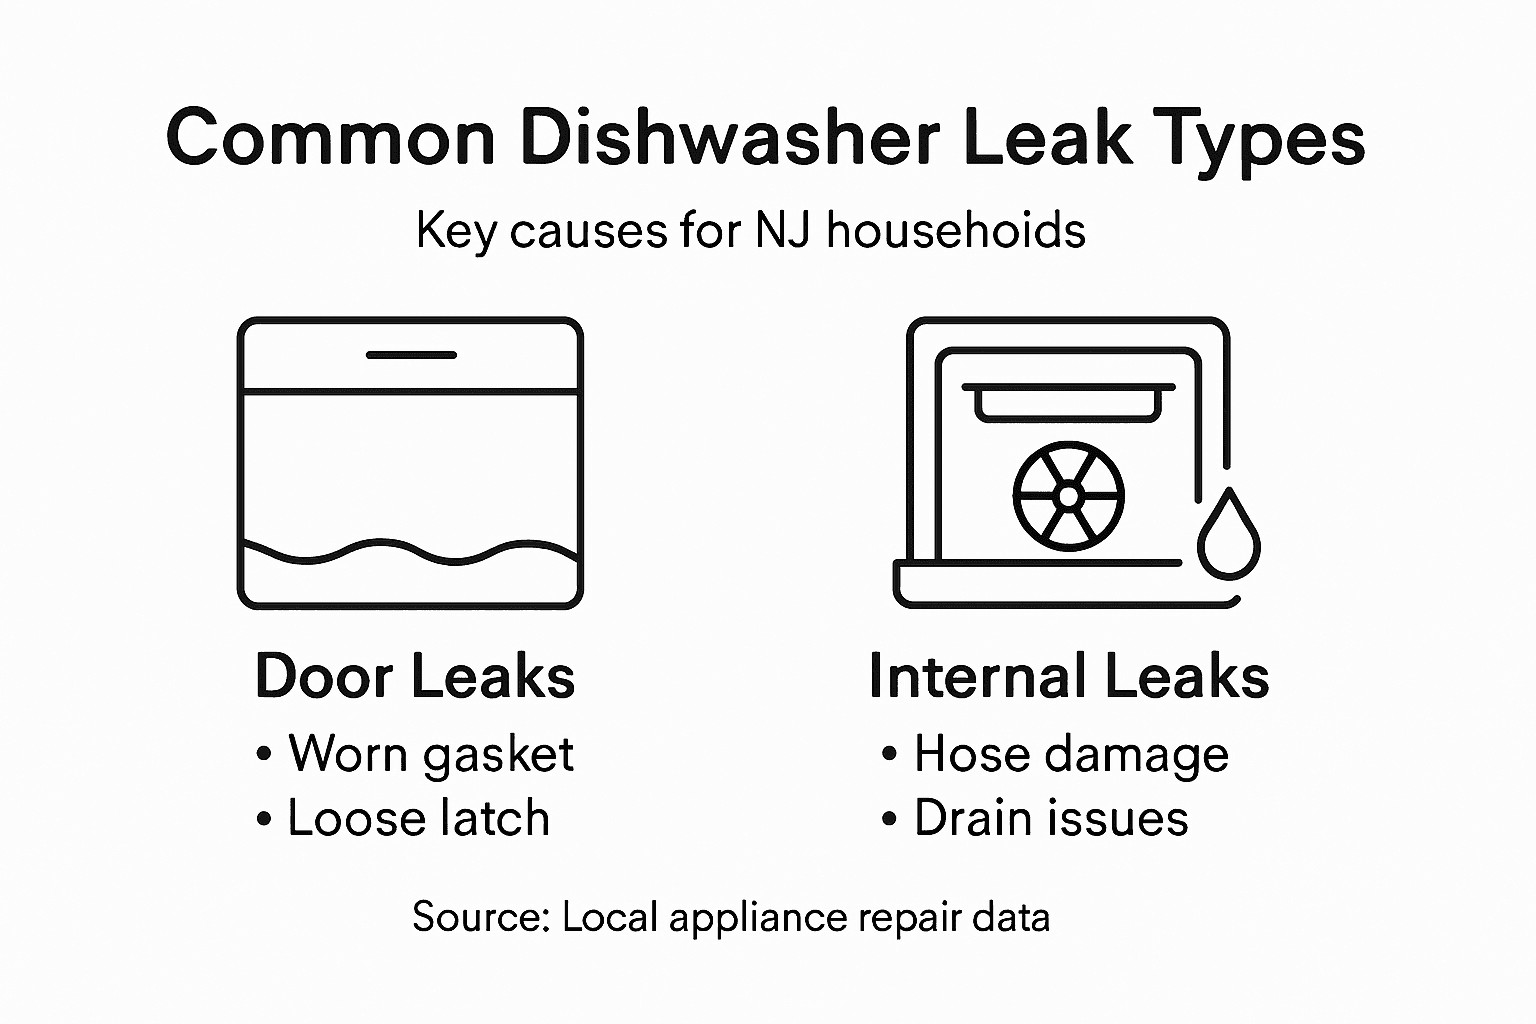
Inspect the Drain System First
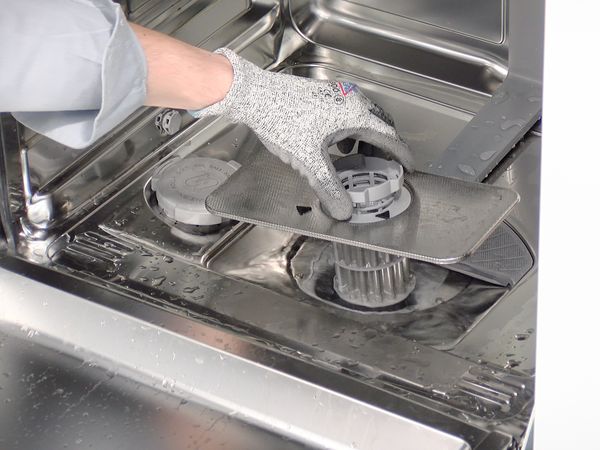
Clean the Filter Assembly
The filter is the number one cause of drainage-related leaks. Located at the tub’s bottom, it traps food and grease. When clogged, water cannot reach the sump pump, leading to standing water and overflow.
Steps to clean:
- Remove the lower rack
- Twist the filter counterclockwise, following the arrow indicator
- Lift out the fine and coarse filters
- Rinse under hot water
- Scrub with a soft brush or toothbrush
- Reinstall securely because misalignment causes sump leaks
Clean the filter every 2 to 4 weeks, depending on use. Never run the dishwasher with the filter removed because this can damage the pump and void warranties.
Verify Drain Hose Routing
Bosch dishwashers route the drain hose to the left side, which explains why left cabinets get wet even without a tub leak. But improper hose setup causes siphoning and backflow.
Check for these issues:
- Kinks or sharp bends behind the unit
- Compression between cabinet and flooring
- Lack of a high loop, 20 to 30 inches above floor
The high loop prevents sink water from flowing back into the dishwasher. If missing, install one using a wire tie or mounting bracket under the countertop.
Test the Check Valve
Some Bosch drain hoses include a non-return check valve near the sink connection. If clogged or stuck closed, water cannot exit and may back up.
To test the valve:
- Disconnect the hose from the sink or disposal
- Blow air through the dishwasher end
- Air should flow freely toward the sink
- Reverse: blowing from the sink side should meet resistance
If the valve is blocked, clean it or replace the hose.
Remove Garbage Disposal Knock-Out Plug
If your dishwasher drains into a garbage disposal, the knock-out plug must be fully removed. Many installations leave a plastic baffle restricting flow.
To confirm removal:
- Disconnect the dishwasher hose from the disposal inlet
- Look inside the port
- Use a screwdriver to break through any remaining plastic
No tool should meet resistance. Full opening ensures proper drainage.
Examine the Door Gasket and Seal
Inspect for Gasket Damage
The door gasket, made of EPDM rubber, creates a watertight closure. Over time, it can crack, warp, or trap debris, breaking the seal.
Signs of failure include:
- Visible cracks or brittleness
- Permanent creases or thinning
- Water pooling at the front base
- Door not closing flush
Run your finger along the entire seal. Feel for gaps, hard spots, or food particles.
Clean the Sealing Surface
Grease, mineral deposits, and food debris prevent a full seal. Clean monthly by wiping the gasket with a damp cloth and using a mild vinegar solution to dissolve buildup. Dry thoroughly. Avoid harsh chemicals because they degrade rubber.
Check Door Latch and Alignment
Even a perfect gasket fails if the door doesn’t close fully. The magnetic latch should snap shut with no gap.
Troubleshoot by ensuring racks are fully inserted because they can block closure. Adjust leveling legs if the unit is tilted. Listen for the latch click. If the door sags or won’t close, inspect hinge ropes and mounting brackets.
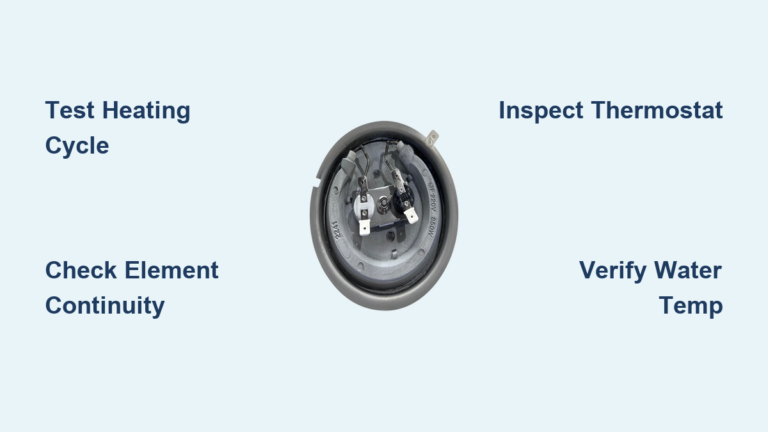
Diagnose Water Inlet Valve Leaks
Locate the Inlet Valve
The water inlet valve connects the hot water line to the dishwasher. It’s behind the lower access panel, usually on the left side.
Common failure signs include:
- Dripping from rear or bottom front
- Cracked plastic housing
- Loose hose clamps
- Broken connectors
If you see water here, shut off the water supply immediately.
Test for Connection Integrity
Check the supply line, whether copper, rubber, or braided steel, for cracks. Check hose clamps for tightness. Check the valve body for stress fractures. A 15 to 16 dollar aftermarket valve from Amazon often fixes the issue. Replacement takes 20 minutes.
Steps for replacement:
- Turn off water and power
- Disconnect the supply line
- Release the retaining clip
- Pull out the old valve
- Install the new one and reconnect
Use a towel to catch residual water.
Perform a Leak Test
After repair, reconnect the water supply and temporarily run the drain into a 5-gallon bucket. Start a 9-minute rinse cycle and watch for drips at connection points. No leaks mean you’ve solved it.
Evaluate the Pump and Pump Seal
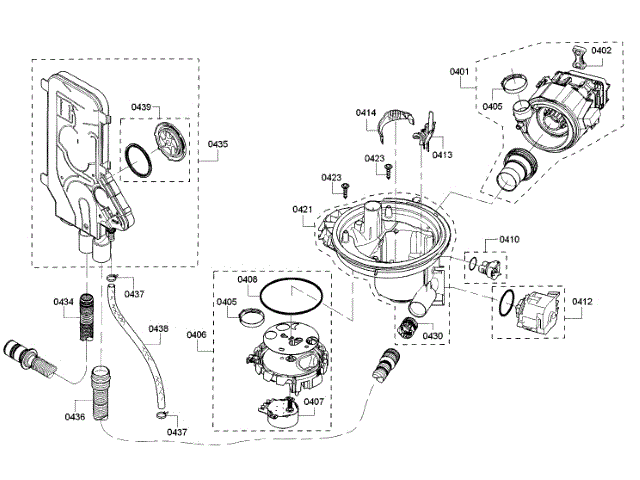
Look for Under-Unit Moisture
Water dripping from the underside of the dishwasher often means a failed pump seal. The integrated pump handles both circulation and drainage, so seal failure affects both.
Symptoms include:
- Dampness under the unit
- Poor drainage
- Grinding or clicking noises
Test Pump Continuity with Multimeter
Before replacing, test the pump. Disconnect power and water, then remove the lower access panel. Set the multimeter to Rx1, resistance. Touch probes to pump terminals. The reading should be near zero ohms. Test ground by placing one probe on a terminal and one on metal housing. This should show infinite resistance. If readings are off, replace the pump.
Clear Pump Blockages
Foreign objects like utensils or packaging can jam the impeller. To inspect, remove the filter and look into the sump area. Manually spin the impeller. If stuck, clear debris with needle-nose pliers. Never force it because broken blades require full pump replacement.
Check Spray Arm Condition
Inspect for Cracks and Clogs
Plastic spray arms crack from heat stress. Metal ones can separate at seams. Even minor damage redirects high-pressure water toward the door’s bottom edge, breaking the seal.
Inspect the lower arm on all models and middle or upper arms if equipped. Look for cracks or warping. Look for wobbling during spin. Look for clogged spray holes.
Clear Blocked Spray Holes
Use a toothpick or thin wire to unclog holes. Avoid metal tools because they can enlarge openings and alter the spray pattern.
Replace Damaged Arms
If an arm is cracked or won’t spin freely, replace it. OEM parts ensure proper fit and pressure distribution. Spin each arm by hand before closing the door. If it rubs against racks, realign or adjust.
Test the Float and Float Switch
Ensure Float Moves Freely
The float rises with water level and triggers the float switch to stop filling. If stuck, the tub overfills and overflows.
Check by lifting the float by hand. It should move smoothly. Remove debris or mineral buildup. Confirm water level doesn’t exceed the heating element.
Diagnose Float Switch with Multimeter
- Disconnect power
- Remove lower access panel
- Locate the switch under the tub
- Remove and test
- Set multimeter to Rx1
- Touch probes to terminals
- Press the switch button. Reading should flip from zero to infinity or vice versa
If no change occurs, replace the switch. A faulty switch causes overfilling, often mistaken for a gasket leak.
Inspect Dispenser Gaskets and Grommets
Examine Detergent Compartment
Leaks near the detergent or rinse aid dispenser point to failed gaskets or grommets.
Check for these issues:
- Cracked rubber grommet around latch mechanism
- Broken dispenser lever
- Cracked container housing
Some models have screw-mounted dispensers with replaceable gaskets. Others require full assembly replacement.
Replace Faulty Components
Unplug the dishwasher and open the door. Inspect the inner panel. Replace the grommet or dispenser if damaged. Even a small crack here can drip water down the door and onto the floor.
Verify Hose and Clamp Integrity
Inspect Recirculation and Drain Hoses
Two hoses connect to the pump behind the kickplate: the drain hose and the recirculation or circulating hose. Over time, clamps loosen and hoses crack or swell.
To inspect:
- Shut off power and water
- Remove the lower access panel
- Disconnect hoses from pump
- Check for cracks, brittle texture, bulging, or mineral buildup
Flush each hose with water to test for blockages.
Replace Damaged Hoses
Use OEM or compatible hoses with the same diameter and check valve if the original had one. Reuse clamps only if undamaged. Otherwise, install new ones.
Prevent Future Leaks with Maintenance
Use Only Dishwasher Detergent
Never use regular dish soap like Dawn or Palmolive. It creates suds that interfere with pump operation, reduce drainage, and force water past seals. Use pods, gel, or powder designed for dishwashers. Educate all household members because pre-soaking in soapy water can also cause suds backflow.
Perform Monthly Vinegar Cycle
Mineral deposits and grease buildup hurt performance. Do this monthly by placing 1 cup of white vinegar on the top rack and running a hot wash cycle with no dishes or detergent. This cleans seals, hoses, and the sump, reducing clogs and odors.
Secure the High Loop
Ensure the drain hose is tied to the underside of the countertop, forming a loop 20 to 30 inches high. This prevents siphoning and backflow from the sink.
Replace Worn Gaskets Annually
Even with cleaning, gaskets degrade. If yours is stiff, cracked, or misshapen, replace it. Part numbers vary by model, so check your manual.
Key Takeaways for Fixing Your Bosch Dishwasher Leaking
Most bosch dishwasher leaking issues are not catastrophic. They are fixable with basic tools and a methodical approach. Start with drainage by cleaning the filter, checking the hose loop, and confirming the knock-out plug is removed. Then inspect the gasket, inlet valve, and pump. In many cases, a 16 dollar valve or 10 minutes of cleaning resolves the problem. With regular maintenance, your Bosch can run leak-free for years.
Frequently Asked Questions About Bosch Dishwasher Leaking
Why is my Bosch dishwasher leaking from the left side?
Left-side leaking is common in Bosch models because they route the drain hose to the left. This often indicates drainage overflow rather than a direct tub leak. Water wicks from internal overflow into adjacent cabinets. Check the filter, drain hose loop, and garbage disposal connection first.
How do I know if the leak is from the door gasket or drainage?
Run a full cycle and observe when water appears. Water spraying during operation typically points to gasket or latch issues. Water pooling after the cycle ends suggests drainage failure and overflow. Also check if more than 1/4 inch of water remains in the tub after draining.
Can using regular dish soap cause a leak?
Yes. Regular dish soap creates excessive suds that interfere with pump operation and drainage. Suds can force water past seals, creating false leak indications. Always use dishwasher-specific detergent like pods, gel, or powder.
How often should I clean my Bosch dishwasher filter?
Clean the filter every 2 to 4 weeks depending on usage. A clogged filter restricts water flow to the sump pump, causing standing water and overflow. Remove the lower rack, twist the filter counterclockwise, and rinse under hot water.
Is it worth replacing the water inlet valve myself?
Yes. A leaking water inlet valve is often a simple fix. Replacement valves cost 15 to 16 dollars online. The repair takes about 20 minutes. Turn off water and power, disconnect the supply line, release the retaining clip, and install the new valve.
When should I call a professional for a leaking Bosch dishwasher?
Call a professional if you need to replace the pump, if electrical diagnostics are required, or if major disassembly like removing the tub is necessary. DIY-friendly tasks include filter cleaning, drain hose inspection, and gasket cleaning or adjustment.